Showing posts with label treats. Show all posts
Showing posts with label treats. Show all posts
Friday, December 4, 2015


Tuesday, March 24, 2015
One Dozen Brownie Cookies

Recipe for One Dozen Brownie Cookies
INGREDIENTS:
1 ounce of bittersweet baking chocolate (I used Ghirardelli)
5 1/2 Tbsp. of unsalted butter, softened at room temperature
1/2 cup plus 2 Tbsp. of sugar
1 tsp. of pure vanilla extract
1 large egg
3/4 cup of all-purpose flour
1 Tbsp. plus 1 1/2 tsp. of cocoa powder
3/8 tsp. of baking powder (use a 1/8 tsp. to measure each, scantily filled)
1/8 tsp. of salt
Powdered sugar, for dusting
DIRECTIONS:
Preheat the oven to 350 degrees. Generously grease a baking sheet with a pat of butter.
Put the baking chocolate into a microwave safe bowl and heat on high in the microwave for about 45 seconds. Remove the chocolate from the microwave and stir. If not fully melted, heat for another 10 - 20 seconds. Once melted, set aside to cool.
Put the softened butter and sugar into a large mixing bowl. Use an electric hand mixer set on medium high speed to mix until well incorporated, about 2 minutes. Then slowly add in the cooled chocolate and mix on low. Then add in the vanilla extract and egg and mix again on low.
Put the flour, cocoa powder, baking powder, and salt into a small bowl and stir. Pour half of the flour mixture into the wet mixture and use the electric hand mixer to beat on low speed until combined. Then add in the rest of it and beat again on low until combined.
Use a one tablespoon cookie dough scoop to scoop up batter and place on prepared baking pan. Bake for 11 minutes. Remove from oven, let the cookies sit on the pan for 2 minutes, and then use a spatula to gently transfer them to a baking rack so they can cool completely. Once cooled, sprinkle with desired amount of powdered sugar.
Recipe makes approximately 1 dozen cookies. They taste best when cooled. Store in an airtight container on the kitchen counter.
Recipe Adapted from: The Pioneer Woman
Sunday, March 15, 2015
Homemade Chocolate Peanut Butter Cups (way better than Reese's)!

Recipe for Homemade Chocolate Peanut Butter Cups (way better than Reese's)!
INGREDIENTS:
1/2 cup of creamy peanut butter
2 Tbsp. of unsalted butter, softened at room temperature
1/3 cup of confectioners' sugar (powdered sugar)
1/8 tsp. of salt
For the chocolate coating
1 cup of semisweet chocolate chips
1 cup of bittersweet chocolate chips
6 ounces of coarsely chopped milk chocolate
1 1/2 Tbsp. of creamy peanut butter
DIRECTIONS:
Line mini muffin pans with paper liners. Use a small pat of unsalted butter and your fingers to lightly butter the bottoms and sides of the liners.
Put the peanut butter and softened butter into a bowl. Use a hand mixer set on medium speed to combine. Then add in the confectioners' sugar and salt and mix on medium speed until well incorporated. Taste, and add in more sugar or salt to desired taste. Set aside.
Put the semisweet chocolate chips, bittersweet chocolate chips, milk chocolate, and peanut butter into a microwave safe bowl. Microwave on medium power for about a minute, then stir. Continue microwaving for about one minute at a time and stirring until the chocolate is smooth.
Using a teaspoon, drop 1 to 1 1/2 teaspoons of the chocolate mixture into the bottom of each liner. Then use a half teaspoon and drop about 1/2 teaspoon to 3/4 teaspoon of the peanut butter mixture on top of the chocolate. Then top the peanut butter with another teaspoon or so of the chocolate. Add on decorative sprinkles, if desired. Place them in the fridge until they are set, about 2 hours.
Enjoy them right out of the fridge for more of a crunch, or at room temperature for a more smooth texture. Delicious either way!
Recipe Adapted from: Taste of Home
Makes approximately 2 dozen peanut butter cups.
Saturday, November 15, 2014
Dark Chocolate Ginger Truffles
Please visit my new blog, Make It and Bake It with Beth, for the dark chocolate ginger truffles recipe.

Tuesday, September 30, 2014
Nutella Cupcakes with Creamy Nutella Frosting & Nutella Ganache

Recipe for Nutella Cupcakes with Creamy Nutella Frosting & Nutella Ganache
INGREDIENTS:For the cupcake
2 cups of water

2 2/3 cups of flour
4 tsp. of baking powder
1/2 tsp. of salt
2 sticks unsalted butter (16 Tbsp.), softened at room temperature
2 cups of granulated sugar
1 Tbsp. plus 1 tsp. of pure vanilla extract
1/4 cup of Nutella
4 eggs
For the frosting
2 sticks unsalted butter (16 Tbsp.), softened at room temperature
1 cup Nutella
2 cups powdered sugar
3 Tbsp. of heavy whipping cream
For the ganache topping
7 Tbsp. heavy whipping cream
5 ounces semisweet chocolate, finely chopped (or 5 ounces chocolate chips - I used Ghiradelli)
2 Tbsp. Nutella
1/2 tsp. of coconut oil
DIRECTIONS:
Preheat the oven to 375 degrees. Line muffin tin with cupcake liners. Bring the water to a boil and then add in the cocoa powder and whisk until mixture is smooth. Remove from heat, let rest for a minute, then put in fridge to cool.
In a medium bowl, sift together the flour, baking powder, and salt. In a large bowl, use an electric hand mixer to beat the butter and sugar on medium speed until smooth and creamy, about 2 minutes. Add the Nutella and vanilla and mix until well incorporated. Add in the eggs, one at a time, beating after each addition. Slowly add in the flour mixture and beat on low speed until just incorporated. Remove cocoa mixture from fridge and with the mixer running, add it in a steady stream and beat on low. Scoop batter into cupcake liners (I filled them almost to the top of the liner, but you can fill just 3/4 full if you want). Put in oven and bake for about 16 - 19 minutes (I baked mine for 17:30). Remove from oven and then transfer cupcakes to wire rack to cool.
Once cooled, make the frosting. Use an electric hand mixer to beat the butter on medium speed until smooth and creamy, about 3 minutes. Then add in the Nutella and mix until well incorporated. Add in 1 cup of the powdered sugar and mix and then add in the other cup and beat until smooth. Pour in the 3 tablespoons of cream and beat until well incorporated. Frost the cupcakes.
Once cupcakes are frosted, make the ganache topping. Put the chocolate or chocolate chips into a bowl. Heat the cream in a small saucepan over medium heat. While the cream is heating, put the Nutella and coconut oil in a small microwave safe bowl and microwave for 30 seconds. Then stir, and microwave for another 30 seconds. Continue as needed until the mixture is thin and pourable. Once the cream comes to a very slight boil and is hot to the touch, pour it over the chocolate or chocolate chips. Stir until smooth and creamy and then add in the Nutella mixture and stir. Use a spoon or fork to put over the frosting in a fun design or just globs, it still will taste the same! Put cupcakes in fridge so the ganache topping can harden before serving.
Store cupcakes in an airtight container in the fridge. They taste amazing the first day they are made and pretty amazing the second day too. Store in fridge for up to 5 days.
Recipe makes approximately 22 cupcakes. You should have enough frosting for all the cupcakes - unless you like TONS of frosting - then you might want to double the frosting recipe!
Recipe Adapted from: Sally's Baking Addiction

Saturday, March 29, 2014
Dark Chocolate Lemon Truffles (made with chocolate chips)

Recipe for Dark Chocolate Lemon Truffles (made with chocolate chips)
INGREDIENTS:
1 1/4 tsp. of lemon zest
5 ounces of Ghiradelli semisweet premium baking chips
2 tsp. of freshly squeezed lemon juice
Cocoa powder
1/2 ounce of bittersweet or unsweetened baking chocolate, grated with a box grater (optional)
Cacao nibs (optional)
Extra chocolate chips, for topping
DIRECTIONS:
Put the heavy cream and the lemon zest into a small saucepan and set over medium heat. Once it simmers, remove from heat and pour in the chocolate chips. Cover the saucepan for 5 minutes. After 5 minutes, gently stir the mixture until it is completely smooth. Gently stir in the lemon juice. Cover the saucepan (make sure to wipe the lid of any moisture before covering) and set in the fridge for several hours or overnight.
Put the cocoa powder into a shallow bowl. Lightly dust your hands with the powder. Scoop up some of the mixture and then use your hands to roll into 3/4-inch balls. Dust with more cocoa if desired. Continue until the mixture is gone. Then roll each ball into the grated chocolate, cacao nibs, or a combination of both. You might need to use your fingers to gently press down the grated chocolate/cacao nibs onto the truffles. Top each truffle with a chocolate chip. Put truffles into the fridge until you are ready to serve.
Recipe makes approximately 16 - 20 truffles. About 55 calories per truffle.
Recipe inspired by various cookbooks in my home and sources on the web.
Tuesday, March 4, 2014
Salted Caramel Brownies

*Because these brownies are so fudgy, you can actually cut them into mini bites and they can be served as candies or fudge. But I won't judge you if you eat a big brownie or two or three large brownies either.
Recipe for Salted Caramel Brownies
 INGREDIENTS:
For the salted caramel sauce
1/4 cup water
1 cup of granulated sugar
2 Tbsp. of light corn syrup
1/2 cup of heavy whipping cream
1 tsp. of sea salt
1/4 cup of sour cream
For the brownies
1 1/4 cups of all-purpose flour
1 tsp. of coarse sea salt
2 Tbsp. of Dutch processed cocoa powder
A couple pinches of instant coffee powder
11 ounces of bittersweet baking chocolate (I used Ghiradelli), coarsely chopped
16 Tbsp. of unsalted butter, cut into 2-inch pieces
1 1/2 cups of granulated sugar
1/2 cup of light brown sugar, packed firmly
5 eggs, at room temperature
2 tsp. of pure vanilla extract
For topping
Sea salt and coarse sugar
DIRECTIONS:
For the caramel sauce
Put the water, sugar, and corn syrup into a saucepan and set it over medium high heat. Stir almost constantly and cook until it becomes a deep amber color or reaches 330 degrees on a candy thermometer. This will take about 15 - 20 minutes. Be careful not to let the mixture burn!
Then remove the saucepan from the heat. Put the cream in a microwave safe liquid measuring cup and heat for 45 seconds. Then slowly pour some cream down the side of the saucepan and whisk constantly, then continue to add more until all of the cream is incorporated (the mixture will steam and bubble up during this process). Then add in the sea salt and sour cream and mix well. Set the caramel sauce aside to cool.
For the brownies
Preheat the oven to 350 degrees and line a 9 x 13 baking pan with parchment paper. Put the flour, sea salt, cocoa powder, and coffee powder into a smallish bowl and sift together. Put the chopped chocolate and cut butter into a large saucepan and set over low heat. Gently stir until the butter and chocolate are melted and smooth. Remove from heat. Add in the granulated sugar and light brown sugar to the chocolate mixture and use an electric hand mixer set on medium speed to fully incorporate. Then add in the eggs and mix well. Stir in the vanilla extract. Then pour in the flour mixture and stir until just combined.
Carefully spread half of the brownie batter into the prepared pan. Smooth down with a spatula. Then pour the caramel sauce over the top of the batter into an even layer. Top the caramel sauce off with the rest of the brownie batter, making sure to carefully smooth over the caramel and fully covering it. Put into the oven and bake for 30 - 35 minutes, making sure to rotate the pan halfway through the baking process. Remove brownies from oven and transfer to a wire rack to cool completely. Once cooled, sprinkle the sea salt and coarse sugar over the brownies (about 1/2 - 1 tsp.). Cover the brownies and put them into the fridge before cutting. This helps to make them extra fudgy!

Recipe makes about 2 dozen regular-sized brownies and makes about 60 small bites.
Recipe Source: Pink Parsley, originally from Baked Explorations
Sunday, February 23, 2014
Dark Chocolate Coconut Muffins

I made these chocolate coconut muffins yesterday morning. I came across a delicious looking muffin recipe on Facebook, but it called for cocoa powder - and I'm out. So I went with another recipe I found that used dark baking chocolate. At first when I had a bite I wasn't sold on them - but once they cooled a little more I thoroughly enjoyed them. My parents and Greg loved them and I hope you do too. Enjoy!
Recipe for Dark Chocolate Coconut Muffins
INGREDIENTS:7 ounces of dark baking chocolate (60 - 70% cocoa)
1 stick (8 Tbsp.) of unsalted butter
2 cups of all-purpose flour
2/3 cup of granulated sugar
1/2 tsp. of salt
1 3/4 tsp. of baking powder
1 tsp. of pure chocolate extract (or pure vanilla extract)
2 eggs
2/3 cup of 2% milk
1 Tbsp. of heavy cream (optional)
2/3 cup of semisweet chocolate chips
1/2 cup of unsweetened coconut flakes
DIRECTIONS:
Preheat the oven to 350 degrees and line a muffin tin with paper liners. Put the butter and chopped chocolate into a small to medium sized saucepan and set over medium heat. Stir frequently until the butter and chocolate are completely melted and smooth. Remove from heat and set aside.
In a large bowl, mix together the flour, sugar, salt, and baking powder. Then add in the chocolate (or vanilla) extract, eggs, milk, and cream. Whisk together until well incorporated. Then stir in the melted chocolate and butter mixture and stir until smooth and chocolate is evenly mixed into the batter. Fold in the chocolate chips and coconut. Scoop the batter into the paper liners and fill. Put the muffins into the oven and cook for 16 - 19 minutes. Remove from oven and allow muffins to cool for a few minutes, then transfer to a wire rack to cool completely.
Put any muffins that are not eaten into an airtight container and store at room temperature or in the fridge.
Recipe Adapted from: Baking Bites
Tuesday, January 21, 2014
The Best Ever Chocolate Chocolate Chip Cookies

Recipe for the Best Ever Chocolate Chocolate Chip Cookies
INGREDIENTS:2 cups of all-purpose flour

2 tsp. baking powder
1/2 tsp. of salt
14 ounces of semisweet (62%) baking chocolate, chopped
4 eggs
2 tsp. of pure vanilla extract
1 tsp. of instant coffee powder
10 Tbsp. of unsalted butter, softened at room temperature
1 1/2 cups of light brown sugar, packed
1/2 cup of granulated sugar
1 3/4 cups of semisweet chocolate chips
Chunky decorative sugar (optional)
Coarse sea salt (optional)
DIRECTIONS:
Put the flour, cocoa powder, baking powder and salt into a medium-sized bowl and mix together. Put the eggs, vanilla extract, and coffee powder into a small bowl and mix well. Put the softened butter into a large bowl and use an electric hand mixer set on medium-high speed to beat until the butter is smooth. Add in the light brown sugar and granulated sugar and beat again until well combined. Set the hand mixer on low speed and gradually pour in the egg mixture and beat until combined.
Prepare the bottom pan of a double boiler with water and set over medium heat. Put the chopped chocolate in the top pan of the double boiler. When the water simmers, set the pan with the chocolate over the water and stir constantly until the chocolate is completely melted and smooth. Remove from heat.
With the hand mixer set on low speed, beat the butter, sugar and egg mixture while pouring the melted chocolate into the bowl in a steady stream. Beat until the chocolate is well combined into the mixture. Add in the flour mixture and beat on low speed until the ingredients are just incorporated. Pour in the chocolate chips and fold in. Cover the bowl with plastic wrap and allow it to sit for about 30 minutes.
Preheat the oven to 350 degrees and line two baking sheets with parchment paper. Use a 1 3/4-inch cookie dough scoop to scoop the dough up into balls and set on the baking sheets. Make sure to leave about 1 inch of space between each ball of cookie dough. Sprinkle a little coarse sugar or sea salt over the balls, if using.
Put in the oven. Bake for 12 - 14 minutes. Remove from oven and allow the cookies to cool for 15 minutes, then transfer to a cooking rack to cool completely. Store in an airtight container at room temperature.
*Recipe makes approximately 3 dozen cookies*
Recipe source: Annie's Eats, originally from Baking Illustrated

Saturday, December 21, 2013
Peanut Butter and Pretzel Truffles

Recipe for Peanut Butter and Pretzel Truffles (Makes about 50)
INGREDIENTS:
4 cups of crushed salted pretzels (about 6 - 7 cups of whole pretzels)
4 Tbsp. of unsalted butter, softened at room temperature
1 1/4 cups of confectioners (powdered) sugar
12 - 16 ounces of semisweet baking chocolate (I used Baker's brand)
Coarse sea salt and/or coarse sugar for sprinkling (optional)
DIRECTIONS:
To crush up the pretzels, place them into the bowl of a food processor and pulse several times until they are at the size you want. You can make the pretzel pieces chunky or fine, just don't turn them into a powder! Then measure out the crushed pretzels into four cups, if you need more, add more whole pretzels to the food processor and pulse.
Scoop the peanut butter into a large bowl. Add in the pretzels, unsalted butter, and powdered sugar. Use an electric hand mixer set on medium speed to briefly blend the ingredients, then use a large spoon to mix well until ingredients are combined and well incorporated. Line a baking sheet with parchment paper. Use a cookie dough scoop to scoop up batter and form into 1-inch balls with your hands. Place each ball on the baking sheet. Then place the baking sheet in the freezer for 45 minutes to an hour.
Break the chocolate into small pieces (start with 12 ounces of chocolate - if you use it all, then you can melt the remaining 4 ounces) and place in the top pan of a double boiler. Prepare the bottom pan of the double boiler with water and set over medium high heat until steam starts to rise. Then place the pan with the chocolate on top and stir the chocolate until it is completely melted. Turn the heat off. Take the peanut butter pretzel balls out of the freezer. Drop one ball into the chocolate and use a spoon to coat. Place back on the baking sheet and sprinkle with the sea salt or sugar. Continue until all balls are coated with the chocolate. Place in the fridge to harden for about 30 minutes. Store in an airtight container for up to one week.
Recipe source: Annie's Eats

Wednesday, December 18, 2013
Pretzel Rolo Turtles (A pretzel, Rolo & toasted pecan)
Please visit my new website, Make It and Bake It with Beth, for the recipe for Pretzel Rolo Turtles!
Saturday, December 7, 2013
Pumpkin Pie Bars

Recipe for Pumpkin Pie Bars
INGREDIENTS:For the crust
1 1/3 cups of all-purpose flour
1/4 cup of granulated sugar
1/2 cup of light brown sugar, firmly packed
1 cup of old-fashioned oats
1/3 cup of almonds
12 ounces of very cold unsalted butter chopped into small pieces (put in freezer for about 15 minutes before using)
For the filling
2 cups of canned pumpkin puree

2/3 cup of granulated sugar
3 eggs
1 1/2 tsp. of pure vanilla extract
2 tsp. of ground cinnamon
1/4 tsp. of ground ginger
1/4 tsp. of ground cloves
1/4 tsp. of ground nutmeg
For topping
Reserved crust mixture
Sweetened shredded flake coconut
DIRECTIONS:
Preheat the oven to 350 degrees. Generously butter a 9 x 9 square pan.
Put the flour, granulated sugar, brown sugar, oats, and almonds into the bowl of a food processor fitted with a metal blade. Pulse for a few seconds to incorporate. Scatter the butter pieces over the mixture. Pulse for several seconds until the mixture resembles coarse crumbs. Pour some of the crust mixture into the prepared pan. Use your hands to press down the crust evenly. You should have plenty of reserve crust mixture, but make sure you have at least 1 1/4 cups. Set aside reserved crust mixture. Place pan in oven and cook for about 15 minutes.
While crust is cooking, put the pumpkin, cream cheese, eggs, vanilla, and spices into a large bowl. Use an electric hand mixer set on medium-high speed to mix ingredients until smooth and well incorporated (about 3 - 5 minutes). Pour the pumpkin mixture into the crust. Top with the reserved crust mixture and then top with coconut. Place back in the oven and cook for 25 - 30 minutes. Allow it to cool completely at room temperature, and then cover and refrigerate. Refrigerate for a couple hours before cutting and serving. Makes about 16 servings. Serve with homemade whipped cream, if desired.
Recipe Adapted from: Joy the Baker, originally from Kraft recipes
Saturday, December 22, 2012
Best Coconut Macaroons Ever X 2 (w/almonds & chocolate)


Tuesday, December 11, 2012
Peppermint Sugar Cookies

I had so much fun making the peppermint truffles the other day! I had leftover peppermints, so I wanted to make another fun treat. I came across a peppermint crunch ball cookie recipe, and I decided to try it out. The cookies did not turn out exactly how I thought they would (I thought they would be crunchier and I didn't think they would flatten - I guess names of recipes can be deceiving), but they were really yummy. The cookie is sweet, but not too sweet - with just the right amount of peppermint. The texture is nice & I love the slight crunch from the crushed mint and sugar. They are cute & festive and perfect for the holidays - enjoy!
 2 sticks of unsalted butter, softened at room temperature
1 cup of confectioners sugar
1 egg
1/4 tsp. of vanilla extract
3/4 tsp. of peppermint extract
2 1/3 cups of all-purpose flour
1/8 tsp. of salt
10 - 15 crushed mini candy canes or Starlight mints
2 Tbsp. of granulated sugar
Decorative Sugar (optional)
DIRECTIONS:
In a large mixing bowl, beat together the softened butter and confectioners sugar with an electric hand mixer set on medium speed. Mix for a few minutes, until the mixture is smooth and creamy. Add in the egg and mix to incorporate. Stir in the vanilla extract and peppermint extract. Slowly add the flour to the mixture, by pouring in 1/3 cup at a time. Use the hand mixer to beat on low for several seconds after each addition of flour. Mix in the salt. Make sure all ingredients are well blended together. Cover the bowl with a lid and put into the fridge for 1 - 2 hours.
Preheat the oven to 375 degrees. Line baking sheets with parchment paper. In a small bowl, mix together the crushed peppermints (I grind up the Starlight mints in my food processor) and granulated sugar. Take the mixture out of the fridge. Use a cookie dough scoop to scoop the mixture up and roll into 1 1/2-inch balls. Coat the balls in the crushed mint and sugar mixture and place on baking sheet. Space each ball about 2-inches apart from each other. Place in oven and bake for 12 - 14 minutes.
Optional: About 3 minutes before the cookies are finished baking, sprinkle decorative sugar on top of each cookie and then put back into the oven.
Once cookies are finished baking, transfer them to a wire rack to cool.
*Makes about 3 dozen cookies.
Recipe Adapted from: Mr. Food
Recipe for Peppermint Sugar Cookies
INGREDIENTS:
1 cup of confectioners sugar
1 egg
1/4 tsp. of vanilla extract
3/4 tsp. of peppermint extract
2 1/3 cups of all-purpose flour
1/8 tsp. of salt
10 - 15 crushed mini candy canes or Starlight mints
2 Tbsp. of granulated sugar
Decorative Sugar (optional)
DIRECTIONS:
In a large mixing bowl, beat together the softened butter and confectioners sugar with an electric hand mixer set on medium speed. Mix for a few minutes, until the mixture is smooth and creamy. Add in the egg and mix to incorporate. Stir in the vanilla extract and peppermint extract. Slowly add the flour to the mixture, by pouring in 1/3 cup at a time. Use the hand mixer to beat on low for several seconds after each addition of flour. Mix in the salt. Make sure all ingredients are well blended together. Cover the bowl with a lid and put into the fridge for 1 - 2 hours.
Preheat the oven to 375 degrees. Line baking sheets with parchment paper. In a small bowl, mix together the crushed peppermints (I grind up the Starlight mints in my food processor) and granulated sugar. Take the mixture out of the fridge. Use a cookie dough scoop to scoop the mixture up and roll into 1 1/2-inch balls. Coat the balls in the crushed mint and sugar mixture and place on baking sheet. Space each ball about 2-inches apart from each other. Place in oven and bake for 12 - 14 minutes.
Optional: About 3 minutes before the cookies are finished baking, sprinkle decorative sugar on top of each cookie and then put back into the oven.
Once cookies are finished baking, transfer them to a wire rack to cool.
*Makes about 3 dozen cookies.
Recipe Adapted from: Mr. Food
Thursday, December 6, 2012
Dark Chocolate Peppermint Truffles
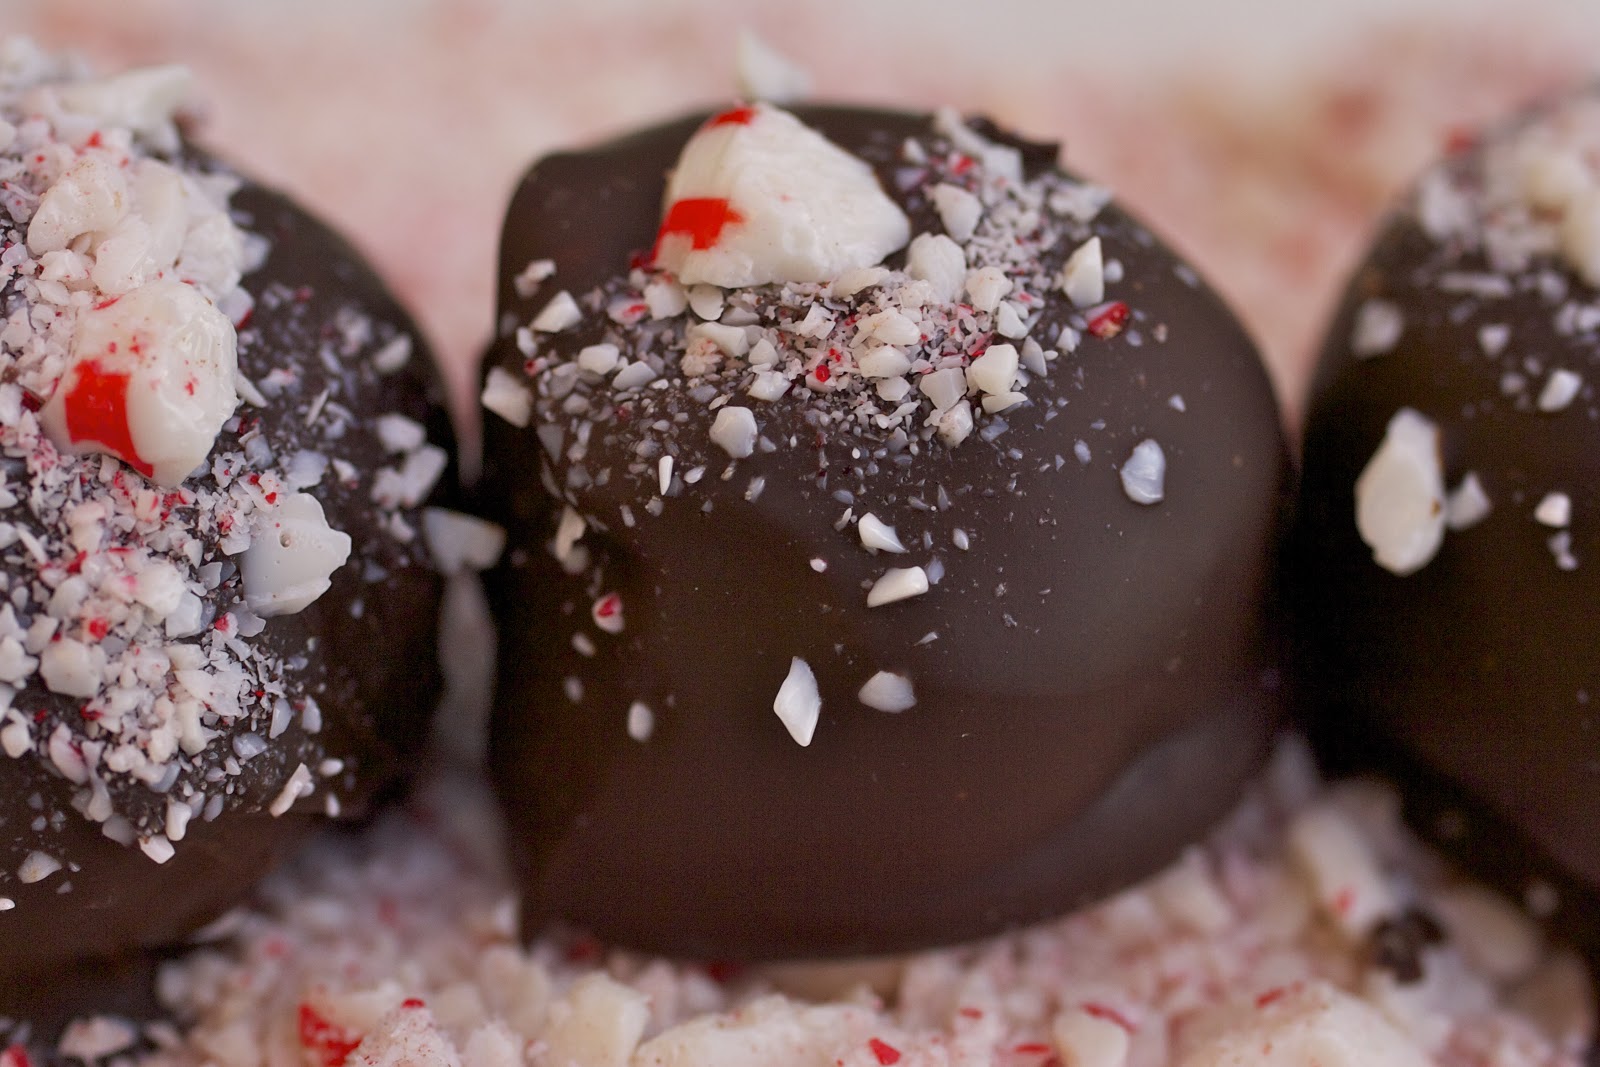
I was going to wait to post this recipe over the weekend, but I am just so excited about it that I had to share it now! I made peppermint truffles for the first time yesterday. The filling was made with a dark chocolate ganache with peppermint extract, and then I dipped them in dark chocolate and sprinkled on some crushed mints. They were pretty amazing. I took some by a friend's house this morning on my way to work, and she messaged me to let me know that they are the best truffles I have ever made (she has sampled the coconut truffles, sweet cream and walnut truffles, cookie dough truffles, and pumpkin truffles)! I think I might agree with her, but I need to go eat another one before I can know for sure. Greg loved them too, and so did my coworkers at the elementary school.
These truffles are the perfect holiday baking project - all of your friends, coworkers, and family would love to have some of these delicious festive treats! They would also be great to serve at a holiday party, or at a shower that is held during the holiday season. Enjoy.
Recipe for Dark Chocolate Peppermint Truffles
INGREDIENTS:
For the filling
10 ounces of semisweet baking chocolate, chopped very finely
8 ounces of whipping cream or heavy whipping cream
1 1/2 - 2 tsp. of peppermint extract (I used 2 tsp.)
For the coating
16 ounces of semisweet baking chocolate, coarsely chopped or broken in half
10 - 15 crushed mini candy canes or Starlight mints
DIRECTIONS:
For the filling
Chop the chocolate. It can be chopped by putting it into the bowl of a food processor and pulsing until chopped very finely. Put the chocolate into a heat-safe metal bowl. Put the cream into a small saucepan. Set the saucepan over medium heat and bring it to a simmer (watch it closely). Once it simmers, pour it over the chopped chocolate. Let it sit for 1 - 2 minutes. Gently stir the mixture for about a minute, making sure to fully incorporate the cream and chocolate together. Stir it until it is smooth and completely dark in color. Stir in peppermint extract. Let it rest on the countertop for about 10 minutes. Cover the bowl with a lid and place it into the refrigerator for several hours, to allow the mixture to harden.
Use a cookie dough scoop to scoop up the mixture and then roll with your hands into 3/4-inch to 1-inch balls. Place the balls onto parchment lined containers. Cover the containers and place in the freezer for at least 2 hours.
For the coating
Line a baking sheet with parchment paper. Put the crushed mints on a corner on the baking sheet or in a small bowl. Use a small spoon to sprinkle the mints onto the truffles, when ready for that step.
Put the coarsely chopped chocolate into a small to medium saucepan. Put about 3/4 cup of water into the bottom pan of a double boiler. Set the double boiler over medium-high heat. When steam begins to come up, place the saucepan with the chocolate on top of the boiler. Stir the chocolate frequently until it is completely smooth and melted. Turn off the stovetop. Take one container of the filling out of the freezer. Drop one of the balls into the melted chocolate, and use a spoon to completely coat. Use the spoon to carefully place the truffle onto the baking sheet. Sprinkle the crushed mints on top, while the chocolate is still wet. Repeat until each truffle is coated with the chocolate. Repeat with the remaining containers of the filling in the freezer.
Place the baking pan with the truffles in the fridge, and allow the coating to harden before serving.
Recipe makes 25 - 30 truffles.
Recipe Adapted from: Food For My Family
NOTE: Since there is cream in the filling, it is best to store the peppermint truffles in the fridge - don't let them sit out long.
These truffles are the perfect holiday baking project - all of your friends, coworkers, and family would love to have some of these delicious festive treats! They would also be great to serve at a holiday party, or at a shower that is held during the holiday season. Enjoy.
Recipe for Dark Chocolate Peppermint Truffles
INGREDIENTS:
10 ounces of semisweet baking chocolate, chopped very finely
8 ounces of whipping cream or heavy whipping cream
1 1/2 - 2 tsp. of peppermint extract (I used 2 tsp.)
For the coating
16 ounces of semisweet baking chocolate, coarsely chopped or broken in half
10 - 15 crushed mini candy canes or Starlight mints

DIRECTIONS:
For the filling
Chop the chocolate. It can be chopped by putting it into the bowl of a food processor and pulsing until chopped very finely. Put the chocolate into a heat-safe metal bowl. Put the cream into a small saucepan. Set the saucepan over medium heat and bring it to a simmer (watch it closely). Once it simmers, pour it over the chopped chocolate. Let it sit for 1 - 2 minutes. Gently stir the mixture for about a minute, making sure to fully incorporate the cream and chocolate together. Stir it until it is smooth and completely dark in color. Stir in peppermint extract. Let it rest on the countertop for about 10 minutes. Cover the bowl with a lid and place it into the refrigerator for several hours, to allow the mixture to harden.
Use a cookie dough scoop to scoop up the mixture and then roll with your hands into 3/4-inch to 1-inch balls. Place the balls onto parchment lined containers. Cover the containers and place in the freezer for at least 2 hours.
For the coating
Line a baking sheet with parchment paper. Put the crushed mints on a corner on the baking sheet or in a small bowl. Use a small spoon to sprinkle the mints onto the truffles, when ready for that step.
Put the coarsely chopped chocolate into a small to medium saucepan. Put about 3/4 cup of water into the bottom pan of a double boiler. Set the double boiler over medium-high heat. When steam begins to come up, place the saucepan with the chocolate on top of the boiler. Stir the chocolate frequently until it is completely smooth and melted. Turn off the stovetop. Take one container of the filling out of the freezer. Drop one of the balls into the melted chocolate, and use a spoon to completely coat. Use the spoon to carefully place the truffle onto the baking sheet. Sprinkle the crushed mints on top, while the chocolate is still wet. Repeat until each truffle is coated with the chocolate. Repeat with the remaining containers of the filling in the freezer.
Place the baking pan with the truffles in the fridge, and allow the coating to harden before serving.
Recipe makes 25 - 30 truffles.
Recipe Adapted from: Food For My Family
 |
| Dark chocolate peppermint truffles - possibly the best truffles I have ever made... |
NOTE: Since there is cream in the filling, it is best to store the peppermint truffles in the fridge - don't let them sit out long.

Saturday, December 1, 2012
Mexican Hot Chocolate Cookies (chocolate Snickerdoodles)

Today I decided to recreate the cookie in my own kitchen. I found a few different recipes online for the cookies, and I followed one with only a few minor changes. The batter is made with cocoa and just a little cinnamon, and then the dough is rolled in a delicious mixture of sugar, cinnamon, and ancho chile powder. These cookies are kind of like Snickerdoodles, but they are chocolate instead. They smelled so good while baking, and they tasted amazing. Greg has already had several of the cookies since I pulled them out of the oven. I will definitely be making these again. I think I might take some to the neighborhood holiday party next week! Enjoy.
Recipe for Mexican Hot Chocolate Cookies
INGREDIENTS:For the cookie dough
2 large eggs
2 1/4 cups of all-purpose flour
1/2 cup of cocoa powder
2 tsp. of cream of tartar
1 tsp. of baking soda
1/4 tsp. of sea salt
1/4 tsp. of cinnamon
For the cinnamon-sugar coating
1/3 cup of granulated sugar
2 tsp. of cinnamon
A dash or two of ancho chili powder (optional)
DIRECTIONS:
Preheat the oven to 400 degrees.
In a large bowl, beat together the softened butter and sugar with an electric hand mixer set on medium speed. Beat until smooth and creamy. Add in the eggs, and incorporate well.
In a medium bowl, sift together the flour, cocoa powder, cream of tartar, baking soda, salt, and cinnamon. Pour the dry ingredients into the butter mixture. Mix together the ingredients with the electric hand mixer set on the lowest speed, until the ingredients are well incorporated and a batter is formed.
In a small bowl, stir together the sugar, cinnamon, and ancho chile powder - this is the cinnamon-sugar coating.
Use a cookie dough scoop to scoop up about 1 tablespoon of the batter. Use your hands to form the dough into balls, and then roll each one into the cinnamon-sugar mixture, until fully coated. Place on a baking sheet, and leave about 2-inches of space between each (I put about 12 on a baking sheet, using 3 baking sheets). Place baking sheet in the oven and bake for 5 minutes. Rotate the baking sheet, and then cook another 5 or so minutes. The cookies are done when they begin to crack on the tops. After you remove the cookies from the oven, let them rest on the baking sheet for a few minutes, then transfer to a cooling rack to cool completely.

***Makes about 3 dozen (36) cookies***
Recipe Source: A Pretty Life
%20-%20Bake%20It%20and%20Make%20It%20with%20Beth "Pin It")
Wednesday, November 21, 2012
The Best Pumpkin Pie with Homemade Whipped Cream

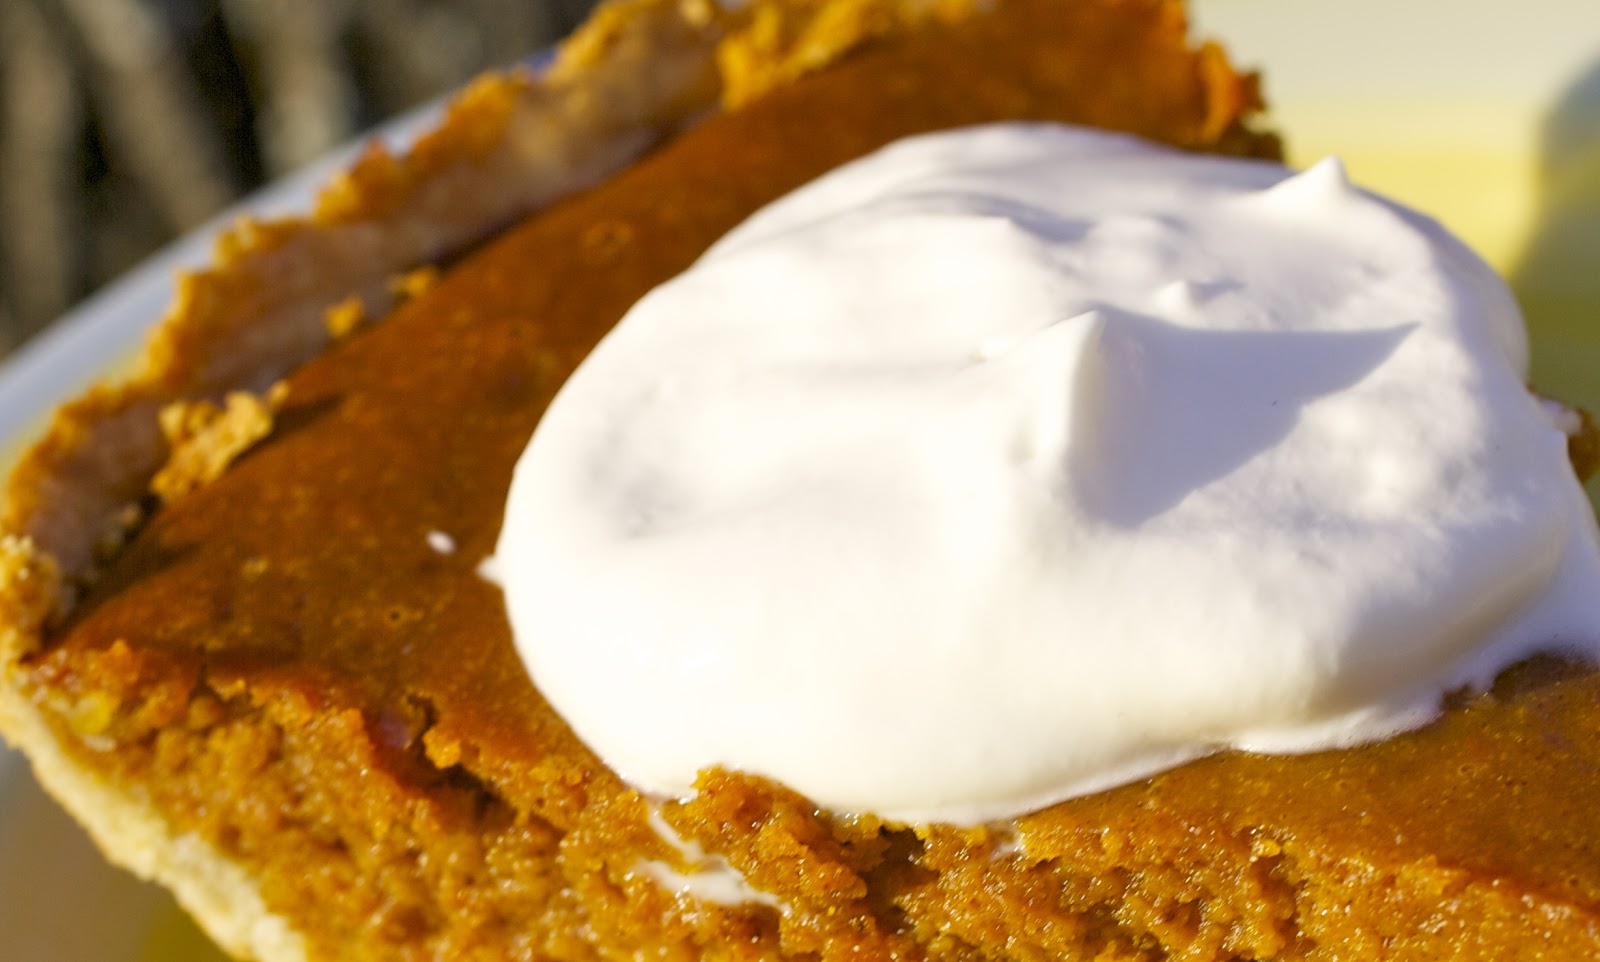
I first came across this recipe last winter. I will never try another recipe for pumpkin pie again, because this one really is the absolute best. This pie taste delicious when it is warm or cold, and it is great with or without whipped cream. But since whipped cream makes everything better, I usually opt for a piece topped with whipped cream. If you have never had homemade whipped cream, you are missing out. Once you have it, you probably will never buy store-bought whipped cream again.
I hope everyone has a very happy Thanksgiving! I have a lot to be thankful for, but today I'm especially thankful for pumpkin pie!
Recipe for the Best Pumpkin Pie with Homemade Whipped Cream
For the pie crust
1 1/4 cups of all-purpose flour
1 Tbsp. of granulated sugar
1/4 tsp. of kosher salt
1 stick of very cold butter, chopped into small chunks
3 - 4 Tbsp. of ice-cold water
DIRECTIONS:
Place the flour, salt, and sugar into the bowl of a food processor fitted with a metal blade. Pulse briefly to just combine. Add in the very cold pieces of butter. Pulse several times until the mixture resembles coarse crumbs (about the size of peas). With the food processor running, slowly pour a tablespoon of the water through the feed tube. Continue to pour in more water, a tablespoon at a time. After you have poured in 3 tablespoons of water, add in the fourth tablespoon if the dough has not yet left the sides of the bowl. Allow the food processor to keep running until the dough completely leaves the sides of the bowl and forms into a ball. Carefully remove the dough from the food processor and wrap in saran wrap or seal in a plastic bag. Put into the refrigerator for 45 minutes.
 For the pumpkin pie filling
INGREDIENTS:
1 14-ounce can of pumpkin
1 14-ounce can of sweetened condensed milk
2 eggs, beaten with a fork
1/2 cup of light brown sugar, packed
2 Tbsp. of granulated sugar
1 1/2 tsp. of ground cinnamon
1/2 tsp. of ground ginger
1/2 tsp. of ground nutmeg
1/2 tsp. of salt
1/4 tsp. of ground cloves
1/8 tsp. of vanilla extract
DIRECTIONS:
Place all of the ingredients into a large mixing bowl. Beat the ingredients together with an electric hand mixer set on medium speed for two minutes.
For assembly and cooking
Preheat the oven to 425 degrees.
Take the dough out of the fridge. Place it into a 9 to 10-inch pie pan. Use your hands to firmly press and work the dough so it is evenly distributed onto the bottom and the sides of the pan. Pour the pumpkin pie filling mixture into the pan. Place the pie pan into the oven and cook for 15 minutes. After 15 minutes, lower the oven temperature to 350 degrees. Cook for another 45 - 50 minutes. Cool the pie on a cooling rack for at least 20 minutes before serving. Makes 8 - 12 servings.
Pie Crust Recipe Source: Annie's Eats
Pumpkin Pie Recipe Source: Food.com
INGREDIENTS:
1 cup of heavy whipping cream (chilled)
1 Tbsp. of confectioners sugar (powdered sugar)
DIRECTIONS:
Place a medium to large metal mixing bowl and the whisk attachment for an electric hand mixer into the freezer. Let chill for about 10 minutes. Once chilled, pour the cup of heavy whipping cream into the bowl. Attach the chilled whisk to the electric hand mixer. Beat the cream on high speed for about one to two minutes, then add in the powdered sugar. Continue to beat on high speed for several minutes, or until the cream starts to form soft peaks. This recipe makes enough whipped cream to serve on each piece of pie (or at least it should)!
Saturday, November 17, 2012
Chocolate Marshmallow MADNESS!

This recipe was inspired by the frosting on the ice cream cone cupcakes. I tried making these once before, but the butter did not work too well in the recipe. So I omitted the butter this time, added some mini chocolate chips to the mix, and it was a success. My coworkers approved, Greg approved, and I hope you will also approve of the madness! Make sure to enjoy the chocolate marshmallow madness with a glass of milk.
Recipe for Chocolate Marshmallow MADNESS!
INGREDIENTS:For the inside:
2 7-ounce jars of marshmallow creme
1 1/4 cups of chocolate chips (regular sized)
1/4 cup of cocoa powder
1/2 tsp. of vanilla extract
1 - 1 1/2 cups of mini chocolate chips (depending on your desired amount of chunkiness)
For the coating:
16-ounces of semisweet baking chocolate squares, broken in half
DIRECTIONS:
For the inside:
Melt the 1 1/4 cups of regular-sized chocolate chips in a smallish saucepan set over medium-low heat, stirring occasionally. Remove the chocolate from heat once it is melted and smooth. Set aside to cool slightly.
Put the marshmallow creme, cocoa powder, and vanilla extract into a large mixing bowl. Add in the slightly cooled melted chocolate and the mini chocolate chips. Using an electric hand mixer set on medium-low speed, beat the mixture together for a couple minutes until it is smooth and all ingredients are well incorporated. Stir in more mini chocolate chips, if desired. Cover the bowl with a lid and put it in the fridge for several hours, preferably overnight.
After mixture has been refrigerated, line a couple freezer-safe containers with parchment paper. Take the mixture out of the fridge and use a cookie dough scoop to form the marshmallow filling. Scoop a little out and roll into 1-inch (or larger) balls. Place each one onto the parchment lined containers. Cover the containers with foil and place in the freezer for a few hours (or more).
For the coating:
Line a baking sheet with parchment paper.
Place the broken squares of baking chocolate into a medium-sized saucepan. Prepare a double boiler with about 1/2 cup of water, and set the double boiler over medium heat. Once steam starts to come up through the boiler, set the saucepan of chocolate on top. Allow the chocolate to melt, stirring frequently. Once the chocolate melts, turn off the heat. Take the chilled chocolate marshmallows out of the freezer. Drop each one into the melted chocolate one at a time and use a spoon to coat. Use the spoon to carefully place each one onto the prepared baking pan. Once you have coated each one, place baking sheet into the refrigerator. Allow the chocolate to harden. Once the chocolate has hardened, they are ready to eat. I found that they actually taste best at room temperature, so you can take them out of the fridge to sit until they are ready to be served.

Tuesday, November 6, 2012
Easy Fudge with Cacao Nibs

I love this fudge recipe. Not only is the fudge delicious, but it is SO easy to make. I like the fact that I can make the fudge without the use of a candy thermometer. Whenever I try to make something that requires a reading on a candy thermometer, I always lose patience and figure that 5 - 10 degrees lower should suffice. And it never does...
This fudge has a subtle coffee flavor with a hint of cinnamon. The texture is smooth and creamy, and you will love the slight crunch from the cacao nibs. I shared some of this fudge at work yesterday, and it was quite the hit. My coworkers also vote yes to this fudge, and I hope that you will too. Enjoy!
Recipe for Easy Fudge with Cacao Nibs
INGREDIENTS:4 Tbsp. of unsalted butter
1 7-oz. jar of marshmallow cream
2/3 cup of heavy whipping cream
1/2 cup of granulated sugar
1 1/4 tsp. of instant ground coffee
1/4 - 1/2 tsp. of cinnamon
1/4 tsp. of salt
12 ounces of semisweet baking chocolate (62% cocoa), very finely chopped
1 - 2 tsp. of SCHARFFEN BERGER cacao nibs
DIRECTIONS:
Carefully fit a piece of foil into the bottom and on all four sides of an 8 x 8 pan. Very lightly grease the foil in the pan with the end of a stick of butter.
Put the baking chocolate into the bowl of a food processor fitted with a metal blade. Pulse until the chocolate is chopped very finely. Set aside.
Place the butter, marshmallow cream, heavy cream, sugar, ground coffee, cinnamon, and salt into a medium sized saucepan. Set it over medium heat. Stir to combine the ingredients and allow it to come to a boil. Once it boils, stir it constantly for about 4 - 5 minutes. Then remove the saucepan from heat and immediately pour in the chocolate, and stir until the mixture is completely smooth. Pour the mixture evenly into the prepared pan. Sprinkle the cacao nibs on top of the fudge mixture. Cover the pan with foil and store in the fridge until it hardens, about 4 hours.
Carefully remove the foil from the fudge. Use a long sharp knife to cut it into desired size pieces. Store fudge in the fridge in an airtight container. Enjoy!
Recipe Adapted from: Annie's Eats
Wednesday, October 24, 2012
Pumpkin Chocolate Chip Truffles
 |
| Pumpkin chocolate chip truffles, garnished with gingersnap crumbs! |
Recipe for Pumpkin Chocolate Chip Truffles
INGREDIENTS:
4 ounces of cream cheese, softened at room temperature

3/4 cup of finely ground up gingersnaps
1/8 tsp. of grated orange zest
1/4 tsp. of cinnamon
2 Tbsp. of powdered sugar
1/2 cup of canned pumpkin
1/3 cup of semisweet mini chocolate chips
16 ounces of semisweet baking chocolate, chopped (I used Baker's chocolate)
DIRECTIONS:
Place the chopped white chocolate in a small saucepan. Put 1/2 cup of water in the pan of a double boiler and place the double boiler over medium high heat. Once the water begins to simmer, place the saucepan of white chocolate on top and stir until the chocolate is fully melted. Remove the chocolate from heat and set aside.
Place the softened cream cheese, graham cracker crumbs, ground gingersnaps, orange zest, cinnamon, powdered sugar, and pumpkin in a large bowl. Once the chocolate has slightly cooled, stir in the chocolate. Use an electric hand mixer set on low to medium-low speed to incorporate all of the ingredients together. Mix until smooth. Gently fold in the chocolate chips. Cover the bowl with a lid and place in the fridge for several hours (I usually chill for at least 4 hours, sometimes overnight).
Line a couple of freezer-safe containers with parchment paper. Use a cookie dough scoop to scoop up the mixture and form into 1-inch to 1.5-inch balls. Cover the containers and chill in the freezer for several hours (I usually chill in freezer overnight).
When you are ready to dip the truffles, line a baking sheet with parchment paper. Place the semisweet baking chocolate in a medium saucepan. Put about 1/2 cup of water in a double boiler and set it over medium-high heat. Once the water begins to simmer, set the saucepan with the chocolate over the boiler. Stir chocolate frequently until it is fully melted. Turn the heat off of the stovetop but keep the saucepan with chocolate over the double boiler. Drop a couple of the frozen pumpkin balls into the chocolate and use a spoon to fully coat. Use the spoon to carefully transfer the coated truffles onto the lined baking sheet. Repeat until all of the truffles are coated with the chocolate. Put the baking sheet in the fridge to allow the truffles to harden. They will be ready to eat within 20 minutes or so. Yum!
Recipe Adapted from: Annie's Eats
Subscribe to:
Posts (Atom)