Translate

Showing posts with label indulgent. Show all posts

Tuesday, November 15, 2016

Chocolate Chip Cookie Dough Cupcakes

Guess what? You need these chocolate chip cookie dough cupcakes in your life right now. I bet it is dark when you are waking up in the morning and even darker when you are coming home after an exhausting day at work, and there is probably not too much that can get you out of your funk.  These chocolate chip cookie dough cupcakes are here to help. Just like the cookie dough truffles, there is no raw egg in the cookie dough filling. The mixture is made up everything that is good in life,  like butter, brown sugar, condensed milk, flour, vanilla, and chocolate chips. 

I got together with a friend a few weekends ago, and we made these cupcakes for the first time. I had seen them before and thought about making them, but I always thought they looked too involved. Hey, they really are a little involved, but they aren't too tricky, and they are well worth the extra time in the kitchen.

So, what are you waiting for? Go make some chocolate chip cookie dough cupcakes and put a smile back on that face. Enjoy!

Recipe for Chocolate Chip Cookie Dough Cupcakes

INGREDIENTS
For the cupcakes
3 sticks of unsalted butter, at room temperature
1 1/2 cups of light brown sugar, packed
4 large eggs
2 2/3 cup of all-purpose flour
1 tsp. of baking powder
1 tsp. of baking soda
1/4 tsp. of salt
1 cup of 2% or whole milk
2 tsp. of pure vanilla extract
1 cup of semisweet chocolate chips

For the cookie dough filling
4 Tbsp. of unsalted butter, at room temperature
6 Tbsp. of light brown sugar, packed
1 cup plus 2 Tbsp. of all-purpose flour
7 ounces of sweetened condensed milk
1/2 tsp. of pure vanilla extract
1/3 cup of semisweet chocolate chips (regular or miniature)

For the cookie dough frosting
2 sticks of unsalted butter, at room temperature
2 1/4 cup of powdered (confectioners') sugar
2/3 cup of all-purpose flour
1/2 tsp. of salt
2 Tbsp. of milk
2 tsp. of pure vanilla extract

Extra chocolate chips, for topping cupcakes

DIRECTIONS
For the cupcakes
Preheat the oven to 350 degrees. Line two cupcake pans with paper liners. Put the butter and the brown sugar in a large mixing bowl and use an electric hand mixer to mix on medium high speed until light and fluffy, about 3 - 4 minutes. Then add in the eggs one at a time, beating well after each addition.

Combine the flour, baking powder, baking soda, and salt in a medium mixing bowl and stir together. Add one third of the flour mixture into the butter mixture and beat on low speed, then add 1/2 cup of the milk and beat again on low speed. Continue alternating and end with the dry ingredients, mixing each time until just incorporated. Add in the vanilla extract and mix. Fold in the chocolate chips.
Divide the batter evenly into the paper liners. Bake for 18 - 20 minutes, or until a toothpick inserted in the center of the cake comes out clean. Allow the cupcakes to cool in the pan for 10 minutes, then transfer to a wire rack and let cool completely.

For the cookie dough filling
Once cupcakes are in the oven, make the cookie dough filling. Combine the butter and sugar in a mixing bowl and mix on medium high speed with an electric had mixer until light and fluffy, about 3 minutes. Then mix in the flour, sweetened condensed milk, and vanilla extract and mix until smooth. Stir in the chocolate chips. Cover the bowl and put in fridge until mixture is firm, about one hour.

To stuff the cupcakes
When cupcakes are cooled, add in the cookie dough! Cut a cone-shaped portion (or use a spoon and scoop) out of the center of each cupcake. Fill each hole with a ball of the cookie dough mixture. Use all of the filling to stuff the cupcakes - the more you have, the better the cupcake!

For the frosting
Put the butter and brown sugar into a medium mixing bowl and use an electric hand mixer set on medium high speed to beat until creamy. Add in the confectioners' sugar and mix until smooth. Add in the flour and salt and mix until just incorporated. Pour in the milk and vanilla extract and beat until smooth and well incorporated.

Frost the cupcakes, top with chocolate chips, and celebrate!

*Recipe makes approximately 2 dozen cupcakes.
Store cupcakes in an airtight container in the fridge.

Monday, January 25, 2016

Baked Hot Chocolate

What do you do when there is close to 3-feet of snow on the ground and you really do not feel like doing much at all? If you are anything at all like me, you do things like catch up on reading, dance and color with your toddler, think about getting dressed in something other than sweats (but never do), bake, and eat lots of food. I finished up the container of hot chocolate that I made on Friday, and instead of making some more (especially since we are a bit low on milk), I made this amazing baked hot chocolate instead. It is made with rich semisweet chocolate, butter, eggs, and sugar - that's it. Since Greg is not feeling too well he decided not to have one of the two mugs of this deliciousness that I made, so I got to eat both over the past 24 hours. I did share a little with Wendy, and she was pretty crazy about it, as she yelled "more, more" after every bite I gave her. I am pretty sure you will also love baked hot chocolate. It has a thin layer of crunchy, a middle layer of smooth, and you will not stop eating it until you reach the bottom. It is kind of like a cross between a chocolate lava cake, chocolate pudding, and hot chocolate! I found out that tomorrow is another snow day for me, so more baked hot chocolate making and eating is at the top of my to do list! I might even put on some jeans, too. Enjoy!


Recipe for Baked Hot Chocolate

INGREDIENTS: 
5 ounces of semisweet baking chocolate, finely chopped (I used SCHARRFEN BERGER 62% baking bar)
3 1/2 Tbsp. of unsalted butter, cut into small cubes
SNOW DAY + BAKED HOT CHOCOLATE = HAPPINESS
2 large eggs, at room temperature
2 Tbsp. of pure cane sugar (or granulated)
A pinch of cinnamon (optional)

DIRECTIONS:
Position the oven rack to the middle and preheat oven to 350 degrees. Put two 8-ounce oven-proof mugs or ramekins into a baking pan or roasting pan.

Put an inch of water in the bottom pan of a double boiler and set over medium high heat. Bring to a gentle simmer. Put the chopped chocolate and butter in the top pan of the double boiler and set over the simmering water, stirring until fully melted and smooth. Set aside. Leave the bottom pan with the water on the stovetop and continue to let it simmer.

Put the eggs, sugar, and cinnamon in a small saucepan and whisk together with a fork. Then use the handle of the saucepan to hold it over the simmering water for a few minutes or until warm, almost hot to the touch(I just literally held it over the steam from the water - it's a good workout...). Then use a hand mixer set on medium-high speed to beat the egg and sugar mixture until light and fluffy, about 3 - 4 minutes. Carefully pour the egg mixture into the chocolate mixture, making sure that there is no water from condensation on the bottom of the pan that drips in (I used a towel to wipe the bottom of the pan before I added to chocolate mixture). Use a spoon to gently fold the eggs and chocolate together until smooth and you don't see any streaks. Pour or ladle into the mugs or ramekins. Pour very hot water into the baking dish, being careful not to let water splash into the mugs, until it reaches about halfway up the sides of the mugs. VERY carefully transfer the pan to the oven. Cook for 15 - 20 minutes, or until the tops are no longer shiny. Remove from oven, use a hot pad holder to remove the mugs out of the water, and place mugs on a cooling rack for a few minutes before serving. I topped mine with plain cream and some chocolate chips. I am sure it would be amazing with some fresh whipped cream too!

Baked hot chocolate is best enjoyed hot (in my professional opinion), but it can be also eaten at room temperature. You can cover well with foil and store in the fridge for up to one day. To reheat, first let it come to room temperature and then bake at 350 for 5 - 8 minutes.

Recipe Adapted from: The Essence of Chocolate Recipes for Baking and Cooking with Fine Chocolate
Recipe serves 2. 
A shot of our home in the snow!

Friday, December 4, 2015

Outrageous Brownie Truffles

Please visit my new blog, Make It and Bake It with Beth, for the brownie truffles recipe.

Sunday, March 15, 2015

Homemade Chocolate Peanut Butter Cups (way better than Reese's)!

I created something in my kitchen the other day that was truly amazing. A friend of mine was celebrating a birthday, and I remembered that she had said that Reese's peanut butter cups were her favorite candy. I found this homemade peanut butter cup recipe online, and I didn't think that I had everything i needed to make them. I almost decided to make peanut butter whoopie pies instead, but then at the last second I realized I had what I needed to make these adorable little treats! They were incredibly easy to make, and they tasted way better than I had even imagined that they would. I put some in a cellophane baggie, tied it with a cute ribbon, and delivered my gift. I also left quite a few of the peanut butter cups at home, but I only got to eat about two of them. My husband has been back at work on the home renovations with my dad, and they ate the peanut butter cups during their work breaks! They told me that they were way better than Reese's and that they were really, really good. I think you will probably agree. Enjoy!

Recipe for Homemade Chocolate Peanut Butter Cups (way better than Reese's)!

INGREDIENTS:
For the peanut butter filling
1/2 cup of creamy peanut butter
2 Tbsp. of unsalted butter, softened at room temperature
1/3 cup of confectioners' sugar (powdered sugar)
1/8 tsp. of salt

For the chocolate coating
1 cup of semisweet chocolate chips
1 cup of bittersweet chocolate chips
6 ounces of coarsely chopped milk chocolate
1 1/2 Tbsp. of creamy peanut butter

DIRECTIONS:
Line mini muffin pans with paper liners. Use a small pat of unsalted butter and your fingers to lightly butter the bottoms and sides of the liners. 

Put the peanut butter and softened butter into a bowl. Use a hand mixer set on medium speed to combine. Then add in the confectioners' sugar and salt and mix on medium speed until well incorporated. Taste, and add in more sugar or salt to desired taste. Set aside.

Put the semisweet chocolate chips, bittersweet chocolate chips, milk chocolate, and peanut butter into a microwave safe bowl. Microwave on medium power for about a minute, then stir. Continue microwaving for about one minute at a time and stirring until the chocolate is smooth.

Using a teaspoon, drop 1 to 1 1/2 teaspoons of the chocolate mixture into the bottom of each liner. Then use a half teaspoon and drop about 1/2 teaspoon to 3/4 teaspoon of the peanut butter mixture on top of the chocolate. Then top the peanut butter with another teaspoon or so of the chocolate. Add on decorative sprinkles, if desired. Place them in the fridge until they are set, about 2 hours.

Enjoy them right out of the fridge for more of a crunch, or at room temperature for a more smooth texture. Delicious either way!

Recipe Adapted from: Taste of Home

Makes approximately 2 dozen peanut butter cups.

Tuesday, September 30, 2014

Nutella Cupcakes with Creamy Nutella Frosting & Nutella Ganache

Remember how just the other day I said I really wasn't craving things like cake these days, and that I was totally cool with healthy sweet fixes? Well, it's still true, but I certainly enjoyed these cupcakes after making them on Saturday. Our neighborhood had a crab feast/cookout and everyone in the neighborhood got to sign up to bring a dish. I chose a dessert because I figured if I had a hard time getting out the door that it wouldn't matter if I was a little late, and because I think baking is way more fun then preparing a potato salad. I was having a hard time deciding what to make and when I finally decided on cupcakes, I knew they had to be these Nutella ones. I put Nutella in the cupcake itself, in the frosting, AND in the ganache topping. If you're a Nutella fan, this cupcake is definitely for you! I didnt' get a chance to take a picture before the cookout so I was secretly hoping there wouldn't be any left so I had an excuse to make them again, but Greg came back with two of them in hand. They were a hit in my house and a hit with the neighbors, and I definitely might have to make them again very soon! Enjoy.

Recipe for Nutella Cupcakes with Creamy Nutella Frosting & Nutella Ganache

INGREDIENTS:
For the cupcake
2 cups of water
2 cups of unsweetened cocoa powder
2 2/3 cups of flour
4 tsp. of baking powder
1/2 tsp. of salt
2 sticks unsalted butter (16 Tbsp.), softened at room temperature
2 cups of granulated sugar
1 Tbsp. plus 1 tsp. of pure vanilla extract
1/4 cup of Nutella
4 eggs

For the frosting
2 sticks unsalted butter (16 Tbsp.), softened at room temperature
1 cup Nutella
2 cups powdered sugar
3 Tbsp. of heavy whipping cream

For the ganache topping
7 Tbsp. heavy whipping cream
5 ounces semisweet chocolate, finely chopped (or 5 ounces chocolate chips - I used Ghiradelli)
2 Tbsp. Nutella
1/2 tsp. of coconut oil


DIRECTIONS:
Preheat the oven to 375 degrees. Line muffin tin with cupcake liners. Bring the water to a boil and then add in the cocoa powder and whisk until mixture is smooth. Remove from heat, let rest for a minute, then put in fridge to cool.

In a medium bowl, sift together the flour, baking powder, and salt. In a large bowl, use an electric hand mixer to beat the butter and sugar on medium speed until smooth and creamy, about 2 minutes. Add the Nutella and vanilla and mix until well incorporated. Add in the eggs, one at a time, beating after each addition. Slowly add in the flour mixture and beat on low speed until just incorporated. Remove cocoa mixture from fridge and with the mixer running, add it in a steady stream and beat on low. Scoop batter into cupcake liners (I filled them almost to the top of the liner, but you can fill just 3/4 full if you want). Put in oven and bake for about 16 - 19 minutes (I baked mine for 17:30). Remove from oven and then transfer cupcakes to wire rack to cool.

Once cooled, make the frosting. Use an electric hand mixer to beat the butter on medium speed until smooth and creamy, about 3 minutes. Then add in the Nutella and mix until well incorporated. Add in 1 cup of the powdered sugar and mix and then add in the other cup and beat until smooth. Pour in the 3 tablespoons of cream and beat until well incorporated. Frost the cupcakes.

Once cupcakes are frosted, make the ganache topping. Put the chocolate or chocolate chips into a bowl. Heat the cream in a small saucepan over medium heat. While the cream is heating, put the Nutella and coconut oil in a small microwave safe bowl and microwave for 30 seconds. Then stir, and microwave for another 30 seconds. Continue as needed until the mixture is thin and pourable. Once the cream comes to a very slight boil and is hot to the touch, pour it over the chocolate or chocolate chips. Stir until smooth and creamy and then add in the Nutella mixture and stir. Use a spoon or fork to put over the frosting in a fun design or just globs, it still will taste the same! Put cupcakes in fridge so the ganache topping can harden before serving.

Store cupcakes in an airtight container in the fridge. They taste amazing the first day they are made and pretty amazing the second day too. Store in fridge for up to 5 days.

Recipe makes approximately 22 cupcakes. You should have enough frosting for all the cupcakes - unless you like TONS of frosting - then you might want to double the frosting recipe!

Recipe Adapted from: Sally's Baking Addiction 

Saturday, December 21, 2013

Peanut Butter and Pretzel Truffles


Are you still trying to think of little treats you can give out to friends during this holiday season? The other day I posted a really easy holiday baking idea, and that was the Pretzel Rolo Turtles. These peanut butter and pretzel truffles are also pretty easy to make and they are absolutely divine. If you like the sweet and salty combination or have friends that do, I suggest you make these truffles today (or tomorrow or the next day). I think that they are probably best with a dark chocolate coating, but you can try them with milk chocolate too. I topped the truffles with a little bit of coarse sea salt and coarse sugar, which added a super nice touch. I made a batch last Sunday when my friend came over for some holiday baking, but they went quickly, so I'm making some more today. I'm also making some more of the Pretzel Rolo Turtles and these yummy chocolate pretzel treats (that have a Hershey kiss and M & M). I hope you are enjoying the holidays as much as I am! I am super happy this holiday season because I just finished another two grad courses and I am off work for 12 days! Life can't get much better than that - but it gets even better when there is a peanut butter and pretzel truffle in my hand. Yum!

Recipe for Peanut Butter and Pretzel Truffles (Makes about 50)

INGREDIENTS:
1 16 ounce jar of creamy peanut butter
4 cups of crushed salted pretzels (about 6 - 7 cups of whole pretzels)
4 Tbsp. of unsalted butter, softened at room temperature
1 1/4 cups of confectioners (powdered) sugar
12 - 16 ounces of semisweet baking chocolate (I used Baker's brand)
Coarse sea salt and/or coarse sugar for sprinkling (optional)

DIRECTIONS:
To crush up the pretzels, place them into the bowl of a food processor and pulse several times until they are at the size you want. You can make the pretzel pieces chunky or fine, just don't turn them into a powder! Then measure out the crushed pretzels into four cups, if you need more, add more whole pretzels to the food processor and pulse.

Scoop the peanut butter into a large bowl. Add in the pretzels, unsalted butter, and powdered sugar. Use an electric hand mixer set on medium speed to briefly blend the ingredients, then use a large spoon to mix well until ingredients are combined and well incorporated. Line a baking sheet with parchment paper. Use a cookie dough scoop to scoop up batter and form into 1-inch balls with your hands. Place each ball on the baking sheet. Then place the baking sheet in the freezer for 45 minutes to an hour.

Break the chocolate into small pieces (start with 12 ounces of chocolate - if you use it all, then you can melt the remaining 4 ounces) and place in the top pan of a double boiler. Prepare the bottom pan of the double boiler with water and set over medium high heat until steam starts to rise. Then place the pan with the chocolate on top and stir the chocolate until it is completely melted. Turn the heat off. Take the peanut butter pretzel balls out of the freezer. Drop one ball into the chocolate and use a spoon to coat. Place back on the baking sheet and sprinkle with the sea salt or sugar. Continue until all balls are coated with the chocolate. Place in the fridge to harden for about 30 minutes. Store in an airtight container for up to one week.

Recipe source: Annie's Eats

Wednesday, July 31, 2013

Chocolate Chip Cookie Dough Truffle Ice Cream


Well, the month of July isn't quite over yet, so that means that National Ice Cream Month isn't over either! I think July went by way too fast. I meant to accomplish lots of things this past month, and I feel like I only accomplished about 25% of them (if that). Can I have a redo of July, please? Yesterday I got a letter in the mail about opening activities for the first week back to work in August, and the end of summer depression definitely started to set in. So, what did I do? I made some ice cream. I made some delicious and sinful ice cream and it was just what I needed. The idea came to me to make a cookie dough truffle ice cream & I am sure glad I went with it. It is so much better than store-bought cookie dough ice cream (plus some of the cookie dough is covered in dark chocolate, so that is awesome). If you like cookie dough and chocolate and vanilla ice cream, you will go crazy over this chocolate chip cookie dough truffle ice cream. There is so much yummy goodness in every single bite you take. Although I haven't accomplished all the things I wanted to do this summer, at least I have been eating some darn good ice cream! Enjoy.

Recipe for Chocolate Chip Cookie Dough Truffle Ice Cream

INGREDIENTS:
For the cookie dough & cookie dough truffles
1 stick of unsalted butter, softened at room temperature
3/4 cup of light brown sugar
1 can of sweetened condensed milk
2 1/4 cup of all-purpose flour
1 1/2 tsp. of pure vanilla extract
1 1/4 cup of mini chocolate chips
2 ounces of semisweet or bittersweet chocolate, chopped
For the ice cream mixture
3/4 cup of whole milk, well-chilled
1/2 cup of granulated sugar
1 vanilla bean pod, split lengthwise and beans scraped out
1 tsp. of pure vanilla extract
A pinch of salt
1 1/2 cups of heavy whipping cream, well-chilled

DIRECTIONS:
For the cookie dough & cookie dough truffles
Put the softened butter and brown sugar into a large bowl. Use an electric hand mixer set on medium low speed to mix the butter and sugar together until it is smooth, about 3 minutes. Add in the condensed milk, vanilla extract, and flour. Mix again with the hand mixer set on low for about 30 seconds or until well incorporated. Pour the chocolate chips into the mixture and use a spoon to fold in. Cover the bowl and put it into the refrigerator for about an hour. Make about 50 - 60 tiny (about 1/4 - 1/2 tsp.) cookie dough balls out of the batter and place on a foil-lined container(s). Cover the container(s) and put in the freezer for 1 - 2 hours. When you dip the cookie dough, you will only be dipping HALF of them. The ice cream has some chocolate coated cookie dough and some regular cookie dough balls.

Prepare a double boiler and set the bottom part with the water over medium to medium high heat. Then place the chopped chocolate into the top part of the boiler and fit it on top once the water begins to steam. Stir constantly until the chocolate is melted and smooth. Turn off heat. Use a spoon to dip the cookie dough balls in the chocolate and coat (place several cookie dough balls into the chocolate at one time - I did about 5 at a time). Place the coated balls onto a foil lined dish or baking sheet and then put in the fridge to harden. Put the cookie dough balls that you did not dip back into the freezer until ready to use. You will have a ton of cookie dough batter leftover! You can make a bunch of cookie dough truffles as a gift for someone or just for yourself to indulge in.

For the ice cream mixture
Put the whole milk and sugar into a largish bowl. Mix with an electric hand mixer on low speed for 1 - 2 minutes. Place the vanilla beans into a very small bowl and pour the vanilla extract over. Mix gently with a spoon. Add it to the milk mixture and then add the salt. Stir to incorporate. Pour in the heavy whipping cream and mix with the electric hand mixer set on low speed for about 20 - 30 seconds. Cover the bowl and put it into the fridge for about 30 - 45 minutes.

For the ice cream
Pour the chilled vanilla ice cream mixture into an automatic ice cream maker. Make according to manufacturer directions. After ice cream has been mixing for half the amount of time until finished, with the ice cream maker still running, drop in the cookie dough balls and the cookie dough truffles into the ice cream maker.  Once the ice cream is finished mixing (according to the amount of time on manufacturer directions), spoon it into a container, cover, and place into the freezer. Let freeze for about 30 minutes & serve! Sprinkle some extra mini chocolate chips on top, if desired.

Recipe serves about 6 (possibly less, possibly more, depending on serving size)!

Other Ice Cream Recipes Shared this Month: Dreamy & Creamy Chocolate Ice Cream, Creme Fraiche Ice Cream with Peaches and Blueberries, Roasted Cherry and Vanilla Ice Cream Pie

Beth's Favorite Ice Cream Recipes: Chocolate Mint Ice Cream with Cacao Nibs, Basic Vanilla Ice Cream

Saturday, May 4, 2013

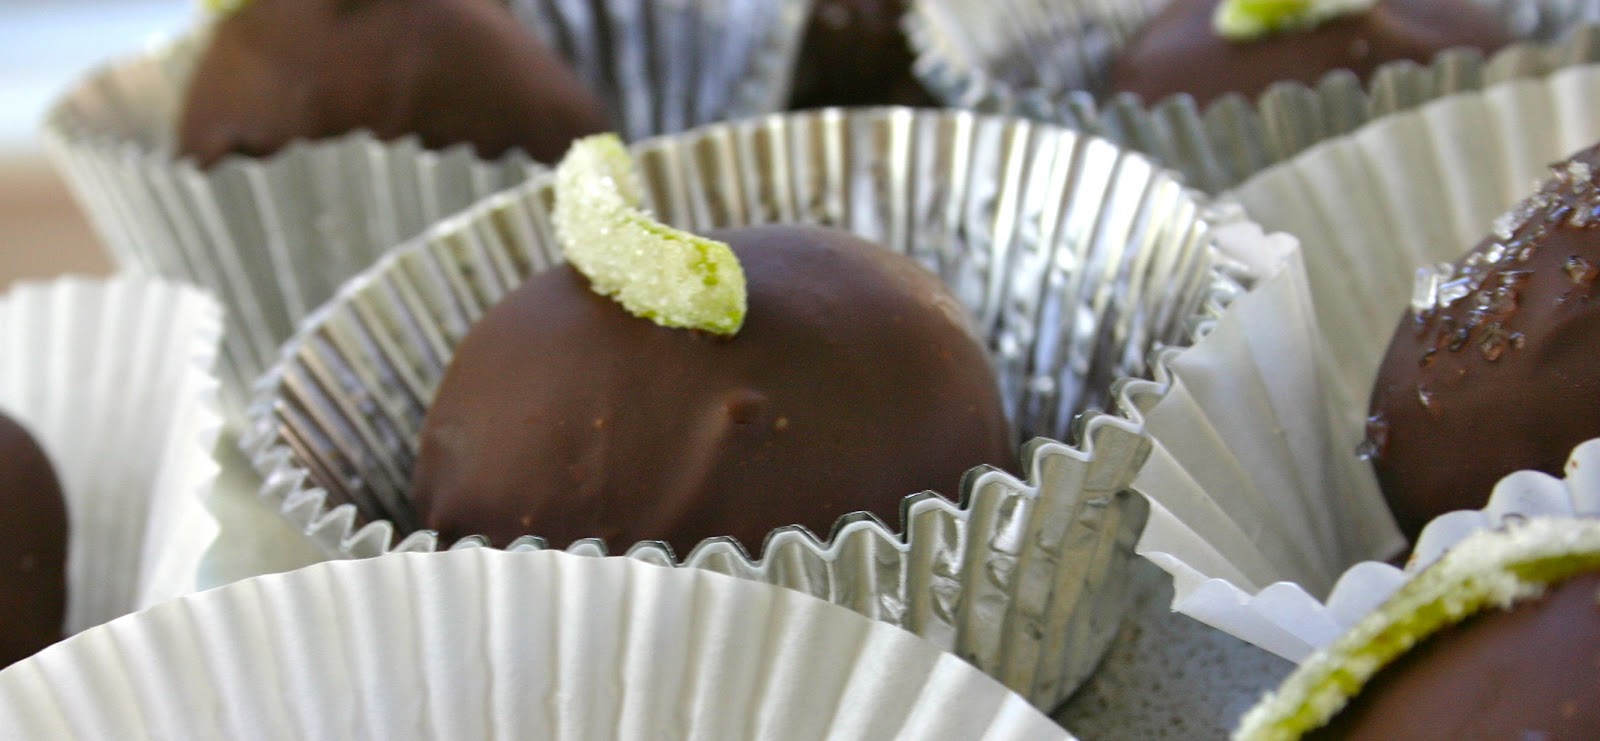
Dark Chocolate Lime Truffles with Candied Lime Peel

I made another type of truffle this week. The recipe was something I hadn't even planned on, and I'm glad it worked. All week long I was wanting to make lemon truffles with bittersweet chocolate. After getting home from work on Tuesday, I started getting the ingredients together for the truffles. And to my surprise, I was completely out of lemons. I drove over to the corner store, hoping they had lemons, but all they had was lemon juice. So I didn't make any truffles on Tuesday. On the way home from work Wednesday, I had every intention of stopping at the grocery store for lemons. But I was so focused on making sure I got through the green traffic light ahead of me that I forgot to turn left to go to the store. I'm always in a hurry, just like everyone else in this world. The guy at the corner store had told me on Tuesday that they might have lemons the next day, so I stopped there again, but I didn't have any luck. I really wanted to make those lemon truffles, but since all I had was limes,  I decided I would try lime truffles instead. I couldn't find any recipes on the web for truffles with dark chocolate and lime, so I wondered if they would even be any good. I trusted my instincts though, and I made the lime truffles. I basically followed the same recipe I use when I make the lemon truffles, but used lime zest and lime juice. I used Scharrfen Berger bittersweet chocolate for the filling and coating of the truffles. They turned out pretty amazing, and I love them. I totally made something with lime just in time for Cinco de Mayo too, and I'm pretty proud of that. I'll be serving them for dessert after my Cinco de Mayo dinner. And then I'll share the rest of them at work on Monday! Hope you have the best Cinco de Mayo ever - I know I will.

Recipe for Dark Chocolate Lime Truffles with Candied Lime Peel

INGREDIENTS:
For the truffle filling
3/4 cup plus 2 Tbsp. of heavy whipping cream
3 tsp. of lime zest
9.7 - 10 ounces of bittersweet chocolate (70% cocoa)
2 Tbsp. of freshly squeezed lime juice
Cocoa powder, to help with rolling
For the truffle coating
9.7 - 10 ounces of bittersweet chocolate (70% cocoa)
For topping 
2 medium limes
2 Tbsp. of water
1/2 cup granulated sugar, divided
Decorative sugar (optional)

To make the candied lime peel, use a vegetable peeler to grate strips of the lime peel. Use a knife to cut the grated peels into 3/4-inch long and 1/4-inch thick pieces. Place the water and 1/4 cup of the sugar into a small saucepan and set over medium-high heat. Bring to a boil, stirring almost constantly, until the sugar is fully dissolved. Add in the lime peel, put heat on low, and cover. Allow to cook for 3 minutes. Remove from heat, uncover, and allow to cool completely. After cooling, drain through a fine mesh sieve/strainer. Separate the lime peels and place onto a large plate lined with parchment paper and let dry. Once dried, put lime peels into a bowl and add in the remaining 1/4 cup of sugar. Toss until the lime peels are coated with the sugar. Set aside until ready to use for topping truffles. You will probably have more candied lime peel than you will need - pick out the prettiest ones to top the truffles with & save the rest for nibbling!

TRUFFLE DIRECTIONS:
For the truffle filling
Finely chop the chocolate by breaking it into squares and placing in the bowl of a food processor fitted with a metal blade. Pulse until the chocolate is finely chopped. Leave chocolate in food processor bowl until ready to use.

Put the heavy whipping cream and lime zest in a medium-sized saucepan and set over medium heat. Cook until the cream just comes to a simmer, then remove from heat and immediately pour in the finely chopped chocolate. Cover the saucepan and let it sit for 5 minutes. After 5 minutes, stir the cream and chocolate together very gently until the mixture is smooth. Add in the lime juice and stir until just combined. Pour the mixture into a bowl and cover tightly with a lid or with plastic wrap. Put in the fridge for several hours, preferably overnight.

Line the bottom of freezer-safe containers with foil or parchment paper. Take the chocolate lime mixture out of the fridge. Dust your hands with cocoa powder, have ample supply of paper towels nearby (because your hands will get messy), and use a cookie dough scoop to scoop up the mixture. Use your hands to roll each scoop into a 3/4-inch ball, then place in a single layer in the prepared containers. Cover the containers with a lid and place in the freezer for at least 2 hours.

For the truffle coating
Line a baking sheet with parchment paper. Prepare the bottom pan of a double boiler by adding water. Use a sharp knife and cutting board to cut the dipping chocolate into smallish pieces. Place the chocolate in the double boiler saucepan. Place the bottom pan of the double boiler over medium heat, and when the water begins to simmer and steam rises, place the saucepan with the chocolate on top of the boiler. Stir the chocolate frequently until is is completely melted and smooth. Turn off the heat. Take the balls out of the freezer. Drop one or two at a time into the chocolate mixture, and use a spoon to coat completely with the chocolate. Gently drop on the prepared baking sheet and top with a candied lime peel. Sprinkle with a little bit of decorative sugar, if desired. Continue this process, working quickly, until all of the truffles are dipped and topped. Place the pan into the fridge and allow the chocolate to harden. They should be ready to eat after about 20 minutes. Store in an airtight container in the fridge. Enjoy!

Recipe makes 25 - 30 truffles.


Candied lime peel recipe adapted from Cooking Light

Saturday, November 17, 2012

Chocolate Marshmallow MADNESS!


I thought I was making up a new truffle recipe when I made these, and the name of the truffles were going to be "chocolate marshmallow madness truffles." But then I realized they weren't really like truffles, because they turned out to be more like chocolate marshmallow yumminess and gooeyness - covered in chocolate. Yes, I really did make something chocolate and covered it with chocolate - and it was wonderful.

This recipe was inspired by the frosting on the ice cream cone cupcakes. I tried making these once before, but the butter did not work too well in the recipe. So I omitted the butter this time, added some mini chocolate chips to the mix, and it was a success. My coworkers approved, Greg approved, and I hope you will also approve of the madness! Make sure to enjoy the chocolate marshmallow madness with a glass of milk.

Recipe for Chocolate Marshmallow MADNESS! 

INGREDIENTS:
For the inside:
2 7-ounce jars of marshmallow creme
1 1/4 cups of chocolate chips (regular sized)
1/4 cup of cocoa powder
1/2 tsp. of vanilla extract
1 - 1 1/2 cups of mini chocolate chips (depending on your desired amount of chunkiness)
For the coating:
16-ounces of semisweet baking chocolate squares, broken in half

DIRECTIONS:
For the inside:
Melt the 1 1/4 cups of regular-sized chocolate chips in a smallish saucepan set over medium-low heat, stirring occasionally. Remove the chocolate from heat once it is melted and smooth. Set aside to cool slightly.
Put the marshmallow creme, cocoa powder, and vanilla extract into a large mixing bowl. Add in the slightly cooled melted chocolate and the mini chocolate chips. Using an electric hand mixer set on medium-low speed, beat the mixture together for a couple minutes until it is smooth and all ingredients are well incorporated. Stir in more mini chocolate chips, if desired. Cover the bowl with a lid and put it in the fridge for several hours, preferably overnight.
After mixture has been refrigerated, line a couple freezer-safe containers with parchment paper. Take the mixture out of the fridge and use a cookie dough scoop to form the marshmallow filling. Scoop a little out and roll into 1-inch (or larger) balls. Place each one onto the parchment lined containers. Cover the containers with foil and place in the freezer for a few hours (or more).
For the coating:
Line a baking sheet with parchment paper.
Place the broken squares of baking chocolate into a medium-sized saucepan. Prepare a double boiler with about 1/2 cup of water, and set the double boiler over medium heat. Once steam starts to come up through the boiler, set the saucepan of chocolate on top. Allow the chocolate to melt, stirring frequently. Once the chocolate melts, turn off the heat. Take the chilled chocolate marshmallows out of the freezer. Drop each one into the melted chocolate one at a time and use a spoon to coat. Use the spoon to carefully place each one onto the prepared baking pan. Once you have coated each one, place baking sheet into the refrigerator. Allow the chocolate to harden. Once the chocolate has hardened, they are ready to eat. I found that they actually taste best at room temperature, so you can take them out of the fridge to sit until they are ready to be served.

Monday, July 16, 2012

Who Wants More Truffles? (Recipe for Sweet Cream & Walnut Truffles)


I really love truffles. I also really love to make truffles, and I sometimes find myself brainstorming new truffle recipes...

When Greg and I sailed to St. Michaels back in the beginning of June, we visited a cute cupcake and ice cream shop. I ordered sweet cream ice cream because it's my favorite, and as we were walking around I started thinking about how delicious a sweet cream truffle would be. I thought about how I would make them, and I decided that adding walnuts to the mix would be a good idea.

A few days after we got home, I tried out the truffle recipe. I dipped the truffles in milk chocolate, white chocolate, and dark chocolate - because I really wasn't sure which one would taste the best. In my opinion, the dark came in first, with the white not far behind, and the milk taking third place. However, they all tasted really yummy to me.

I tested the truffles out on a few of my friends, and in the end, the dark won. But, there are no rules here - so dip them in your favorite kind of chocolate! I just made another batch last night with the dark chocolate.

The filling for the truffles is a bit like a cream cheese frosting. You will get a bit messy when you shape the truffles, so have an ample supply of paper towels close by. These truffles are sweet, indulgent, and decadent. Someone said that they kind of taste like a chocolate covered cherry, but better. You'll only need to eat one in order to fulfill any dessert cravings after dinner! Enjoy.


Recipe for Sweet Cream & Walnut Truffles

INGREDIENTS:
1 stick of unsalted butter, softened at room temperature, but still cool
5 oz. of regular cream cheese
1 Tbsp. of almond extract
1 1/2 tsp. of vanilla extract
1 cup powdered sugar
3/4 cup of chopped walnuts
9 - 10 oz of baking chocolate, coarsely chopped (white, milk, or dark). I used SCHARFFEN BERGER.
Walnut pieces, for garnish (optional)

DIRECTIONS:
In a bowl, beat together the butter, cream cheese, almond extract, and vanilla extract with an electric hand mixer on medium-low speed until the mixture is fluffy (about 1 - 2 minutes). Add in the powdered sugar, and beat on low speed until well incorporated. Pour in the walnut pieces, and use a spoon to fold them into the mixture.  Cover the bowl with a lid and put in the fridge for at least 3 hours.

After chilling the mixture, line a freezer-safe container with parchment paper. Use a cookie dough scoop to scoop up the sweet cream mixture, and roughly shape into 3/4-inch to 1-inch balls with your hands (it will be messy - have paper towels nearby)! You can dust your hands with powdered sugar before shaping each one to reduce the amount of stickiness. Place each ball on the prepared container. Cover the container with foil, and place in freezer for a few hours, overnight if needed.

Put chopped chocolate in a pot. Prepare a double boiler by filling it 1/4 full with water and place the double boiler over medium heat. Once water begins to lightly simmer and steam forms, place the pot with chocolate on top of the boiler. Stir almost constantly until the chocolate is completely melted and smooth. Once chocolate is almost melted, remove balls from freezer. Prepare a baking pan or plate with parchment paper. Using a spoon, drop one or two balls at a time in the chocolate and fully coat. Place on prepared pan or plate, and if using the walnut pieces, immediately place a walnut piece on top of the truffle before dipping the next one.  When each one is dipped, place the pan/plate in the fridge so chocolate can harden, about 30 minutes. Store truffles in fridge until ready to serve. ENJOY!

Makes 1 1/2 - 2 dozen truffles. 


**Original Recipe**

Looking for more truffle recipes? Check out the recipes for cookie dough truffles & coconut truffles! 

Tuesday, June 26, 2012

Triple Chocolate Cookies

There aren't many women I know who do not love chocolate. In the offices I work in, chocolate is usually an easy fix to any problem. During my workday, I often hear things such as "I really need chocolate, who has chocolate?" The good news is that I usually do have chocolate!
I am off for summer break right now, but during the school year I am involved in weekly meetings. One week we had a particularly stressful and busy meeting day, so I decided to whip up some chocolate cookies for my coworkers and myself to alleviate some of the stress. I chose to make these perfectly chewy cookies which are loaded with chocolate and guaranteed to satisfy all of your chocolate cravings.
This recipe comes from Baking Illustrated, and it is shared on many food blogs. The recipe calls for melting the baking chocolate, but I was stressed when I was making them and I accidentally forgot that step and added in a new one. It is ok though, because they still turned out great! I also did not have any semisweet baking chocolate on hand, so I substituted with a high quality bittersweet chocolate. The cookies were pretty much devoured at the office.
I haven't made these cookies in a while, and I am craving chocolate. I also just bought a bar of Scharffen Berger chocolate. Who wants me to bring them some triple chocolate cookies? I just need a small excuse to whip up a batch of them right now...

Recipe for Triple Chocolate Cookies

INGREDIENTS
1 cup of all-purpose flour
1/4 cup of Dutch-processed cocoa powder
1 tsp. of baking powder
1/4 tsp. of salt
8.5 ounces of SCHARFFEN BERGER 70% cacao bittersweet baking chocolate, chopped very finely using a food processor
1 tsp. of instant coffee powder
2 large eggs
1 tsp. of vanilla extract
5 Tbsp. of unsalted butter, softened but still cool
3/4 cup of light brown sugar, packed
1/4 cup of granulated sugar
1 cup of semisweet chocolate chips

DIRECTIONS:
In a medium bowl, stir together the flour, cocoa powder, salt, and baking powder. Sift, then set bowl aside.
In a small bowl, mix together the eggs and vanilla with a fork. Add in the coffee powder. Stir, and let the coffee powder dissolve in to the egg mixture.
Put the butter in a large mixing bowl. Use an electric hand mixer on medium speed to beat the butter until it is smooth and creamy. Add in the brown sugar and white sugar, and beat until the sugars are well combined. Turn the mixer to low speed and gradually beat in the egg mixture in to the sugar mixture until it is well incorporated. Then add in the finely chopped chocolate until it is combined in to the mixture. With the mixer still on low speed, add in the dry ingredients. Beat until just combined, making sure not to over beat. Use a spoon or spatula to fold in the chocolate chips in to the batter. Cover the bowl with a lid or plastic wrap and let it stand at room temperature for about 30 minutes.
Preheat the oven to 350 degrees. Line a baking sheet with parchment paper. Using a 1 3/4-inch cookie dough scoop, scoop the dough in to mounds and place on baking sheet. Make sure to leave 1 1/2-inches of space between the mounds of dough.
Bake the cookies for 10 minutes. Halfway between baking, rotate the pan 180 degrees in the oven. After cooking is complete, take cookies out of the oven and let cool for 10 minutes. Then transfer them to a wire rack to cool completely.
Makes about 20 delicious cookies.

NOTE:
When I first started baking, I did not understand why some recipes called for regular cocoa powder and others called for Dutch-processed cocoa powder. Author and popular food blogger, David Lebowitz, shares great information on his blog about cocoa powder. If you're new to baking, I suggest you check it out!

Sunday, June 10, 2012

Coconut Cupcakes with Coconut Cream Cheese Frosting


Please visit my new blog, Make It and Bake It with Beth, for this coconut cupcake recipe!