Translate

Showing posts with label whipped cream. Show all posts

Monday, April 13, 2015

The Best Banana Pudding

My little girl turned 1-year old last Tuesday! This past year just flew right by, and a lot of it is kind of a blur to me. Wendy is a total sweetie, and she brings such joy into our lives. We celebrated her birthday on Easter with family. Greg made North Carolina-style barbecue, and I made coleslaw, hush puppies, and this banana pudding for dessert. It was quite fun experimenting with deep frying hush puppies, and they were delicious, but my favorite part of the meal was definitely the banana pudding. Greg's father, who has had a lot of banana pudding in his lifetime, said it was the best banana pudding he has ever had. Wendy has been eating bananas since she started eating solid foods, and she went crazy over the banana pudding. I couldn't resist posting a picture of her eating the banana pudding. We had decided to do the pudding in place of cake for her celebration, but on her actual birthday, we let her have a chocolate cupcake. She loved that too and definitely has my chocolate-loving gene! If you are looking for an easy dessert to make for a big crowd, this banana pudding is perfect. Enjoy!

Recipe for The Best Banana Pudding

INGREDIENTS:
1 14-ounce can of sweetened condensed milk
1 1/2 cups of ice cold water
1 package of Jello Brand instant vanilla pudding mix (3.4 ounce)
3 cups of heavy cream
1 1/2 - 2 boxes of Nabisco Nilla Wafer cookies
4 cups of sliced ripe bananas, cut into 1/4-inch slices

DIRECTIONS:
Put the sweetened condensed milk and ice cold water into a small bowl. Use an electric hand mixer set on medium speed to mix until they are well combined, about 1 minute. Then add the instant pudding mix into the bowl and beat for about 2 minutes, or until well incorporated. Cover the bowl and put into the fridge for at least 4 hours.

Put the heavy cream into a large bowl and use the electric hand mixer set on medium speed to beat until stiff peaks form. Then gently fold in the pudding mix and blend until you no longer see any streaks of the pudding mix.

Assemble the banana pudding. In a large and wide glass bowl, arrange the wafers on the bottom and then add one-third of the banana slices on top of the wafers. Cover with 1/3 of the pudding mixture. Then repeat with the wafers, bananas, and pudding two more times, finishing with a layer of pudding on top. Garnish the top layer of pudding with wafers and banana slices. Cover the bowl tightly with plastic wrap and put in the fridge for at least 4 hours, but no more than 8 hours, before serving.

 *This recipe requires a lot of time to set, so make sure you start it well in advance to when you want to serve it. I started it at 9 AM in order to serve it for dessert by 6:00 PM.

She loved celebrating her first birthday, and she was crazy about the banana pudding!
Recipe from: Eclectic Touch, originally from Magnolia's Bakery Cookbook

Tuesday, February 10, 2015

Creamy Nutella Pie

World Nutella Day occurred last week! Did you know that such a day even existed? It seems like there are days to celebrate anything and everything, so of course Nutella would be on the list. February 5th was declared World Nutella Day and Nutella lovers united! I have to be honest, I think that every day should be World Nutella Day. I want you to know that if you missed it last week, it is definitely not too late to celebrate! I made this delicious pie made with an oatmeal crust and a filling of Nutella, whipped cream, and mascarpone. Yum yum yum yum - you know you want some. So go ahead, open up a jar of Nutella and make some Creamy Nutella pie. Enjoy!

*For less prep work, you can use a pre-made crust if you want. I made an oatmeal crust but a graham cracker crust would work well here too. You and I both know it is really all about the filling.

Recipe for Creamy Nutella Pie

For the crust
INGREDIENTS:
3/4 cup of quick oats (Quick oats are finer than rolled oats so you won't need the food processor)
5 Tbsp. of light brown sugar
1 Tbsp. of granulated sugar
1/2 cup of all-purpose flour
Pinch of salt
8 Tbsp. of butter, melted

DIRECTIONS:
Preheat the oven to 350 degrees. Put the rolled oats, brown sugar, granulated sugar, flour, and salt into a mixing bowl and then pour the melted butter over. Then use your hands to gently incorporate all the ingredients and form into a ball. Press the mixture down onto a buttered glass pie pan so that the bottom is covered evenly and then use your hands to push the mixture up onto the sides so an edge is formed.  Put it in the oven and bake for 9 - 11 minutes. Remove from oven, place on wire rack, and let it cool completely. You don't want the crust to get too hard; so watch it carefully as it cooks. If any of it comes down from the edges while it cooks, you can push up after it cools a little.

For the Creamy Nutella Filling
INGREDIENTS:
1 cup of Nutella
1 Tbsp. of granulated sugar
7 ounces (about 3/4 cup plus 2 Tbsp.) of Mascarpone cheese
 1 cup of heavy whipping cream

DIRECTIONS:
Put the Nutella, sugar, Mascarpone and heavy whipping cream into a large bowl. Use an electric hand mixer set on medium speed to mix until ingredients are well incorporated. Then increase the speed to high and beat until the mixture is smooth and thickened. Then spoon the filling into the cooled pie crust. Put the pie in the fridge for at least 4 hours to set before serving. Serve chilled.

For serving: Top pie with fresh whipped cream and grated dark chocolate. 

Pie crust adapted from: Show Food Chef
Nutella filling inspired by: A Cup of Joe, originally by Alania Pouliot of Fabtastic Eats

Read about some handy dandy Nutella facts here! 


Saturday, November 29, 2014

Pumpkin Coffee Cupcakes with Whipped Cream and Caramel Sauce

Wow, this was an amazing cupcake! I actually had made these cupcakes a couple years ago around the same time of year for my mother's birthday, but I didn't get around to taking a picture. I can't believe it took me another two years to make them again. They are spectacular.

A few months ago I met a new neighbor who has a daughter that is just two weeks younger than Wendy! I felt so happy to know that Wendy had her friend Cayd, who is a few months younger, and Elyse, on the same street as her! I envisioned many play dates in her (and my) future. The other day Wendy had a play date with Elyse while Angela and I made these cupcakes. Although it is a little difficult to cook with babies in our arms, we were able to make these cupcakes without too many disasters. I did have to remind Angela on the recipe the difference between the tablespoon and teaspoon (she is from Italy and cooks in grams) and fortunately we realized when almost a tablespoon of salt went into the flour mixture!

What I love about these pumpkin coffee cupcakes is that they are incredibly moist. I also love the whipped cream topping and caramel sauce. It is a cupcake that you can seriously eat for breakfast (and I did...twice). It reminds a bit of eating gingerbread with whipped cream and lemon sauce. They are pretty easy to make and I know you will enjoy every single bite! I will definitely not be waiting two years or even one year to make these again. Maybe I will make them next week. Or today. Only time will tell....

Enjoy!

Recipe for Pumpkin Coffee Cupcakes with Whipped Cream and Caramel Sauce 

INGREDIENTS:
2 2/3 cups of all-purpose flour
3 Tbsp. of instant coffee powder
2 tsp. of baking powder
2 tsp. of baking soda
1 tsp. of salt
1 1/4 tsp. of cinnamon
1/8 tsp. of ground cloves
1/8 tsp. of ground nutmeg
15 ounces of canned pumpkin
1 cup of vegetable oil
1 cup of granulated sugar
1 cup of light brown sugar, packed
4 eggs

For topping
4 ounces coffee (to be brushed on when cupcakes are still warm)
2 cups of heavy whipping cream
3 Tbsp. of powdered sugar
*Salted vanilla bean caramel sauce - I halved this recipe and it was plenty. You will need 1/2 cup granulated sugar, 5 ounces of heavy cream, 1/2 vanilla bean, 1/8 tsp. of coarse sea salt, and 1/4 tsp. of vanilla extract (if you also choose to cut the recipe in half)

DIRECTIONS:
Preheat the oven to 350 degrees.

Put the flour, instant coffee powder, baking powder, baking soda, salt, cinnamon, cloves, and nutmeg into a medium bowl and then sift to mix. Put the pumpkin, oil, granulated sugar, and light brown sugar into a large bowl. Use an electric hand mixer set on medium speed to beat. Then add in the eggs, one at a time, and beat after each addition to incorporate. Put the hand mixer on low speed and add in half of the flour mixture. Beat until just incorporated and then add in the rest of the flour mixture and beat again until just incorporated.

Line a cupcake pan or muffin pan with paper cupcake liners. Use a cookie dough scoop to scoop the batter into the liners and fill about 3/4 full. Place the pan in the oven and bake for about 20 minutes. Then transfer the pan to a wire rack to cool for 10 minutes. Remove the cupcakes from the pan and place on top of a paper towel or a pan (to avoid getting coffee all over your countertops). Generously brush the tops of each cupcake with the coffee. Brush one coat of coffee on each cupcake, then brush each one again. Add another coat if desired. Make sure to do this while the cupcakes are still warm! Then allow the cupcakes to cool completely.

While the cupcakes are cooling, make the caramel sauce.

Before making the topping, place a metal bowl and a beater in the freezer for a few minutes. Then make the whipped cream topping. Pour the heavy whipping cream into the cold metal bowl and use an electric hand mixer fitted with the cold beater to beat the cream. First beat the cream on medium low speed and then gradually increase to high speed. When soft peaks begin to appear, blend in the powdered sugar. Then whip until stiff peaks form in the cream mixture and make sure not to over beat it. Use a spoon or spatula to top each cupcake with the whipped cream topping. If you are fancy, you can use a pastry bag with a decorating tip to frost (but I'm not that fancy). Then drizzle with the caramel sauce.

If you aren't serving right away, drizzle caramel sauce on right before serving. These cupcakes are best eaten within a couple days of making them. Store in the refrigerator in an airtight container.

*Comment on the caramel sauce: Be patient. When I was making it, the mixture turned rock-like and I didn't think it would work. As you continue to stir it will liquefy and turn into caramel! It does take a long time for the sugar to caramelize. And, it's okay if the caramel sauce is thin (like mine was). It is still absolutely divine.

Recipe Source: Annie's Eats, cake recipe originally from Williams Sonoma

Saturday, December 28, 2013

Tres Leches (Three Milk) Cake

I think that tres leches cake is seriously the best cake in the whole entire world. I recently made a tres leches cake for a neighborhood holiday party and I was shocked at how many people at the party had never heard of or tried this amazing cake.

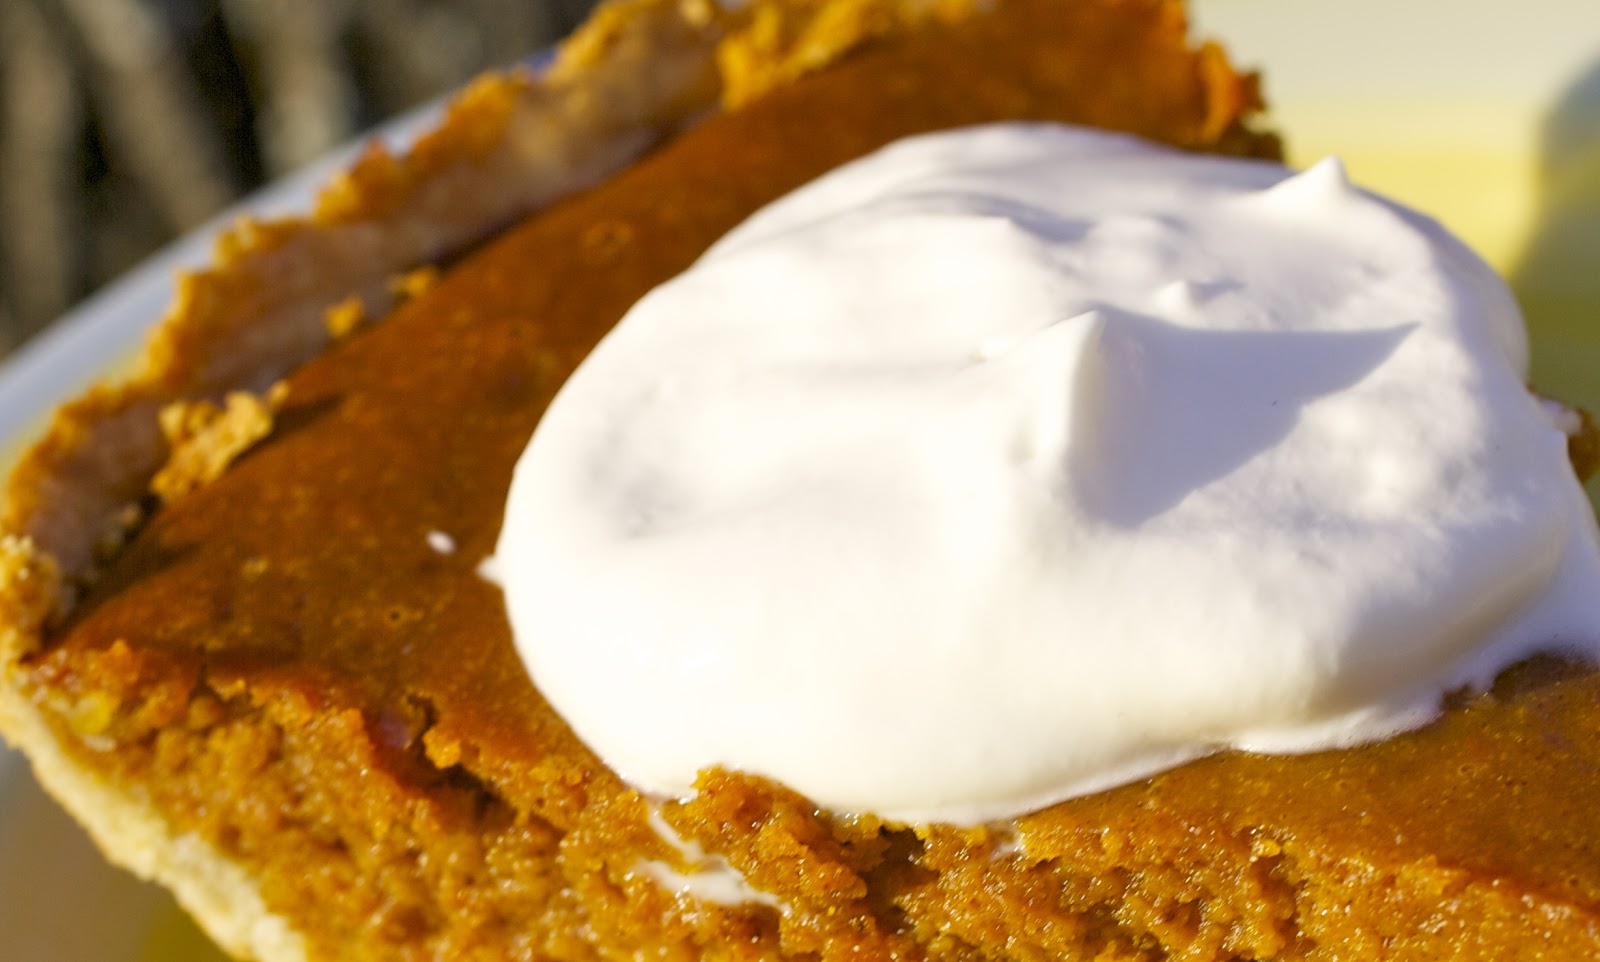
So, what is tres leches cake? Tres leches means three milk in Spanish for those of you who are linguistically challenged (like me). A tres leches cake is sort of like an angel food cake, but once it is cooled it is pierced all over with a fork and then soaked with three different kinds of milks. But, it isn't soaked with skim milk, 1% milk and 2 % milk like I joked with my neighbor - it is soaked with sweetened condensed milk, evaporated milk, AND heavy whipping cream. Um, yum. Then you let the "milks" absorb into the cake and then after that, the cake is topped with a sweet layer of whipped cream. Who wants some tres leches cake (everyone raises their hands now - unless you are lactose intolerant).

I was introduced to tres leches cake when I was growing up because my mom would make it from time to time (but not often enough). I had never made one before though. While returning from our trip to the British Virgin Islands, we had a layover in Miami. We had dinner at this authentic Cuban restaurant and for dessert we ordered the tres leches cake. Greg had said he had never tried it before, and he fell in love with it. That inspired me to make it for the holiday party - and then since it was pretty much devoured I decided to make it again to serve for dessert with our dinner guests. My friend's 5-year old daughter was saying goodbye to us and she said "thank you again for the yummiest most deliciousest cake in the whole entire world." Adorable. I made the tres leches cake today to have for dessert after dinner tonight at my parents' house - I am also making baked chicken taquitos and corn pudding for my birthday dinner! I think you will also love this cake as much as me and everyone else. Enjoy!

Recipe for Tres Leches (Three Milk) Cake

INGREDIENTS:
For the cake
1 cup of all-purpose flour
1 1/2 tsp. of baking powder
1/4 tsp. of salt
5 eggs (they will be separated into yolks and whites)
1 cup of granulated sugar (divided - you will use 3/4 cup with the yolks and then 1/4 cup for the whites)
1/3 cup of 2% milk or whole milk
1 1/4 tsp. of pure vanilla extract

For the three milks
1/3 cup of heavy whipping cream
1 12.5 ounce can of evaporated milk
1 14 ounce can of sweetened condensed milk

For the whipped cream topping
1 2/3 cup of heavy whipping cream
1/4 cup of granulated sugar
1/8 tsp. of almond extract (optional)

Maraschino cherries, strawberries, or raspberries for topping each piece

DIRECTIONS:
For the cake:
Butter a 9 x 13 inch cake pan with unsalted butter or spray it with cooking oil. Preheat the oven to 350 degrees. Put the flour, baking powder and salt into  largish bowl and mix to incorporate.

Separate the egg yolks and egg whites into two separate medium-sized bowls. Add 3/4 cup of sugar to the egg yolks and mix with an electric hand mixer set on high speed for about 45 - 55 seconds, or until the yolks are pale yellow in color. Add in the milk and the vanilla extract and stir well. Pour the egg yolk mixture into the dry ingredients and stir gently until it is well combined.

Use the electric hand mixer set on high speed to beat the egg whites until soft peaks form (about 35 - 45 seconds). Continue beating the whites on high speed and pour in the 1/4 cup of sugar and beat until the egg whites are stiff (about 1 1/2 - 2 minutes). Add the egg white mixture to the batter and fold in very gently until it is just combined. Pour the batter into the cake pan and spread evenly.

Bake for about 35 - 40 minutes or until you prick it with a toothpick or fork and it comes out clean.

Place cake pan on a cooling rack and allow it to cool completely.

Once cooled, pierce the surface of the cake ALL over with a fork, making sure you don't poke all the way through the cake.

For the three milk mixture
Combine the condensed milk, heavy whipping cram, and evaporated milk into a 4-cup liquid measuring cup and stir until smooth. Pour the mixture all over the cake, making sure to get a lot around the edges of the cake too.

Cover the cake and place in the fridge to allow it to absorb the milk mixture. I think it's best to allow it to absorb for at least 2 hours before adding on the whipped topping and serving.

Before serving, make the whipped topping.

For the whipped topping
Before making the whipped topping, place a metal bowl and the attachment for the electric hand mixer into the freezer to chill for about 15 minutes. Then put the heavy whipping cream, sugar, and almond extract into the chilled metal bowl. Use the chilled beater on the electric hand mixer set on high speed and beat until the cream turns thick, about 1 1/2  to 2 minutes. Use a spoon or spatula to evenly top the cake. Put cake back into the fridge until ready to serve. Then cut into squares and top each piece with a maraschino cherry, strawberry, or raspberry (or whatever else you desire). Enjoy!

Store cake covered in the fridge for up to 5 days.

Makes approximately 16 - 20 servings, depending on how big you make the slices!

Recipe adapted from: The Pioneer Woman Cooks

Wednesday, November 21, 2012

The Best Pumpkin Pie with Homemade Whipped Cream


Oh, pumpkin pie - how I love you. If you are still looking for the perfect recipe for pumpkin pie this Thanksgiving, look no further, because you have come to the right place. This pumpkin pie is incredible. The secret is in the sweetened condensed milk - it makes for a really nice consistency, and it enhances the flavors of the cinnamon, nutmeg, and ginger.

I first came across this recipe last winter. I will never try another recipe for pumpkin pie again, because this one really is the absolute best. This pie taste delicious when it is warm or cold, and it is great with or without whipped cream. But since whipped cream makes everything better, I usually opt for a piece topped with whipped cream. If you have never had homemade whipped cream, you are missing out. Once you have it, you probably will never buy store-bought whipped cream again.

I hope everyone has a very happy Thanksgiving! I have a lot to be thankful for, but today I'm especially thankful for pumpkin pie!

Recipe for the Best Pumpkin Pie with Homemade Whipped Cream

For the pie crust
INGREDIENTS:
1 1/4 cups of all-purpose flour
1 Tbsp. of granulated sugar
1/4 tsp. of kosher salt
1 stick of very cold butter, chopped into small chunks
3 - 4 Tbsp. of ice-cold water
DIRECTIONS:
Place the flour, salt, and sugar into the bowl of a food processor fitted with a metal blade. Pulse briefly to just combine. Add in the very cold pieces of butter. Pulse several times until the mixture resembles coarse crumbs (about the size of peas). With the food processor running, slowly pour a tablespoon of the water through the feed tube. Continue to pour in more water, a tablespoon at a time. After you have poured in 3 tablespoons of water, add in the fourth tablespoon if the dough has not yet left the sides of the bowl. Allow the food processor to keep running until the dough completely leaves the sides of the bowl and forms into a ball. Carefully remove the dough from the food processor and wrap in saran wrap or seal in a plastic bag. Put into the refrigerator for 45 minutes.
For the pumpkin pie filling
INGREDIENTS:
1 14-ounce can of pumpkin
1 14-ounce can of sweetened condensed milk
2 eggs, beaten with a fork
1/2 cup of light brown sugar, packed
2 Tbsp. of granulated sugar
1 1/2 tsp. of ground cinnamon
1/2 tsp. of ground ginger
1/2 tsp. of ground nutmeg
1/2 tsp. of salt
1/4 tsp. of ground cloves
1/8 tsp. of vanilla extract
DIRECTIONS:
Place all of the ingredients into a large mixing bowl. Beat the ingredients together with an electric hand mixer set on medium speed for two minutes.
For assembly and cooking
Preheat the oven to 425 degrees.
Take the dough out of the fridge. Place it into a 9 to 10-inch pie pan. Use your hands to firmly press and work the dough so it is evenly distributed onto the bottom and the sides of the pan. Pour the pumpkin pie filling mixture into the pan. Place the pie pan into the oven and cook for 15 minutes. After 15 minutes, lower the oven temperature to 350 degrees. Cook for another 45 - 50 minutes. Cool the pie on a cooling rack for at least 20 minutes before serving. Makes 8 - 12 servings.

Pie Crust Recipe Source: Annie's Eats
Pumpkin Pie Recipe Source: Food.com


Recipe for Whipped Cream
INGREDIENTS: 
1 cup of heavy whipping cream (chilled)
1 Tbsp. of confectioners sugar (powdered sugar)
DIRECTIONS:
Place a medium to large metal mixing bowl and the whisk attachment for an electric hand mixer into the freezer. Let chill for about 10 minutes. Once chilled, pour the cup of heavy whipping cream into the bowl. Attach the chilled whisk to the electric hand mixer. Beat the cream on high speed for about one to two minutes, then add in the powdered sugar. Continue to beat on high speed for several minutes, or until the cream starts to form soft peaks. This recipe makes enough whipped cream to serve on each piece of pie (or at least it should)!