Translate

Showing posts with label weeknight meals. Show all posts

Sunday, November 22, 2015

5-Ingredient Pumpkin Black Bean Soup

Have you tried the apple and mozzarella quesadillas yet? If not, I urge you to try them out. Those quesadillas, served along with this pumpkin black bean soup, is seriously our favorite meal these days. This soup is super awesome because you make barely any mess making it, the prep time is less than 1 minute, and the cooking time is just a little over 5 minutes. Oh, and it also is pretty darn tasty AND healthy. It's loaded with Vitamin A, protein, and fiber. You can make it with more kick based on the type of salsa you use in the recipe. The first few times I made it I used a Hatch Chile salsa, and it was nice and spicy. The past couple times I have used Newman's Own Farmer's Garden salsa, which is a little sweet and mild. You can serve this with the apple quesadillas or serve it on its own with some tortilla chips. Yesterday I made it for lunch and served it with oven-baked tortilla chips drizzled with white truffle oil and sea salt . This soup is rich and creamy, and is definitely a comfort-type food, but it has the bonus of being good for you. Make it with the leftover canned pumpkin you might have after making pumpkin pies for Thanksgiving! Enjoy.

Recipe for 5-Ingredient Pumpkin Black Bean Soup

INGREDIENTS:
1 can of black beans (15.5 ounces), drained and rinsed
1/2 cup of water
1/3 cup of canned pumpkin puree
1/3 cup of salsa (we like it with Newman's own Farmer's Garden - you can use hot or mild salsa)
1/2 tsp. of cumin powder
Salt and pepper, to taste
1/3 cup of full-fat Greek yogurt (I like Fage)

DIRECTIONS
Dump the black beans, water, pumpkin puree, and salsa into a medium sized pot. Sprinkle in the cumin powder, salt, and pepper. Use a spoon to mix well. Set the pot over medium heat on the stove top and cook for 4 - 5 minutes, or until hot. Then adjust the heat to low and stir in the Greek yogurt until smooth. Cook for an additional 45 seconds to 1 minute (don't cook too long, because the yogurt will curdle a bit and slightly effects the texture of soup). Remove from heat and ladle into bowls. Sprinkle with white cheddar cheese, if desired.

Makes approximately 2 - 3 servings. 
Original Recipe

Per Serving (with a serving being 1/3 of the recipe): 155 calories, 2 grams fat, 29 grams carbohydrates, 12 grams protein, 8 grams fiber, 50% RDA Vitamin A, 15% RDA Iron,

Wednesday, November 11, 2015

Quesadillas with Mozzarella and Buttery Cinnamon Maple Apples


Apples, in a quesadilla? Yes! You will not believe how amazing these quesadillas are. Greg thinks that these quesadillas are the perfect meal for dinner, but that they could also be a good breakfast food because they kind of taste like crepes. Although we have only been eating them for dinner, I agree that these sweet and savory quesadillas would make an outstanding breakfast. You could even sprinkle a little powdered sugar on them if you prefer the breakfast option, and leave off the white truffle oil and use butter instead. We have seriously had these quesadillas for dinner at least 7 times in the past 2 weeks, due to Greg's continued requests. I don't mind since they are so easy to make (especially if you have a batch of the apples in the fridge) and they require very little time in the kitchen. I have been serving them with a super easy pumpkin black bean soup that only has five ingredients, and I'll share that recipe very soon. Fall is the perfect season for enjoying delicious apples, and you can enjoy them in so many ways!

Recipe for Quesadillas with Mozzarella and Buttery Cinnamon Maple Apples

INGREDIENTS:
Butter, for coating the baking pan 
8 ounces of Mozzarella cheese, sliced into 1 ounce slices (don't use fresh, because it has too much moisture)
White truffle oil (optional, you can use butter instead) for brushing the sides of the tortillas
Sea salt (optional), for sprinkling the sides of the tortillas

DIRECTIONS:
Preheat the oven to 300 degrees.

Lightly grease a baking pan with butter.

Wrap the tortillas in a paper towel and zap in the microwave for about 25 seconds. Blot out any of the excess moisture from the tortillas, then lay them onto the prepared baking sheet. Put one and a half slices of mozzarella cheese in the center of each tortilla (you will have 4 half pieces of cheese leftover that you will use to top the apples with). Place in the oven and cook for about 4 - 5 minutes, or until the cheese has just begun to melt. Meanwhile, if using apples that have been stored in the fridge, place desired amount of apples into a bowl and microwave for about 15 - 20 seconds. Once the cheese has begun to melt, remove the pan from the oven and adjust oven temperature to 375 degrees. Spoon desired amount of apples onto one half of the tortilla (I used about 2 tsp. of apples per quesadilla). Top the apples with the remaining half pieces of mozzarella cheese. Fold the tortillas in half. Lightly brush each side of the tortillas with white truffle oil or butter. I used about 1/8 tsp. of white truffle oil per side. Then sprinkle each side with a little bit of sea salt. Place back into the oven and cook for about 2 - 3 minutes, then carefully flip tortillas and cook for another 2 - 3 minutes. Remove from oven and serve immediately.

Original Recipe

Friday, September 25, 2015

Pumpkin Sage Pasta

Fall is here, and so that means we will be eating LOTS of pumpkin in my house for the next several weeks. My first post of the Fall season is a vegetarian pasta dish with a creamy pumpkin sauce, fresh sage, and melted cheese. My mom sent me the recipe and brought over fresh sage from her garden the other day, so I made the pasta and served it to everyone for lunch. It was really good! I have not cooked much with sage before, and after cooking this dish, I would like to try more recipes with it. This pumpkin sage pasta is easy to prepare, and it is a very satisfying meal. If you are not worried about making it vegetarian, you can top it with cooked bacon or a mild crumbled sausage instead of the crispy sage. I loved the crispy sage on top of it, but Greg really liked having bacon on his! Now that I have cooked my first pumpkin dish of the season, I am thinking about what my first pumpkin dessert of the season will be, and a pumpkin cheesecake keeps popping into my head. That will probably be my next post! I hope you like this recipe, and I hope you are enjoying the Fall weather where you live as much as I am loving it here in Maryland.

Recipe for Pumpkin Sage Pasta

INGREDIENTS:
12 ounces of pasta (good choices would be farfalle, penne, ziti)
3 Tbsp. of unsalted butter
3 cloves of garlic, minced
1/4 cup of all-purpose flour
2 cups of whole milk
1 cup of canned pumpkin 
A couple pinches of nutmeg
Salt and pepper, to taste
1/3 cup of chopped fresh sage leaves
1/2 cup of grated Parmesan cheese, divided
1 1/4 cups of sharp white cheddar cheese
For the crispy sage topping
1 Tbsp. of extra-virgin olive oil 
1/3 cup of fresh sage leaves, sliced thin

DIRECTIONS:
Preheat the oven to 350 degrees. Lightly butter an oven-safe dish (9x13, 2" deep). 
Cook the pasta according to package directions to al dente, then drain in a colander.
While the pasta is cooking, make the sauce. Put the butter in a large saucepan set over medium heat. Once butter is melted, add in the garlic and cook, stirring frequently, for about 4 minutes. Add the flour to the pan and stir until the flour is golden brown, about 2 minutes. Then slowly pour in the milk and use a whisk to mix. When milk is mixed in and mixture is smooth, add in the pumpkin and continue to whisk. Cook until the sauce is thickened, about 5 - 7 minutes. Then remove from heat and add in the nutmeg, salt, pepper, fresh sage, and  1/4 cup of the Parmesan cheese. Stir in the pasta and coat it with the sauce. Spread the pasta into the prepared pan. Top evenly with the sharp white cheddar cheese and the remaining Parmesan. Cover the top of the dish with foil and place in the oven to cook. Cook for 15 minutes. A few minutes before the pasta is finished cooking, make the crispy sage topping, if using. Heat a small saucepan on medium high heat. Once hot, add in the olive oil and let it coat the pan. Add in the sage leaves and cook until crispy but not burnt, 2 - 3 minutes. Remove the pasta from the oven and sprinkle the crispy sage over it, or you can sprinkle it over each individual serving. 

You can also top the pasta with cooked bacon pieces or a mild crumbled sausage if you don't care about it not being a vegetarian meal!

Recipe Makes approximately 8 servings
Recipe Adapted from: Oh My Veggies

Sunday, August 30, 2015

Slow Cooker Barbacoa Beef

Who likes Barbacoa? I thought that Barbacoa was something I could only order when out to eat at places like Chipotle, but now I know I can make it at home, too! I have really had to change the way I eat since I started eating a more low carb diet, so the truth is, I do not have much experience with preparing and cooking meat. I actually had never even bought chuck roast before I made this recipe! I could not believe how easy it was to cook this barbacoa beef.  The prep time for the meal was less than 5 minutes, and then I just let my slow cooker do its magic. The meat was cooked in the slow cooker until tender, and it shredded beautifully. The meat is incredibly flavorful, thanks to the spice mixture that is rubbed on it prior to it going into the slow cooker. Greg and I ate the barbacoa in a salad four nights in a row. Greg said there are some meals he gets tired of if he has to eat them too much, but he said he was still loving this meal on the fourth night. I made the barbacoa salad with romaine lettuce, rice, beans (kidney or black), corn, tomato, avocado, Colby jack cheese, sour cream, salsa, and bacon habanero tortilla chips. You can prepare it however you like, though. Use it in tacos, burritos, salads, or just eat it over rice with vegetables. Enjoy!

Recipe for Slow Cooker Barbacoa Beef 

INGREDIENTS:
1 medium yellow onion, chopped
1 tsp. of garlic powder
1 Tbsp. of oregano
1 1/2 Tbsp. of cumin
1/2 tsp. of ground cloves
2 tsp. of salt
3/4 tsp. of black pepper
2 1/2 pounds of chuck roast
3/4 cup of beef broth
1/4 cup of freshly squeezed lime juice (about 2 large limes)
2 1/2 Tbsp. of apple cider vinegar
3 bay leaves

DIRECTIONS: 
Put the chopped onion into a slow cooker. In a small bowl, mix together the garlic powder, oregano, cumin, ground cloves, salt, and pepper. Spoon some of the mixture over the meat and rub over the surface of the meat using the spoon. Continue until the surface of the meat is coated with the spice mixture. Put the meat in the slow cooker with the onion, and include any of the spice mixture that may have fallen off. Then add in the beef broth, lime juice, apple cider vinegar, and bay leaves. Cook on low for 8 to 10 hours (I cooked it for 8 1/2 on low) or you can cook it on high for 4 - 6 hours.

Once meat finishes cooking, transfer it to a large plate and shred. Get rid of the fatty pieces of meat. Discard the bay leaves from the slow cooker. Add the meat back to the slow cooker and let it soak in the liquid for about 10 minutes before serving.

Store any leftover meat in the fridge in airtight containers and consume within 4 days.

Recipe Source: Seeded at the Table

Makes approximately 8 servings. 


Thursday, August 6, 2015

Maple and Mustard Palate-Pleasing Chicken

I came across this chicken recipe several weeks ago on a blog called "Witty in the City." I thought it sounded really good, and I wanted to make it, but every time I planned to, something else would get in the way of the dinner plan. I finally made it a few days ago, and it was just as tasty as I thought it would be. It seriously was so easy to prepare, and Greg absolutely loved it. The original recipe is called "man-pleasing chicken," and although that seems like an appropriate name, I decided to call it palate-pleasing chicken, because you don't have to be a man to enjoy this chicken! To be honest, I actually didn't get to have the maple and mustard chicken for dinner. I bought bone-in chicken thighs, and didn't realize that one pound of the meat would only be two pieces of chicken. Greg has been teaching an evening sailing class this week, so I decided to let him eat it when he got home from work for two nights in a row, rather than make it one dinner for the two of us. I did get to sample it when it was fresh out of the oven, and I really did have to stop myself from eating it all. I hope Greg appreciates what a nice wife I am! If you are looking for a quick (45 minutes) and easy meal to serve, try this chicken recipe. It is totally savory, comforting to the soul, and delicious. I think it would taste great with some mashed sweet potatoes and a green vegetable, or with white rice and a vegetable (I served it with carrots). When Greg was eating it last night, Wendy was eating her dinner, and he let her try a piece. She ate it, her eyes got wide, and we swear she shouted out "Mmm, it's good!" Not only will you love this chicken, but your kids will probably love it too. Enjoy!


Recipe for Maple and Mustard Palate-Pleasing Chicken

INGREDIENTS:
2 pounds of bone-in chicken thighs
Salt and pepper
3/4 cup of Dijon mustard
1/3 cup of pure maple syrup
1 1/2 Tbsp. of rice vinegar
1 1/2 Tbsp. of fresh rosemary

DIRECTIONS:
Preheat the oven to 450 degrees. While the oven is heating, prepare the sauce. In a smallish bowl, mix together the Dijon mustard, maple syrup, and rice vinegar. Set aside. Line a baking dish with foil. Place the chicken thighs in a single layer into the dish. Salt and pepper the chicken. Then pour the sauce over the chicken, and use a fork to gently turn the chicken in the sauce so it gets pretty coated. Put the chicken thighs into the oven and cook for 40 to 45 minutes, or until the internal temperature reaches 165 degrees using an instant-read meat thermometer. Halfway through cooking, carefully spoon some of the sauce in the dish over the chicken and rotate your baking dish. Once finished cooking, remove the chicken from the oven and immediately sprinkle with the rosemary. Let cool for a few minutes, then serve with your favorite sides. 

Recipe Source: Witty in the City, originally from the I Love Trader Joe's Cookbook

Monday, July 6, 2015

Grilled Shrimp Fajitas (cooked in a foil packet)

Recipe for Grilled Shrimp Fajitas (cooked in a foil packet)

Please visit my new website, Make It and Bake It with Beth, for the grilled shrimp fajitas recipe

Tuesday, June 23, 2015

Simple White Fish Tacos

I am not sure why, but I have always thought that making fish tacos wouldn't be easy. Boy, have I been so wrong! This is one of the simplest meals to throw together, and it takes only 30 minutes from start to finish. I love the combination of the lime and cilantro in this recipe. We topped our fish tacos with mango, avocado, cabbage, mild cheddar cheese, and Panko bread crumbs I think these tacos would also be really good with some jicama. You can add whatever you want to your fish tacos, as long as you promise to top them with the creamy cilantro sauce. Oh, and the Panko bread crumbs really do add a nice crunch to the tacos, so you might want to consider those too. This is a great recipe for summer because it is so light, healthy, refreshing, and easy. Enjoy!

Recipe for Simple White Fish Tacos

INGREDIENTS:
For the fish
8 ounces of white fish (I used tilapia)
1 Tbsp. of fresh lime juice
2 Tbsp. of extra virgin olive oil, divided
1 1/2 Tbsp. of cilantro leaves, torn
1/8 tsp. of cumin powder
1 clove of garlic, pressed
Salt and pepper

For the creamy cilantro sauce
Juice from 1/2 lime
1 Tbsp. of cilantro leaves, minced
1/4 cup of Greek yogurt (or sour cream)
1 clove of garlic, pressed
A pinch or two of ground cayenne pepper (optional)
Freshly ground black pepper

For serving
6-inch flour tortillas
Chopped mango (from 1 medium mango)
Chopped avocado (from 1 medium Hass avocado)
Shredded green cabbage
Finely grated mild cheddar cheese
Cilantro leaves
Panko bread crumbs (gives it a nice crunch)!
Or, whatever you want

DIRECTIONS:
In a shallow dish, stir together the fresh lime juice, 1 tablespoon of olive oil, cilantro, cumin, and garlic. Put the fish in the dish and coat. Cover and put in the fridge to marinate for 20 minutes.

While the fish is marinating, make the creamy cilantro sauce. Stir together the lime juice, cilantro, Greek yogurt, garlic, cayenne pepper, salt, and pepper in a bowl. Mix well, cover, and refrigerate until ready to serve.

Heat the other tablespoon of olive oil in a large skillet set over medium-high heat. Once it is simmering, put the fish into the skillet and cook, without touching, for 3 minutes. Then carefully flip the fish over and cook on the other side for 2 -3 more minutes, or until cooked through. Remove the fish and season with salt and pepper as desired. Let it sit for a couple minutes, then use two forks to shred the fish into bite-sized chunks.

Assemble the tacos on the tortillas with the fish, cilantro crema, and favorite toppings.

Recipe makes approximately 4 - 6 tacos.

Recipe Adapted from: Annie's Eats, originally from The Way the Cookie Crumbles

Saturday, May 23, 2015

Easy Shrimp Scampi with Pasta

I had a goal to post more recipes this month than last month. But it's almost the end of May, and this is only my second posting for the month (and my first one wasn't even a recipe, it was a recipe round-up). I ended up having a lot going on in the beginning of the month. I had to finish all of my student teaching assignments and complete an online portfolio with artifacts that demonstrate my knowledge on certain teaching standards, with reflections. Then I had to prepare for an exit conference with my supervisor, mentor teacher, and the director of the education program I am enrolled in. Sounds intimidating, right? Well, I was super worried and stressed about it, but it went very smoothly. I am so happy to have it over with, and I'm also really happy that my summer vacation is just around the corner. Greg and I were talking the other day about comfort foods. He said that there are so many comfort foods we eat during the cooler weather, like hearty soups, but not many foods that are good for the soul in the spring and summer. I told him maybe shrimp scampi was a warmer weather comfort food, and he asked me to make some. I realized I had actually never made shrimp scampi before, and I was excited to find out that all the recipes looked super easy (so it is kind of funny that I call this easy shrimp scampi, because I'm not sure there are any tricky shrimp scampi recipes out there). This meal was made in less than 15 minutes and tasted great. I loved it because I have been really cutting the carbs out of my diet recently, so I just had the shrimp with a sprinkle of Panko bread crumbs and Parmesan cheese, and Greg enjoyed the shrimp and pasta. It was a nice change from all the grilled chicken I have been eating lately. If you are looking for an easy meal that is refreshing and satisfying, try this easy shrimp scampi over pasta! Enjoy.

Recipe for Easy Shrimp Scampi with Pasta

INGREDIENTS:
8 ounces of uncooked linguine or spaghetti noodles (I used Dreamfields pasta)
3 Tbsp. of unsalted butter
1 pound of frozen medium shrimp, thawed, deveined, and peeled
1/2 - 3/4 tsp. of crushed red pepper flakes
1/4 cup of dry white wine or chicken stock
Zest of one lemon 
1/4 cup of freshly squeezed lemon juice (about one lemon)
A pinch or two of kosher salt
Freshly ground black pepper
2 Tbsp. of chopped fresh parsley leaves
1/2 cup of freshly grated Parmesan cheese
Panko bread crumbs, if desired

DIRECTIONS: 
Cook the pasta according to package directions. When it is finished cooking, drain in a colander.

While the pasta is cooking, prepare the shrimp scampi. Melt the butter in a large skillet over medium-heat. Once it is melted, add in the shrimp, garlic, and crushed red pepper flakes.  Cook, stirring frequently, until the shrimp is pink (about 3 minutes). Then add in the wine or chicken stock and the lemon juice. Sprinkle on the salt and pepper. Give it a stir, then adjust the heat to medium-low and bring to a simmer. Once it comes to a simmer, remove from heat. Carefully add in the drained pasta, lemon zest, and parsley and toss.

Serve immediately. Top each serving with Parmesan cheese and Panko bread crumbs, if desired.

Makes approximately 4 servings. 

Recipe Adapted from: Damn Delicious, originally from Closet Cooking


Sunday, January 11, 2015

African Peanut Soup

Years ago, I worked at a teacher resource center in Howard County. It was the best job ever for many reasons. I had an amazing boss who is also a friend and I met a wonderful woman who volunteered there during the week, who also became a good friend. Not only was the job a place with lots of wonderful people, it was also a place where good food was had on a daily basis. The building I worked in was right across the street from a market called Produce Galore, which sadly went out of business the last year I worked at the resource center. Every day I would walk over to Produce Galore to get lunch. One of the things I especially loved there was the soup bar. There were exciting new soups to try every day and I don't think I was ever disappointed with anything that I had. One soup that I got a few times was a peanut soup. It was rich and creamy and like no other soup I had ever had before. I finally decided to try to make the soup (seven years later) and I'm so glad I did! I had no idea it would be so easy. When I searched online for recipes, I came across many different ones and the one I decided to go with turned out great. I served it over rice and added some Greek yogurt on top. This soup is vegetarian (vegan if you omit the cream), but if you want to add meat Greg and I think that chicken or shrimp would go well with it. Greg was pretty skeptical when I told him about the soup when I was making it but he ended up raving about it when he tried it! It makes a lot of leftovers too (we ate it for the fourth time today and are still looking forward to eating the last of it tomorrow night). The soup is rich because of the coconut milk and peanut butter, but if you serve with the rice you don't need much of it to fill you up. We did about 1/2 cup of cooked rice and 3/4 cup of soup per bowl. But you can eat as much as you want! Enjoy.

Recipe for African Peanut Soup

INGREDIENTS:
4 cups of vegetable broth
3 cups of coconut milk (I use the So Delicious culinary brand)
1 small yellow onion, diced
4 cloves of garlic, pressed
1/2 tsp. of crushed red pepper flakes
1 very large or 2 medium sweet potatoes, peeled and cubed into 1-inch pieces
1 14.5 ounce can of fire-roasted diced tomatoes
1 1/2 tsp. of sea salt
1/4 tsp. of paprika
1/8 tsp. of smoked paprika
Several grinds of fresh black pepper
A pinch of cayenne pepper
A pinch or two of ground ginger
1 cup of creamy peanut butter
*2 Tbsp. of heavy cream
Fresh cilantro leaves, for garnish
Cooked rice, such as Jasmine rice, for serving
Greek yogurt, for garnish
Roasted peanuts, for garnish

*If desired, and if it doesn't matter to you if this meal is vegan, you can add in the heavy cream. I did!

DIRECTIONS:
Pour the broth into a large pot and set over high heat. Add in the coconut milk, fire-roasted tomatoes, diced onion, pressed garlic, crushed red pepper flakes, cubed sweet potato, sea salt, paprika, smoked paprika, black pepper, cayenne pepper, and ginger. Give it a stir and let it sit over high heat for 15 - 20 minutes, or until the potatoes are cooked through (you can check this by pricking the potatoes with a fork, if it goes all the way through they are done cooking). Then use a ladle to take out 1 1/2 cups of the liquid and throw out. Stir in the peanut butter and stir until smooth. Remove the soup from heat. Use an immersion blender to puree until the soup is smooth and there are no chunks of onion or potato. Stir in the cream, if using. Then return the pot to the stove and set over low heat for a couple minutes before serving.

Scoop desired amount of rice into a bowl. Top with the peanut soup. Add on some cilantro leaves and peanuts for garnish. If desired, top with a little bit of Greek yogurt (I did this, but Greg did not).

Store leftovers in an airtight container in the fridge. Recipe makes about 8 -10 servings (if you serve with rice).

Recipe Adapted from: Oh My Veggies, originally from The 30-Minute Vegan: Soup's On! More than 100 Quick and Easy Recipes for Every Season by Mark Renfield

Sunday, December 21, 2014

Lemon Garlic Pasta with Sausage and Baby Spinach

Okay, so I have been making this recipe forever and I seriously cannot believe that I had not posted it on my blog yet. I made this dish for a neighbor back in July after she had her baby boy and when she asked for the recipe a couple months ago I realized that I didn't have it posted! I meant to post it right away, but I am just getting around to it. Greg and I really love this meal. It is very easy to make and takes less than 30 minutes from start to finish. It also makes a ton of leftovers for us which we love. I use chicken sausages, but I'm sure pork sausage would be good in it too. The dressing for the pasta is pretty amazing. You can't really go wrong with olive oil, garlic, lemon, salt, and pepper! Oh, and to spice it up a little you can add in the crushed red pepper flakes. I had originally added in kale to this recipe, but then decided I like the addition of spinach better. I've also used mustard greens which taste great too, but it is a bit of a stronger flavor. You can make it vegetarian by leaving out the chicken sausages too. Enjoy!


Recipe for Lemon Garlic Pasta with Sausage and Baby Spinach

INGREDIENTS
 4 chicken sausage links, cut into 1/8-inch slices
1 pound of penne or farfalle pasta
For the dressing
2 cloves garlic, pressed
1/4 tsp. of kosher salt
Juice of 1 lemon
5 Tbsp. of extra virgin olive oil
1/2 tsp. of crushed red pepper flakes (optional)
A few grinds of fresh black pepper
 1/2 cup of finely grated Parmesan cheese
To mix in
Baby spinach leaves (desired amount - I used about 4- 5 cups & there are 6 cups in an 8 ounce package)

DIRECTIONS
First, cook the chicken sausages according to package directions. Set aside.

Cook the pasta according to package directions. While the pasta is cooking, make the dressing. Put the pressed garlic into a small bowl and add in the salt. Press the salt into the garlic with a spoon and make sure it is mixed in well. Then add in the lemon juice, olive oil, red pepper flakes, and freshly ground black pepper and stir well. Stir in the Parmesan cheese.

When the pasta is done cooking, drain in a colander and then return pasta to the pot that it was cooked in. Pour the dressing over the pasta and mix well. Then add in the baby spinach leaves and stir until they are wilted. Finally, mix in the chicken sausages and serve!

Recipe Adapted from: Annie's Eats, Spoon with Me, and originally from In the Kitchen with a Good Appetite
Recipe makes approximately 6 - 8 servings.

Saturday, October 18, 2014

"Not So Sloppy" Turkey Sloppy Joes

There were only a few meals that I did not like to eat when I was a kid. I was never fond of meatloaf or Sloppy Joes. Luckily, both these meals weren't something that were served frequently in my parent's home. I didn't mind singing about Sloppy Joes after Adam Sandler sang his Lunch Lady song on Saturday Night Live, but I still wasn't interested in eating them. It had been at least 25 years since I thought about eating a Sloppy Joe sandwich until I saw this Sloppy Joe recipe a couple months ago on a blog that I like. I read the author's writeup and apparently she wasn't crazy about the idea of  Sloppy Joes EITHER until trying them again with this recipe. So I thought I'd give it a try and  I'm glad I did. I don't like to cook with meat much, but this meal was so easy to make and helped me to overcome some of my meat preparation fears.

Greg is also not a Sloppy Joe person and he was really happy with these not so sloppy Sloppy Joes!
I call them "not so sloppy" because they aren't too saucy and the sandwich pretty much stays in tact. I omitted the tomato sauce from the recipe and used ketchup instead. This recipe uses ground turkey and the sauce combines things like root beer and apple cider vinegar. I will definitely be making this recipe again. Enjoy!

Recipe for "Not So Sloppy" Sloppy Joes

INGREDIENTS:
1 Tbsp. of olive oil
2 Tbsp. of dried onion flakes
1 pound of ground turkey meat
2 cloves garlic, pressed
1 tsp. dried mustard powder
1/4 tsp. cumin powder
2 Tbsp. of ketchup
1 Tbsp. of apple cider vinegar
2 tsp. of Tabasco sauce
3 ounces of root beer
3/4 Tbsp. of Worcestershire sauce
1/2 tsp. salt
freshly ground black pepper
4 hamburger buns, lightly toasted
Ketchup or other sauce, for serving

DIRECTIONS:
Put the olive oil in a large (nonstick) skillet over medium heat. Add in the dried onion flakes, stir, and cook for about 45 seconds. Add in the ground turkey and break the meat up as it cooks. Cook for about 4 - 5 minutes, or until it starts to brown. Stir in the pressed garlic, mustard powder, cumin, ketchup, and salt. Cook and stir until the mixture is fragrant, about 1 minute. Then stir in the apple cider vinegar, Tabasco sauce, root beer, and Worcestershire sauce. Bring the mixture to a simmer and cook for about 7 minutes, or until most of the liquid has evaporated. Season with some ground pepper.

Divide the meat amongst the 4 buns and serve. Serve with extra ketchup or other sauce (I used extra Tabasco on mine), if desired. Serve with your favorite sides. We had some tasty barbecue potato chips and a spinach salad!

Recipe Adapted from: Pink Parsley, originally from Cooking Light, September 2014

Saturday, June 7, 2014

Delicious Cauliflower Burgers (that don't taste like cauliflower)!

Cauliflower burgers - you never knew that cauliflower could taste SO good! 
Yeah, so I know what you are thinking. Cauliflower...in a burger? Yes, it's a thing and it's a totally awesome thing. I came across the recipe for cauliflower fritters on the vegetarian food blog Oh My Veggies. This recipe is an adaptation of those fritters. I was a little skeptical of it but I thought it was worth a shot after reading all of the glowing comments from readers who had already tried the recipe. I am so happy I tried them!  I've made them twice in the past couple weeks and bought another head of cauliflower the other day so I can make them again this weekend. Greg was definitely skeptical too when I told him that there was cauliflower in the burgers I was making. He has never liked cauliflower before, and after eating a couple of the burgers, he said that he never knew that cauliflower could taste so good! I agree. I have never been a huge fan of cauliflower either and I am now looking forward to trying more fun recipes with cauliflower!  These burgers are easy to make and take about 1 hour or less from start to finish. They are a great vegetarian meal where nobody will miss the meat. Don't forget to add the spicy mayo! Enjoy.

Recipe for Delicious Cauliflower Burgers
INGREDIENTS:
1 cup of baby carrots, chopped into matchstick sized pieces
2 cups of cauliflower florets
1/2 cup of all-purpose flour
1/2 tsp. of garlic powder
1/4 tsp. of cayenne pepper
1/4 tsp. of kosher salt
freshly ground black pepper
2 Tbsp. of Panko breadcrumbs
1/3 cup plus 2 Tbsp. of finely grated Asiago, Parmesan, or Romano cheese
1 egg, lightly beaten
1/4 cup of Italian parsley leaves, stems removed and torn
Olive oil or olive- canola oil blend, for frying

Fixings: 
Spicy Mayo: In a small bowl, mix together 4 Tbsp. of mayonnaise, freshly ground black pepper, 1/8 tsp. of garlic powder, and a couple pinches of cayenne pepper. Taste and adjust seasonings to your liking.
6 Lightly Toasted Buns
Baby Spinach Leaves

DIRECTIONS:
Bring a pot with 4 cups of water to a boil and add in the chopped carrots and cauliflower. Cook for 4 minutes. Drain well. Transfer vegetables to a cutting board and chop more finely (it doesn't have to be perfect, you can have some bigger pieces and some smaller pieces)! Gather vegetables in paper towel and press down try to get out as much excess water as possible. Transfer to a large bowl. Add in the flour and stir well to coat. Add in the garlic powder, cayenne pepper, salt, pepper, Panko bread crumbs, grated cheese, egg, and parsley leaves and gently mix until ingredients are well incorporated.

Heat 1 - 2 Tbsp. of oil in a saute pan over medium high heat. Use a 1/3 cup measuring cup to scoop up mixture and then tap it onto the saute pan. Press down with a spatula to shape into a patty. Cook for about 3 - 4 minutes, or until golden brown on one side. Carefully flip and cook the other side until it is browned. Transfer to a plate. Continue this process until there is no more batter left. Then sprinkle each one with salt and pepper. If desired, place patties on a baking pan and heat in the oven at 225 degrees for a couple minutes while the buns are toasting, just to warm them back up a little.

Toast the buns lightly in a toaster oven. Put mayo on each side of the bun, add on the patty and a few spinach leaves. Serve with your favorite sides. We served them with baked beans and potato chips!

Recipe Adapted from: Oh My Veggies

Recipe makes 6 burgers (unless you nibble a bunch on the burgers while making them...)

Thursday, May 1, 2014

Mediterranean-Style Orzo Salad with Avocado and Arugula

I was pleasantly surprised by how delicious this orzo salad was! It was the first meal I made since before I had the baby (unless you count cheese quesadillas as a meal..). For the first couple weeks after having Wendy all I wanted to do was eat something super quick and easy, such as frozen pizza. Well, that got old fast. I decided I was ready to start cooking again and that I wanted to eat healthier. I went out to the grocery store with a list of healthy ingredients in hand. It felt good to get out of the house all by myself (yes, I'll admit it) and I'll even admit that I took my time at the store! I had this salad in mind when I did my shopping, but the cauliflower didn't look too hot and I couldn't find farro, so I decided I'd just go with a a different type of salad. Greg was amazed with how good the salad was. I think he commented like five times while he was eating it on how much he loved it. And usually I have to ask him f he likes something I made or not! This salad is super easy to make and it's incredibly healthy. It reminded me a little of this awesome salad I made a couple summers ago, that has quinoa and asparagus. Make the orzo salad vegan by leaving out the feta! Enjoy.

Recipe for Mediterranean-Style Orzo Salad with Avocado and Arugula
INGREDIENTS:
2 cups of dried orzo
1 1/2 Tbsp. of extra-virgin olive oil
1 clove of garlic, pressed
1/8 tsp. of kosher salt
1/8 - 1/4 tsp. of crushed red pepper flakes
Freshly ground black pepper
1 Tbsp. of freshly squeezed lemon juice
1 tsp. of oil from sun dried tomato jar
12 - 16 sun dried tomatoes in oil, chopped
16 - 20 kalamata olives, chopped
Desired amount of feta cheese (I like a lot), crumbled
Desired amount of baby arugula (I recommend a couple handfuls a serving)
2 avocados, sliced
2 cucumbers, peeled and sliced thin

DIRECTIONS:
Cook the orzo according to package directions. While the orzo is cooking, make the dressing. Combine the olive oil, garlic, salt, red pepper flakes, black pepper, lemon juice, and sun dried tomato oil in a small bowl and whisk well. Once orzo is finished cooking, drain it of any excess water and then immediately transfer to a large bowl. Allow it to cool slightly while you chop the sun dried tomatoes and kalamata olives.

Then toss the orzo with the dressing and add in the sun dried tomatoes and olives. Toss again. Cover the bowl and put it in the fridge for at least 30 minutes. Just before taking it out of the fridge, slice the avocados and cucumbers.

Put the arugula leaves, cucumber slices, and avocado slices on a plate(s). Drizzle on a little bit of olive oil and a couple squeezes of lemon juice (just a tiny amount). Sprinkle a bit of salt and pepper on top. Top with a generous amount of the orzo. Add the crumbled feta on top. Serve with your favorite bread.

Recipe makes about 4 - 6 servings. 

Recipe Adapted from: Cookie and Kate 

Wednesday, April 2, 2014

Pasta with Green Veggies and Cheese Sauce

This pasta dish is kind of like a grown-up mac and cheese. The cheese sauce on it reminds me of cheese fondue, which I absolutely love. It is made with white wine, roasted garlic, and sharp cheddar cheese. This recipe was super easy to make and it took less than 50 minutes from start to finish. It is yet another pasta dish that can be filed away under "quick and easy." You can choose what green vegetable you want to add to the pasta. The first time I made it, I used a combination of asparagus and green beans. Then I just used asparagus the second time around. Snap peas would also probably be a good choice! Greg loved this meal and was impressed that I could still cook something tasty in my FORTIETH week of pregnancy. My dad helped himself to three or so servings for lunch the other day. It was definitely a hit. Even though it taste good leftover too, it is best straight from the pot. The cheese sauce gets a little thinned out after being in the fridge and reheated. But the leftovers are still tasty and that's what I'll be eating for dinner tonight. Enjoy!

Recipe for Pasta with Green Veggies and Cheese Sauce 
INGREDIENTS: 
1 clove of garlic
1 - 2 tsp. of Extra-virgin olive oil
Kosher salt
1 bunch of chopped asparagus or another green vegetable, steamed
16 ounces of dried pasta, such as Farfalle (bowtie) or Penne
4 Tbsp. of unsalted butter
3 Tbsp. of all-purpose flour
1/2 cup of dry white wine or cooking wine
2 cups of chicken broth (or vegetable broth)
1 3/4 cups of grated sharp white cheddar cheese
Freshly ground black pepper
Panko bread crumbs (optional)

DIRECTIONS:
Roast the garlic first. Preheat oven to 350 degrees. Put the garlic on a baking sheet and drizzle with about a teaspoon or so of olive oil. Place in middle rack of oven and cook for 25 - 30 minutes. Remove from oven to cool slightly. *I took the shortcut way on roasting garlic. If you want to do it the longer way, check out the roasted garlic recipe here.

While the garlic is roasting, steam your veggies and then set aside.

After your garlic is roasted and veggies are steamed, bring a large pot of water to a boil and sprinkle with a couple teaspoons of salt. Then add in the pasta and cook just 30 seconds past al dente, according to package directions.

While pasta is cooking, make the cheese sauce. Carefully squeeze the insides of each clove of garlic into a small bowl, making sure to discard of any of the papery bulb. Sprinkle the garlic with some kosher salt, mash it with a fork, and make it into a paste. Set aside.

Put the butter into a very large skillet and melt over medium heat. Once it is melted, add in the garlic paste and cook for one minute. Then add in the flour and stir until the flour is lightly browned, about 1 1/2 minutes. Then pour in the white wine and the chicken broth. Stir constantly until the sauce is a little bit thickened, about 3 minutes. Add in the grated cheese and stir until it is completely melted. Turn off the heat. Add in the steamed veggies.

Drain the pasta with a colander. Then add the pasta into the skillet with the cheese sauce and veggies. Toss to coat well and turn the heat back on low and cook for one minute or until warmed through. Serve immediately. Top each serving with some panko bread crumbs and black pepper, if desired.

Makes approximately 6 - 8 servings.

Recipe Adapted from: Annie's Eats

Monday, March 24, 2014

Quick and Easy Meals Roundup

Creamy Lemon and Thyme Pasta is a really quick and easy meal! You can serve it with or without greens - I used kale. 
I have a confession to make. This post is really more for me than it is for you. I know, I'm selfish. I have been feeling more and more tired these days and therefore much less motivated to cook, as I anxiously await the arrival of baby Wendy. She is due to be here by this Friday, but it seems like she is pretty comfortable where she is and she just might be waiting for the warmer weather before she decides to come! As of now, there are no signs of her showing up on Friday, unless you count being extremely huge, tired, and uncomfortable as signs!  I thought that having a compilation of quick and easy meals would help to encourage me to cook because I know that they require little preparation and cook time, and they seem to be healthier than pre-made meals from the grocery store. Pasta meals pretty much dominate the quick and easy meal list - I have definitely been craving carbs all throughout my pregnancy.

If you are super tired these days or you find yourself pressed for time in the evenings, this post is for you, too! Enjoy.

Quick and Easy Meals Roundup 


Eggplant Parmesan (Romano) Burgers
Tortellini Soup with Sun Dried Tomato, Artichokes, and Chickpeas
Creamy Lemon and Thyme Pasta 
Super Easy Pad Thai (no meat)
Penne Pasta with Arugula Pesto, Chicken Sausages and Goat Cheese
Crustless Quiche with Quinoa, Kale and Peppers
Savory Kale and White Bean Soup
Spicy Bean Burritos 
Quinoa, Corn and Black Bean Wraps
White Chicken Chili Soup 
Pasta with Red Grapes and Sausage 
Easy Chicken Risotto with Caramelized Onions

So, there you have it. The easiest meal on this list would definitely be the tortellini soup. It seriously takes less than 15 minutes from start to finish. The creamy lemon and thyme pasta only requires one pot, so that's nice for clean up! I hope you find these meals to be as convenient and as delicious as I do.

Just for fun I'd like to share a couple pictures of Wendy's nursery . My parents and husband have been doing major home renovations in the last several months and they are turning out to be amazing. I was pretty scared about a month ago that things would never get finished before Wendy was born. I am super impressed with the way things have turned out and wanted to share!


Saturday, March 15, 2014

Cheesy Spinach Soup with Potato (a fun soup for St. Patrick's Day)!

I was actually surprised at how tasty this soup was. I mean, I guess I shouldn't have been too surprised, because it came from a food blog that I love. But how could something so healthy and green be so yummy? Well, it's probably the cheese!

I think this soup is a fun and festive meal or side for St. Patrick's Day. You can call it Luck of the Irish Soup! It also is a good idea for Halloween, when it can be Witches Brew Soup or Spooky Green Soup. But, you don't have to eat this soup only two times out of the year, you can eat it any time. It's super healthy, easy to make, and delicious. Serve the cheesy spinach soup with some grilled cheese sandwiches, if you want to make it a heartier meal. I used the leftover swiss cheese for the grilled cheese sandwiches and they tasted great. I also included a recipe below for grilled cheese because I seriously had to look up on the Internet how to make grilled cheese sandwiches. So, if you are like me, you might benefit from having the recipe!

Enjoy & have a happy (and safe) St. Patrick's Day. Here in Annapolis we are getting ready for a shamrock snowstorm, even though it's 60 degrees today. I am hoping that Spring will come soon and stick around for good!

Recipe for Cheesy Spinach Soup with Potato (a fun soup for St. Patrick's Day)!

INGREDIENTS:
3 Tbsp. of unsalted butter
1 medium to large yellow onion, chopped coarsely
2 cloves of garlic, chopped coarsely
A dash or two of salt
Several grinds of freshly ground black pepper
A pinch or two of ground nutmeg
1 large russet potato, peeled and cut into about 1 inch cubes
4 cups of chicken broth (or vegetable broth, if you want to make it vegetarian)
9 ounces of baby spinach leaves (I used the the pre-rinsed/packaged kind)
1/4 cup of fresh parsley leaves
4 ounces of Swiss cheese, grated
1/4 cup of heavy whipping cream
Sour cream or greek yogurt, for topping (optional)

DIRECTIONS:
Put the butter into a large pot and melt over medium heat. Add in the onions and cook until they are tender, about 4 - 5 minutes. Add in the chopped garlic, potato, salt, pepper, and nutmeg. Cook until the garlic is fragrant, about 1 minute. Stir in the chicken broth and bring the broth to a boil. Then adjust heat to medium low so the soup simmers, and cover the pot. Cook for 10 - 15 minutes or until the potatoes are tender when poked with a fork.

Pour in the baby spinach leaves and parsley. Stir so the spinach leaves are covered by the broth. Cover the pot and cook until the spinach leaves are wilted, about 2 minutes. Then turn off the heat and remove pot from heat. Carefully puree the soup with an immersion blender until the soup is smooth and creamy. Return the soup to the stovetop and put the heat on low. Stir in the Swiss cheese and stir until the cheese is fully melted. Stir in the heavy cream. Taste soup, add extra salt, pepper, and/or nutmeg if desired. Serve soup and garnish each bowl with sour cream or greek yogurt and parsley leaves, if using.

Recipe Makes 4 - 6 servings.
Recipe Adapted from: Annie's Eats

I know this might seem silly, but I actually had to Google how to make grilled cheese sandwiches! I mean, I knew the basic concept, but I still needed that extra support. So here is a recipe for grilled cheese sandwiches that you can eat with the soup, and you can use the leftover Swiss cheese for the sandwiches.

Recipe for Grilled Swiss Cheese Sandwiches (makes one sandwich)

INGREDIENTS:
2 pieces of white sandwich bread
2 Tbsp. unsalted butter, slightly softened so it spreads well
Slices of Swiss cheese
A very small pinch of ground nutmeg (optional)

DIRECTIONS:
Put a large saute pan on the stovetop and turn heat on medium high. While pan is heating, butter both sides of the two pieces of bread (making sure to leave 1/2 Tbsp. leftover for the pan). Once pan is hot, add the remaining 1/2 Tbsp. of butter to the pan. Once butter it is melted and slightly sizzling, put one piece of bread in the pan and top with slices of cheese. Sprinkle on the nutmeg if using.  Put the other piece of bread on top. Cook for a couple minutes and then flip (the bottom side should be light brown and toasty). Cook for about another minute and then transfer to a plate. Eat it while it's hot!
*If you make additional sandwiches, make sure to put additional butter in the pan before you make each one. 

Saturday, March 1, 2014

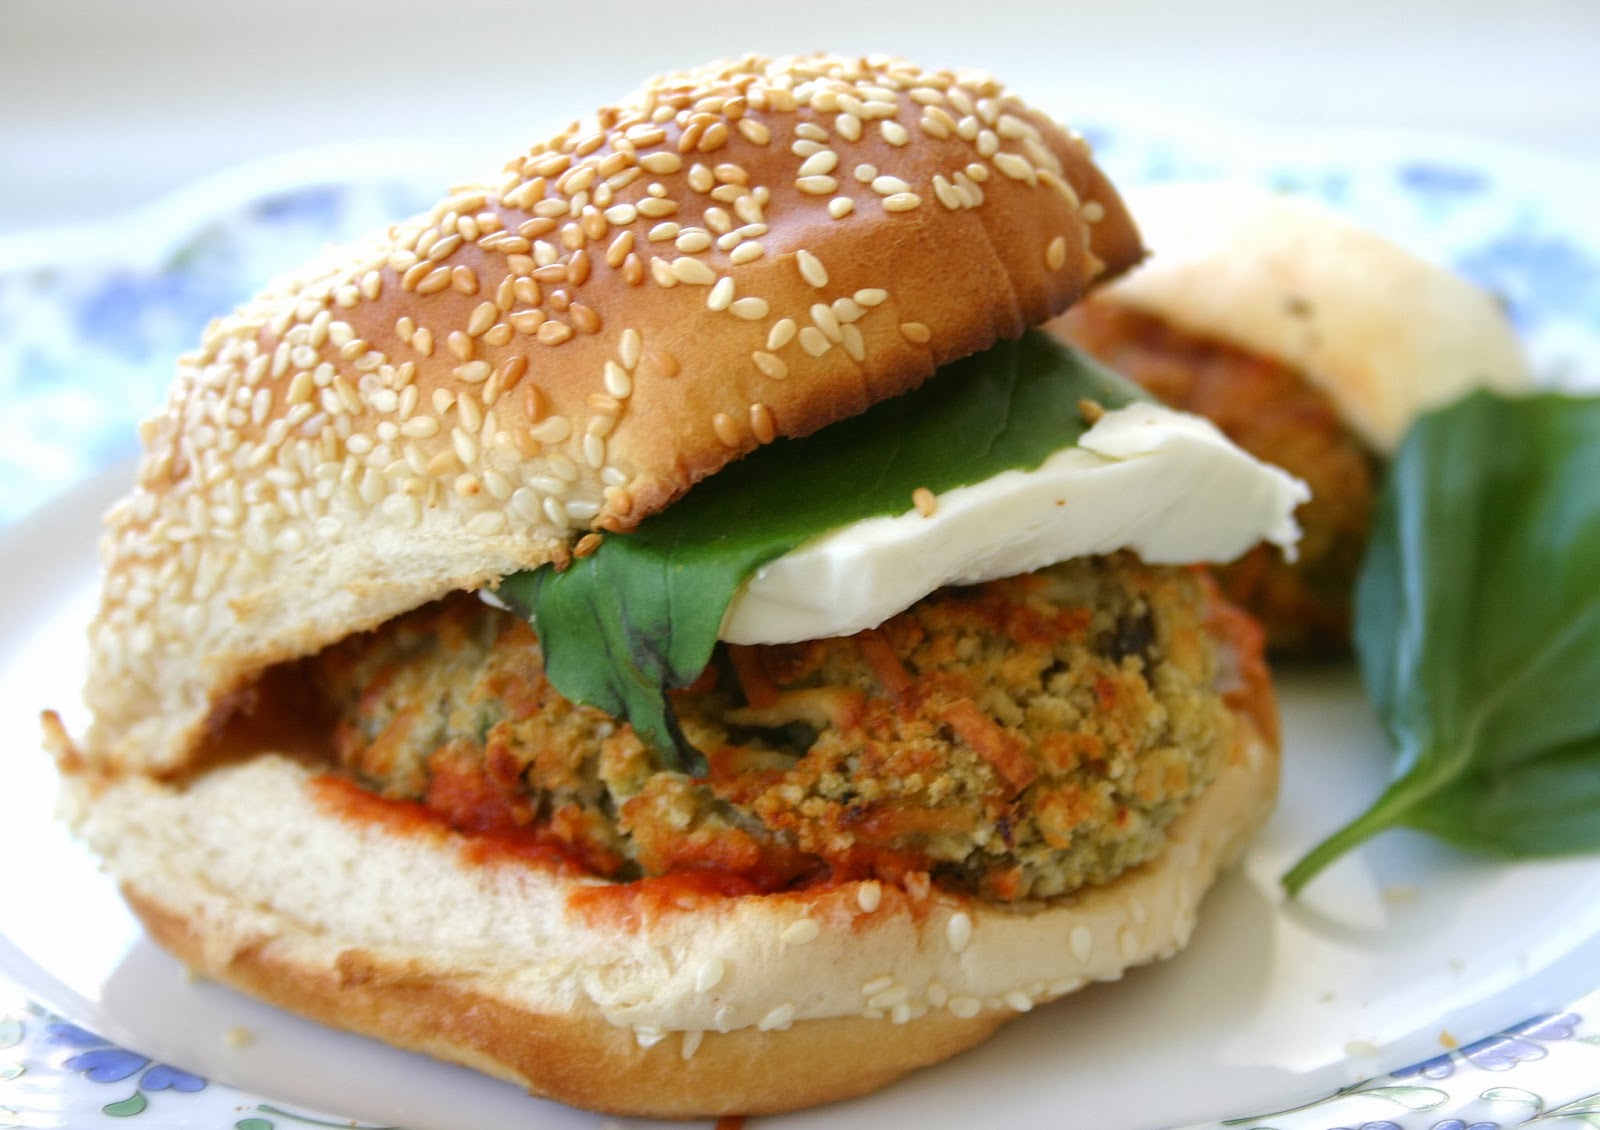
Eggplant Parmesan (Romano) Burgers

Hmm, can I call this Eggplant Parmesan if it doesn't actually have Parmesan in it? I don't know, but that's what I'm doing here. I think Pecorino Romano cheese is close enough in taste to Parmesan, and it's way less expensive! A container of shredded Parmesan at Wegman's is close to $8, and the Romano is only $4. Why is Parmesan SO expensive?

Anyways, I called Greg from work the other day to ask him if it was okay if I made a yummy pasta dish again, and he said he wasn't sure...because his stomach felt like it had turned into pasta (or mush). Ok...! Maybe we had been eating a lot of pasta, with the tortellini soup and the ziti with sausage, but I am liking my carbs these days. I searched my Pinterest board from top to bottom for inspiration. Nothing stood out to me...except for the eggplant dishes. There was a basic baked eggplant parmesan that looked good, but then I came across these burgers - and they looked easier to make and also required less ingredients. I'm glad I went with them! They are super tasty and fairly easy to make. They also taste great without the bun too, just serve with the marinara sauce on the side. I was hoping to roast some potatoes to go along with them but I forgot to get the potatoes when I was at the store! I think they would make a nice side. Just to warn you, Greg pointed out that these will kill your breath...thanks to the garlic (but it is worth it - plus garlic fights off illness and vampires)! Enjoy.

Recipe for Eggplant Parmesan (Romano) Burgers

INGREDIENTS:
2 pounds of eggplant, peeled and cut into 1-inch cubes
Salt
2 1/4 cups of Panko breadcrumbs
2/3 cup of grated Pecorino Romano cheese
3 Tbsp. of fresh basil, chopped finely
3 - 4 cloves of garlic, pressed
Several grinds of freshly ground black pepper
2 Tbsp. of extra-virgin olive oil, plus more for drizzling
2 eggs, beaten
Marinara sauce
Fresh mozzarella cheese, sliced
Basil leaves, for garnishing
Your favorite burger buns

DIRECTIONS:
Add about 1/2 Tablespoon of salt to a large pot of water and bring to a boil. Add in the cubed eggplant pieces to the boiling water and cook for 10 minutes, making sure to stir frequently and making sure that all of the eggplant gets submerged into the water (it has a tendency to stay on the surface). Drain the eggplant in a colander and allow it to cool.

Arrange oven so that a rack is in the second to top position. Preheat the oven to 425 degrees.

While eggplant is cooling, put the Panko breadcrumbs, cheese, garlic, black pepper, and olive oil into a large bowl. Beat the eggs in a separate bowl. Once eggplant is cool, put it between a clean dishcloth and press down and try to get out as much excess moisture as you can. Then transfer the eggplant to a cutting board and chop finely or use your hands to tear and place into the bowl with the bread crumbs. Add in the beaten eggs and gently stir the mixture together. Use your hands to form about 6 - 8 patties, adding in more breadcrumbs if necessary (if mixture seems to moist). Place each patty on a parchment paper lined baking sheet. Drizzle about 1 tsp. of olive oil over top each patty and sprinkle with some freshly ground black pepper. Place the patties in the oven and cook for 8 minutes, then rotate the pan and cook for another 7 - 8 minutes. While they are cooking, lightly toast the buns. About 1 minute  before the patties are finished cooking, add a piece of mozzarella cheese on top of each patty and cook for one more minute or until cheese is bubbly and melted. Remove eggplant patties from oven. Assemble burgers. Spread desired amount of marinara sauce on each side of the bun, put a patty on the bottom half, and top with a basil leave (or serve the patty without the bun and put the marinara sauce on the side for dipping). Serve with a side of roasted potatoes or potato chips, if desired.

Recipe Adapted from: Annie's Eats, originally from Eats Well With Others 

Sunday, February 9, 2014

Lentil and Potato Tacos

I've missed you, tacos! For so long I have been wanting to make my sweet potato tacos or chorizo tacos, but something kept getting in the way. I'm not sure what it was...but I was prevented from making those tacos! Maybe it was because I was supposed to make these lentil and potato tacos instead. I was going through recipes for inspiration the other day because I have kind of found myself in a cooking block and I came across some good looking recipes. I found these lentil tacos with homemade taco seasoning and wanted to give them a try. I added the potatoes for some extra filling, and because I just love potatoes in tacos. I had never had lentils in tacos before, and they worked well. They are kind of crunchy and the seasoning on them was perfect. I topped my tacos with sour cream, salsa, and avocado - but you can do your fave toppings! Leave out the sour cream to make them vegan. Enjoy!

Recipe for Lentil and Potato Tacos

INGREDIENTS:
1 Tbsp. of extra virgin olive oil
1 1/2 pounds of red potatoes, cut in 1/4 - 1/2 inch cubes
1/2 cup of finely diced red onion
2 cloves of garlic, pressed
Salt and pepper
1 1/4 cup of dried lentils
2 cups water (for cooking the lentils)
1 Tbsp. of chili powder
1 1/2 tsp. of ground cumin
1/2 tsp. of paprika
1/2 tsp. of kosher salt
1/2 tsp of black pepper
1/4 tsp. of garlic powder
1/4 tsp. of dried onion flakes
1/4 tsp. of dried oregano
1/8 tsp. of crushed red pepper flakes
2 1/2 Tbsp. of ketchup (I used a black pepper ketchup - if you can find this, it has a great flavor)
10 six-inch soft flour tortillas
Sour cream (leave out to make this meal vegan)
Your favorite salsa (I used Costco's Kirkland organic medium salsa)
Chopped avocados

DIRECTIONS:
Preheat the oven to 375 degrees. Place the cubed potatoes, red onion, and garlic into a bowl and toss to coat well with the olive oil, salt, and pepper. Spread the mixture in a single layer onto a baking pan and place in the oven. Cook for 30 - 35 minutes or until potatoes are crisped but not burnt, tossing every 5 minutes or so with a spatula so the mixture doesn't stick to the pan and cooks evenly.

While the potatoes are cooking, place the water into a pot and add in some salt. Bring to a boil. Add in the lentils, stir, and then lower the heat to medium low. Cover the pot and cook for about 25 minutes or until all the water has been absorbed. Then take lentils off heat and stir in the chili powder, cumin, paprika, kosher salt, black pepper, garlic powder, dried onion flakes, dried oregano, crushed red pepper flakes, and ketchup. Mix well.

Zap the tortillas in the microwave for about 30 seconds so they are warmed and easy to fold. Assemble the tacos. Scoop the potato mixture down the middle, top with the lentils, and then add on the sour cream, salsa, and avocado. Serve with your favorite tortilla chips.

*Recipe makes about 10 tacos. 

Recipe adapted from: A Couple Cooks 

Thursday, January 16, 2014

Creamy Lemon & Thyme Pasta (with or without Kale)

This is one of the easiest pasta dishes I have ever made. It takes less than 20 minutes to make from start to finish. I think it can be served alone as a main course, or you can serve it as a side with meat. The first time I made it I added some kale greens and this is a great idea if you want to get your healthy greens in! This meal is great for weeknights because it is so quick and easy, and it also makes enough to have for leftovers. Another bonus of this creamy lemon and thyme pasta is that all you need to make it is one large pot! The pasta cooks with the sauce, which makes it extra yummy and flavorful. Enjoy!

Recipe for Creamy Lemon & Thyme Pasta

INGREDIENTS:
4 Tbsp. of dried onion flakes
3 garlic cloves, pressed
1/4 tsp. of crushed red pepper flakes
1 tsp. of dried thyme
1/2 tsp. of freshly ground black pepper
1 1/8 tsp. of kosher salt
3 tsp. of lemon zest (use a microplane to zest)
2 1/2 Tbsp. of extra-virgin olive oil
1/2 cup of white cooking wine
1 12-ounce can of evaporated milk
4 cups of water
1 pound of penne pasta
3/4 cup of freshly grated Parmesan cheese
1 Tbsp. of freshly squeezed lemon juice
1/3 cup of heavy cream
2 - 3 cups of chopped kale greens (optional)

DIRECTIONS:
In a large pot, combine the onion flakes, garlic, red pepper flakes, thyme, black pepper, salt, lemon zest, olive oil, cooking wine, evaporated milk, water, and penne pasta. Set the pot over medium-high heat and bring to a boil. Stir the pasta often (about every minute) and boil until the pasta noodles are al dente and almost all the liquid from the sauce has been absorbed (about 10 - 12 minutes).

Remove the pot from heat. Stir in the Parmesan cheese, lemon juice, heavy cream, and greens (if using). Let the pasta rest for 5 minutes then stir again and divide amongst serving dishes. Top each dish with freshly ground black pepper and Parmesan cheese, if desired.

Makes 6 - 8 servings. 

Recipe Adapted from: Pink Parsley