Translate

Showing posts with label candies. Show all posts

Sunday, March 15, 2015

Homemade Chocolate Peanut Butter Cups (way better than Reese's)!

I created something in my kitchen the other day that was truly amazing. A friend of mine was celebrating a birthday, and I remembered that she had said that Reese's peanut butter cups were her favorite candy. I found this homemade peanut butter cup recipe online, and I didn't think that I had everything i needed to make them. I almost decided to make peanut butter whoopie pies instead, but then at the last second I realized I had what I needed to make these adorable little treats! They were incredibly easy to make, and they tasted way better than I had even imagined that they would. I put some in a cellophane baggie, tied it with a cute ribbon, and delivered my gift. I also left quite a few of the peanut butter cups at home, but I only got to eat about two of them. My husband has been back at work on the home renovations with my dad, and they ate the peanut butter cups during their work breaks! They told me that they were way better than Reese's and that they were really, really good. I think you will probably agree. Enjoy!

Recipe for Homemade Chocolate Peanut Butter Cups (way better than Reese's)!

INGREDIENTS:
For the peanut butter filling
1/2 cup of creamy peanut butter
2 Tbsp. of unsalted butter, softened at room temperature
1/3 cup of confectioners' sugar (powdered sugar)
1/8 tsp. of salt

For the chocolate coating
1 cup of semisweet chocolate chips
1 cup of bittersweet chocolate chips
6 ounces of coarsely chopped milk chocolate
1 1/2 Tbsp. of creamy peanut butter

DIRECTIONS:
Line mini muffin pans with paper liners. Use a small pat of unsalted butter and your fingers to lightly butter the bottoms and sides of the liners. 

Put the peanut butter and softened butter into a bowl. Use a hand mixer set on medium speed to combine. Then add in the confectioners' sugar and salt and mix on medium speed until well incorporated. Taste, and add in more sugar or salt to desired taste. Set aside.

Put the semisweet chocolate chips, bittersweet chocolate chips, milk chocolate, and peanut butter into a microwave safe bowl. Microwave on medium power for about a minute, then stir. Continue microwaving for about one minute at a time and stirring until the chocolate is smooth.

Using a teaspoon, drop 1 to 1 1/2 teaspoons of the chocolate mixture into the bottom of each liner. Then use a half teaspoon and drop about 1/2 teaspoon to 3/4 teaspoon of the peanut butter mixture on top of the chocolate. Then top the peanut butter with another teaspoon or so of the chocolate. Add on decorative sprinkles, if desired. Place them in the fridge until they are set, about 2 hours.

Enjoy them right out of the fridge for more of a crunch, or at room temperature for a more smooth texture. Delicious either way!

Recipe Adapted from: Taste of Home

Makes approximately 2 dozen peanut butter cups.

Wednesday, February 12, 2014

Dark Chocolate Raspberry Truffles


Please visit my new blog, Make It and Bake It with Beth, for the recipe for Dark Chocolate Raspberry Truffles.

Thursday, December 6, 2012

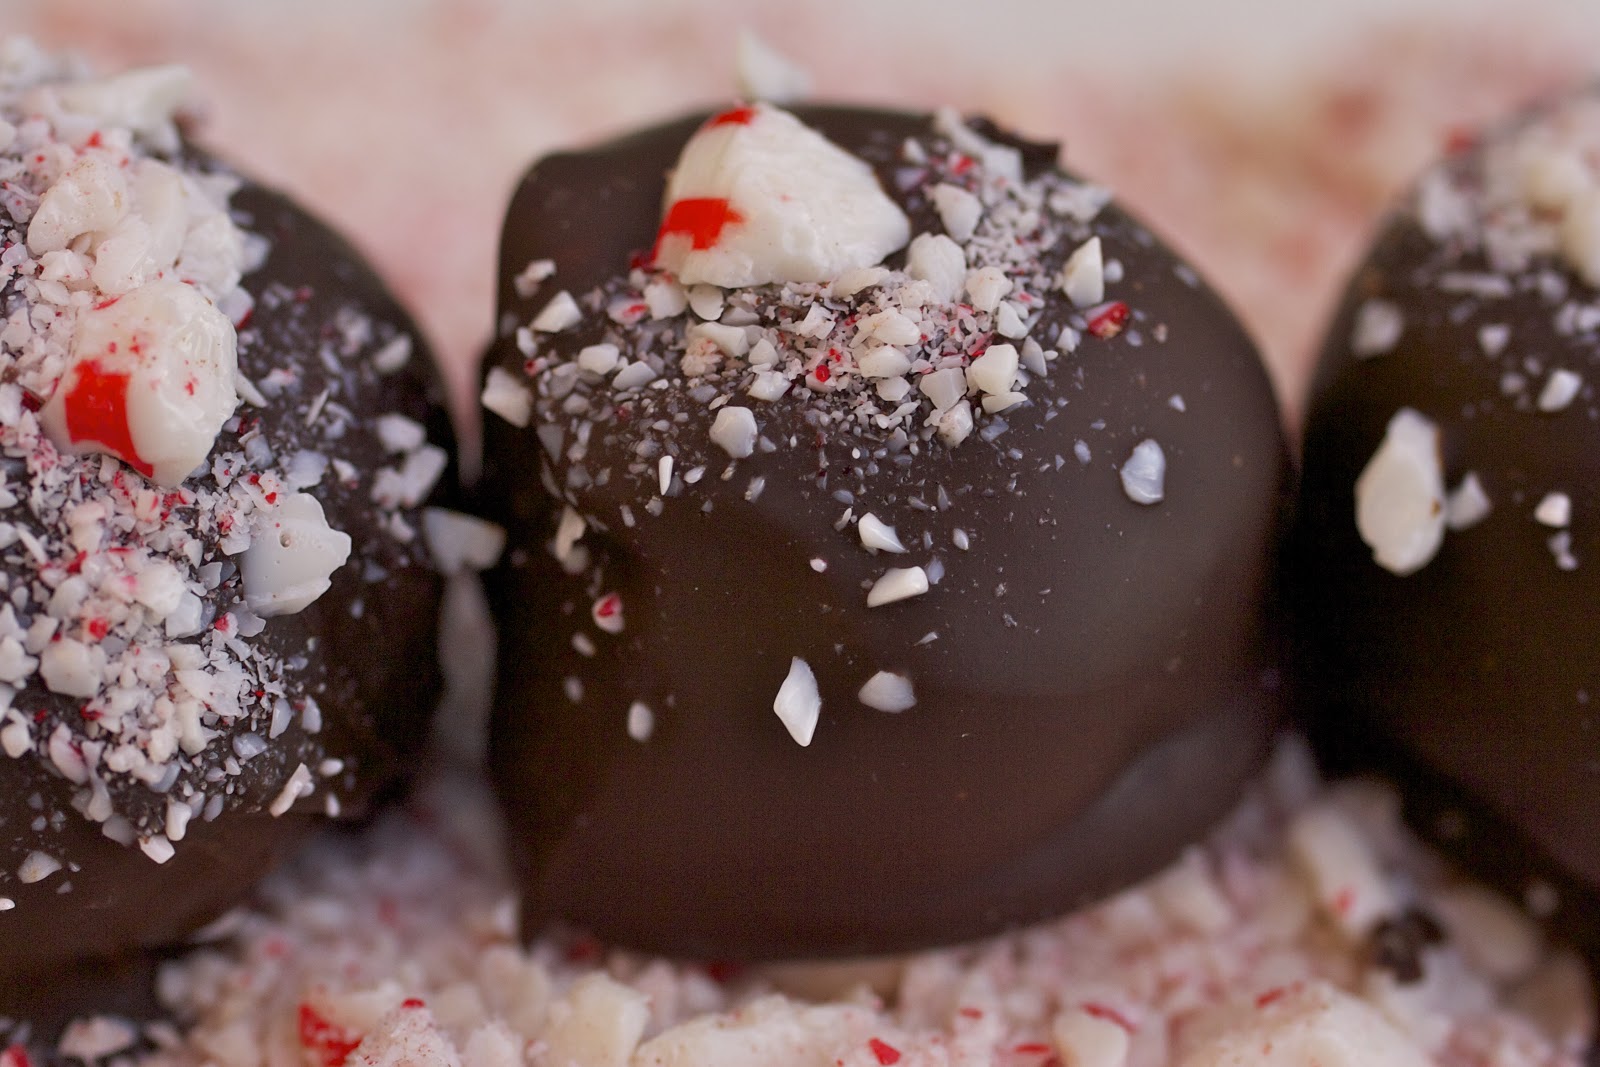
Dark Chocolate Peppermint Truffles


I was going to wait to post this recipe over the weekend, but I am just so excited about it that I had to share it now! I made peppermint truffles for the first time yesterday. The filling was made with a dark chocolate ganache with peppermint extract, and then I dipped them in dark chocolate and sprinkled on some crushed mints. They were pretty amazing. I took some by a friend's house this morning on my way to work, and she messaged me to let me know that they are the best truffles I have ever made (she has sampled the coconut truffles, sweet cream and walnut truffles, cookie dough truffles, and pumpkin truffles)! I think I might agree with her, but I need to go eat another one before I can know for sure. Greg loved them too, and so did my coworkers at the elementary school.

These truffles are the perfect holiday baking project - all of your friends, coworkers, and family would love to have some of these delicious festive treats! They would also be great to serve at a holiday party, or at a shower that is held during the holiday season. Enjoy.

Recipe for Dark Chocolate Peppermint Truffles 
INGREDIENTS:
For the filling
10 ounces of semisweet baking chocolate, chopped very finely
8 ounces of whipping cream or heavy whipping cream
1 1/2 - 2 tsp. of peppermint extract (I used 2 tsp.)
For the coating
16 ounces of semisweet baking chocolate, coarsely chopped or broken in half
10 - 15 crushed mini candy canes or Starlight mints

DIRECTIONS:
For the filling
Chop the chocolate. It can be chopped by putting it into the bowl of a food processor and pulsing until chopped very finely. Put the chocolate into a heat-safe metal bowl. Put the cream into a small saucepan. Set the saucepan over medium heat and bring it to a simmer (watch it closely). Once it simmers, pour it over the chopped chocolate. Let it sit for 1 - 2 minutes. Gently stir the mixture for about a minute, making sure to fully incorporate the cream and chocolate together. Stir it until it is smooth and completely dark in color.  Stir in peppermint extract.  Let it rest on the countertop for about 10 minutes. Cover the bowl with a lid and place it into the refrigerator for several hours, to allow the mixture to harden.

Use a cookie dough scoop to scoop up the mixture and then roll with your hands into 3/4-inch to 1-inch balls. Place the balls onto parchment lined containers. Cover the containers and place in the freezer for at least 2 hours.

For the coating
Line a baking sheet with parchment paper. Put the crushed mints on a corner on the baking sheet or in a small bowl. Use a small spoon to sprinkle the mints onto the truffles, when ready for that step.

Put the coarsely chopped chocolate into a small to medium saucepan. Put about 3/4 cup of water into the bottom pan of a double boiler. Set the double boiler over medium-high heat. When steam begins to come up, place the saucepan with the chocolate on top of the boiler. Stir the chocolate frequently until it is completely smooth and melted. Turn off the stovetop. Take one container of the filling out of the freezer. Drop one of the balls into the melted chocolate, and use a spoon to completely coat. Use the spoon to carefully place the truffle onto the baking sheet. Sprinkle the crushed mints on top, while the chocolate is still wet. Repeat until each truffle is coated with the chocolate. Repeat with the remaining containers of the filling in the freezer.

Place the baking pan with the truffles in the fridge, and allow the coating to harden before serving.

Recipe makes 25 - 30 truffles.

Recipe Adapted from: Food For My Family 
Dark chocolate peppermint truffles - possibly the best truffles I have ever made...

NOTE: Since there is cream in the filling, it is best to store the peppermint truffles in the fridge - don't let them sit out long. 

Saturday, November 17, 2012

Chocolate Marshmallow MADNESS!


I thought I was making up a new truffle recipe when I made these, and the name of the truffles were going to be "chocolate marshmallow madness truffles." But then I realized they weren't really like truffles, because they turned out to be more like chocolate marshmallow yumminess and gooeyness - covered in chocolate. Yes, I really did make something chocolate and covered it with chocolate - and it was wonderful.

This recipe was inspired by the frosting on the ice cream cone cupcakes. I tried making these once before, but the butter did not work too well in the recipe. So I omitted the butter this time, added some mini chocolate chips to the mix, and it was a success. My coworkers approved, Greg approved, and I hope you will also approve of the madness! Make sure to enjoy the chocolate marshmallow madness with a glass of milk.

Recipe for Chocolate Marshmallow MADNESS! 

INGREDIENTS:
For the inside:
2 7-ounce jars of marshmallow creme
1 1/4 cups of chocolate chips (regular sized)
1/4 cup of cocoa powder
1/2 tsp. of vanilla extract
1 - 1 1/2 cups of mini chocolate chips (depending on your desired amount of chunkiness)
For the coating:
16-ounces of semisweet baking chocolate squares, broken in half

DIRECTIONS:
For the inside:
Melt the 1 1/4 cups of regular-sized chocolate chips in a smallish saucepan set over medium-low heat, stirring occasionally. Remove the chocolate from heat once it is melted and smooth. Set aside to cool slightly.
Put the marshmallow creme, cocoa powder, and vanilla extract into a large mixing bowl. Add in the slightly cooled melted chocolate and the mini chocolate chips. Using an electric hand mixer set on medium-low speed, beat the mixture together for a couple minutes until it is smooth and all ingredients are well incorporated. Stir in more mini chocolate chips, if desired. Cover the bowl with a lid and put it in the fridge for several hours, preferably overnight.
After mixture has been refrigerated, line a couple freezer-safe containers with parchment paper. Take the mixture out of the fridge and use a cookie dough scoop to form the marshmallow filling. Scoop a little out and roll into 1-inch (or larger) balls. Place each one onto the parchment lined containers. Cover the containers with foil and place in the freezer for a few hours (or more).
For the coating:
Line a baking sheet with parchment paper.
Place the broken squares of baking chocolate into a medium-sized saucepan. Prepare a double boiler with about 1/2 cup of water, and set the double boiler over medium heat. Once steam starts to come up through the boiler, set the saucepan of chocolate on top. Allow the chocolate to melt, stirring frequently. Once the chocolate melts, turn off the heat. Take the chilled chocolate marshmallows out of the freezer. Drop each one into the melted chocolate one at a time and use a spoon to coat. Use the spoon to carefully place each one onto the prepared baking pan. Once you have coated each one, place baking sheet into the refrigerator. Allow the chocolate to harden. Once the chocolate has hardened, they are ready to eat. I found that they actually taste best at room temperature, so you can take them out of the fridge to sit until they are ready to be served.

Monday, July 16, 2012

Who Wants More Truffles? (Recipe for Sweet Cream & Walnut Truffles)


I really love truffles. I also really love to make truffles, and I sometimes find myself brainstorming new truffle recipes...

When Greg and I sailed to St. Michaels back in the beginning of June, we visited a cute cupcake and ice cream shop. I ordered sweet cream ice cream because it's my favorite, and as we were walking around I started thinking about how delicious a sweet cream truffle would be. I thought about how I would make them, and I decided that adding walnuts to the mix would be a good idea.

A few days after we got home, I tried out the truffle recipe. I dipped the truffles in milk chocolate, white chocolate, and dark chocolate - because I really wasn't sure which one would taste the best. In my opinion, the dark came in first, with the white not far behind, and the milk taking third place. However, they all tasted really yummy to me.

I tested the truffles out on a few of my friends, and in the end, the dark won. But, there are no rules here - so dip them in your favorite kind of chocolate! I just made another batch last night with the dark chocolate.

The filling for the truffles is a bit like a cream cheese frosting. You will get a bit messy when you shape the truffles, so have an ample supply of paper towels close by. These truffles are sweet, indulgent, and decadent. Someone said that they kind of taste like a chocolate covered cherry, but better. You'll only need to eat one in order to fulfill any dessert cravings after dinner! Enjoy.


Recipe for Sweet Cream & Walnut Truffles

INGREDIENTS:
1 stick of unsalted butter, softened at room temperature, but still cool
5 oz. of regular cream cheese
1 Tbsp. of almond extract
1 1/2 tsp. of vanilla extract
1 cup powdered sugar
3/4 cup of chopped walnuts
9 - 10 oz of baking chocolate, coarsely chopped (white, milk, or dark). I used SCHARFFEN BERGER.
Walnut pieces, for garnish (optional)

DIRECTIONS:
In a bowl, beat together the butter, cream cheese, almond extract, and vanilla extract with an electric hand mixer on medium-low speed until the mixture is fluffy (about 1 - 2 minutes). Add in the powdered sugar, and beat on low speed until well incorporated. Pour in the walnut pieces, and use a spoon to fold them into the mixture.  Cover the bowl with a lid and put in the fridge for at least 3 hours.

After chilling the mixture, line a freezer-safe container with parchment paper. Use a cookie dough scoop to scoop up the sweet cream mixture, and roughly shape into 3/4-inch to 1-inch balls with your hands (it will be messy - have paper towels nearby)! You can dust your hands with powdered sugar before shaping each one to reduce the amount of stickiness. Place each ball on the prepared container. Cover the container with foil, and place in freezer for a few hours, overnight if needed.

Put chopped chocolate in a pot. Prepare a double boiler by filling it 1/4 full with water and place the double boiler over medium heat. Once water begins to lightly simmer and steam forms, place the pot with chocolate on top of the boiler. Stir almost constantly until the chocolate is completely melted and smooth. Once chocolate is almost melted, remove balls from freezer. Prepare a baking pan or plate with parchment paper. Using a spoon, drop one or two balls at a time in the chocolate and fully coat. Place on prepared pan or plate, and if using the walnut pieces, immediately place a walnut piece on top of the truffle before dipping the next one.  When each one is dipped, place the pan/plate in the fridge so chocolate can harden, about 30 minutes. Store truffles in fridge until ready to serve. ENJOY!

Makes 1 1/2 - 2 dozen truffles. 


**Original Recipe**

Looking for more truffle recipes? Check out the recipes for cookie dough truffles & coconut truffles!