Please visit my new website, Make It and Bake It with Beth, for the recipe for Chocolate Silk Pie!
Sunday, November 27, 2016
Tuesday, November 15, 2016
Chocolate Chip Cookie Dough Cupcakes

I got together with a friend a few weekends ago, and we made these cupcakes for the first time. I had seen them before and thought about making them, but I always thought they looked too involved. Hey, they really are a little involved, but they aren't too tricky, and they are well worth the extra time in the kitchen.
So, what are you waiting for? Go make some chocolate chip cookie dough cupcakes and put a smile back on that face. Enjoy!
Recipe for Chocolate Chip Cookie Dough Cupcakes
INGREDIENTSFor the cupcakes
3 sticks of unsalted butter, at room temperature
1 1/2 cups of light brown sugar, packed
4 large eggs
2 2/3 cup of all-purpose flour
1 tsp. of baking powder
1 tsp. of baking soda
1/4 tsp. of salt
1 cup of 2% or whole milk
2 tsp. of pure vanilla extract
1 cup of semisweet chocolate chips
For the cookie dough filling
4 Tbsp. of unsalted butter, at room temperature
6 Tbsp. of light brown sugar, packed
1 cup plus 2 Tbsp. of all-purpose flour
7 ounces of sweetened condensed milk
1/2 tsp. of pure vanilla extract
1/3 cup of semisweet chocolate chips (regular or miniature)
For the cookie dough frosting
2 sticks of unsalted butter, at room temperature
2 1/4 cup of powdered (confectioners') sugar
2/3 cup of all-purpose flour
1/2 tsp. of salt
2 Tbsp. of milk
2 tsp. of pure vanilla extract
Extra chocolate chips, for topping cupcakes
DIRECTIONS
For the cupcakes
Preheat the oven to 350 degrees. Line two cupcake pans with paper liners. Put the butter and the brown sugar in a large mixing bowl and use an electric hand mixer to mix on medium high speed until light and fluffy, about 3 - 4 minutes. Then add in the eggs one at a time, beating well after each addition.
Combine the flour, baking powder, baking soda, and salt in a medium mixing bowl and stir together. Add one third of the flour mixture into the butter mixture and beat on low speed, then add 1/2 cup of the milk and beat again on low speed. Continue alternating and end with the dry ingredients, mixing each time until just incorporated. Add in the vanilla extract and mix. Fold in the chocolate chips.
Divide the batter evenly into the paper liners. Bake for 18 - 20 minutes, or until a toothpick inserted in the center of the cake comes out clean. Allow the cupcakes to cool in the pan for 10 minutes, then transfer to a wire rack and let cool completely.
For the cookie dough filling
Once cupcakes are in the oven, make the cookie dough filling. Combine the butter and sugar in a mixing bowl and mix on medium high speed with an electric had mixer until light and fluffy, about 3 minutes. Then mix in the flour, sweetened condensed milk, and vanilla extract and mix until smooth. Stir in the chocolate chips. Cover the bowl and put in fridge until mixture is firm, about one hour.
To stuff the cupcakes
When cupcakes are cooled, add in the cookie dough! Cut a cone-shaped portion (or use a spoon and scoop) out of the center of each cupcake. Fill each hole with a ball of the cookie dough mixture. Use all of the filling to stuff the cupcakes - the more you have, the better the cupcake!
For the frosting
Put the butter and brown sugar into a medium mixing bowl and use an electric hand mixer set on medium high speed to beat until creamy. Add in the confectioners' sugar and mix until smooth. Add in the flour and salt and mix until just incorporated. Pour in the milk and vanilla extract and beat until smooth and well incorporated.
Frost the cupcakes, top with chocolate chips, and celebrate!
*Recipe makes approximately 2 dozen cupcakes.
Store cupcakes in an airtight container in the fridge.
Tuesday, August 2, 2016
Crispy Honey-Sriracha Tofu Tacos with Cucumber Mango Salsa (Vegetarian)

I recently went out to San Francisco to visit family, and I got to enjoy lunch at a favorite place, La Taqueria, in the Mission District of the city. It was hard to move in the restaurant and we had to circle like hawks to find seats to eat our food, but it was all well worth it. I tried the pork tacos there for the first time, and they were amazing. One thing that stood out about the tacos we ordered was that they were made with a double shell, with one crispy tortilla and one softer tortilla. We were given the best of both worlds, a soft taco and a hard taco all at the very same time! I tried the double shell method with these tofu tacos, but after trying a couple times, I found that the tastiest way to eat these is with one tortilla, baked in the oven to crisp up a bit. I think the best tortillas to use are* La Tortilla Factory white corn tortillas. They taste great, and they don't break! One of these days I am going to master the double shell method, though...
I topped these delicious tacos with cucumber-mango salsa, mashed avocado, and extra Sriracha sauce. I was a little nervous about tofu in my tacos, and I was truly amazed at how good they turned out. Even if you are not a vegetarian, I am pretty sure you will find these tacos to be quite tasty. Enjoy!
Stay tuned for even MORE taco recipes!
*In the photos, I used a different tortilla than the La Tortilla Factory brand and the tacos were made with the double shell.
Recipe for Crispy Honey-Sriracha Tofu Tacos with Cucumber Mango Salsa (Vegetarian)
INGREDIENTS:For the Cucumber-Mango Salsa
1 large, ripe mango, cut into 1/4-inch chunks
1/2 English cucumber, peeled and with the seeds removed, finely chopped
1/2 shallot, minced
1/2 jalapeno pepper, minced (with seeds removed)
Juice from 1/2 lime (save the other half for the avocado)
1/2 tsp. honey
Salt and pepper
For the tofu
12 ounces extra firm tofu, drained well, patted with a paper towel, and cut into 3/4-inch chunks
2 Tbsp. Sriracha sauce (plus a little more for adding to taco)
2 Tbsp. honey (plus a little more for drizzling)
1/2 cup + 1 Tbsp. of cornmeal
1/3 cup Panko breadcrumbs
2 Tbsp. all-purpose flour
1/4 tsp. salt
Freshly ground black pepper - about 1/8 tsp.
3/4 tsp. Ancho chile powder
1/8 tsp. of sweet smoked paprika
3 Tbsp. olive oil
1 - 2 Hass avocados

Good quality soft taco sized corn tortillas (I recommend La Tortilla Factory white corn)
DIRECTIONS:
Prepare the cucumber mango salsa. Toss the cucumber, mango, jalapeno, shallot, lime juice, honey, salt and pepper into a bowl and mix well. Cover and place in fridge until ready to use.
Preheat the oven to 315 degrees. Place tortillas on a baking sheet. Rub a very small amount of olive oil all over each side and sprinkle one side with a pinch of fine sea salt. Set aside.
Put the tofu in a large bowl. Mix together the honey and Sriracha sauce in a small bowl. Pour over the tofu, and gently toss to coat well.
In another bowl, mix together the cornmeal, Panko breadcrumbs, flour, salt, pepper, chili powder, and sweet smoked paprika. Then pour 1/3 of the cornmeal mixture over the tofu, and toss gently. Add another 1/3 of the mixture, toss again. Finish with the remaining mixture and toss again to coat the tofu well. Set aside.
Heat the olive oil over medium high heat until hot. Then carefully add in the tofu. Cook, undisturbed, for a few minutes, then gently stir and flip over, a few at a time, until all pieces have been flipped. Cook for 3 - 4 minutes more, then gently stir again. Continue to cook and gently toss until tofu is crisped up on all sides. Add in a drizzle or two of honey, and stir. Turn off the heat. Sprinkle the tofu with salt and pepper.
While the tofu is cooking, place the tortillas in the heated oven. Cook for a few minutes, then flip. You want the tortillas to be a little crispy, but not hard. You want a very light crisp so that they still fold well without breaking. That is why it is important to buy good tortillas!
While the tofu and tortillas are finishing up, mash up the avocado. Squeeze lime juice over the avocado, then sprinkle with salt and pepper.
Assemble the tacos. Top each warm tortilla with desired amount of tofu, cucumber-mango salsa, avocado, and Greek yogurt. Add a squeeze of Sriracha sauce, if desired.
Recipe makes approximately 6 - 8 tacos.
Tofu taco recipe adapted from: The Woks of Life
Cucumber-Mango salsa adapted from: Oh My Veggies
More taco recipes:
Potato, Chorizo & Goat Cheese Tacos with Smoky Aioli
Simple White Fish Tacos
Paladar's Sweet Potato Tacos
Coconut Encrusted Fish Tacos with Mango, Avocado Crema, and Sweet Chipotle Sauce
Steak Tacos with Smoked Tomatillo Salsa
 |
| Sweet potato tacos |
Tuesday, July 19, 2016
Steak Tacos with Smoked Tomatillo Salsa

Steak Tacos with Smoked Tomatillo Salsa
INGREDIENTS:3 tomatillos, husks removed and cut into halves
2 cloves garlic, peeled
1/2 small jalapeno pepper, seeds removed and sliced in 1/4" slices
1 7-ounce can chipotle pepper in Adobo sauce, divided
1 small green bell, sliced

1 small red bell, sliced
1/2 small red onion, sliced
3 Tbsp. of Olive oil, divided
salt and pepper
pinch of sugar
3/4 pound flank steak
Flour tortillas, soft taco size
Greek yogurt or sour cream (optional)
Sliced avocado (optional)
1/2 lime (optional)
DIRECTIONS:
Make the tomatillo salsa first. Put a nonstick skillet over medium-high heat. Place the tomatillos, skin side down, in the skillet, and add in the garlic and jalapeno pepper. Let it cook for about 7 minutes, or until the tomatillos are softened completely through. Then remove from heat and sprinkle with salt and pepper. Transfer contents of skillet to the bowl of a food processor. Add in 1 of the chipotle peppers from the can and 1 Tbsp. of water. Pulse until a salsa is formed. Put in a bowl and set aside. Add the remaining contents of the chipotle peppers to the food processor. Pulse until smooth. Put the steak on a large plate and brush all sides of the meat with a thin layer of the chipotle sauce. Let sit until ready to use.
Preheat oven to 200 degrees. Arrange the tortillas on a baking sheet and brush each side lightly with olive oil and sprinkle one side with a touch of sea salt.
In a large, nonstick pan, heat 2 Tbsp. of olive oil over medium high heat. Add in the peppers and onions, a dash of salt and the 1/8 tsp. of sugar. Cook, stirring frequently, until peppers and onions are cooked through. Transfer to a bowl or plate and cover with foil. Wipe pan out and place back over medium high heat with the last tablespoon of olive oil.
Place the tortillas in the oven.
Add the meat to the skillet. For medium, cook on one side for 4 - 5 minutes, then flip and cook for an additional 4 - 5 minutes. Remove meat and place on a cutting board. Let sit 5 minutes before cutting. If you want a little more kick in the meat, once it is cut, place back in skillet and set over low heat with a little extra sauce for about 1 minute.
Assemble your tacos. Remove warm tortillas from the oven. Place about 1.5 - 2 ounces of steak, peppers, onions, smoky tomatillo salsa, Greek yogurt, avocado, and a squeeze of lime into each and serve!
Recipe Adapted from: Annie's Eats, originally from Mexican Everyday by Rick Bayless
Recipe make approximately 3 - 4 servings.
Sunday, June 26, 2016
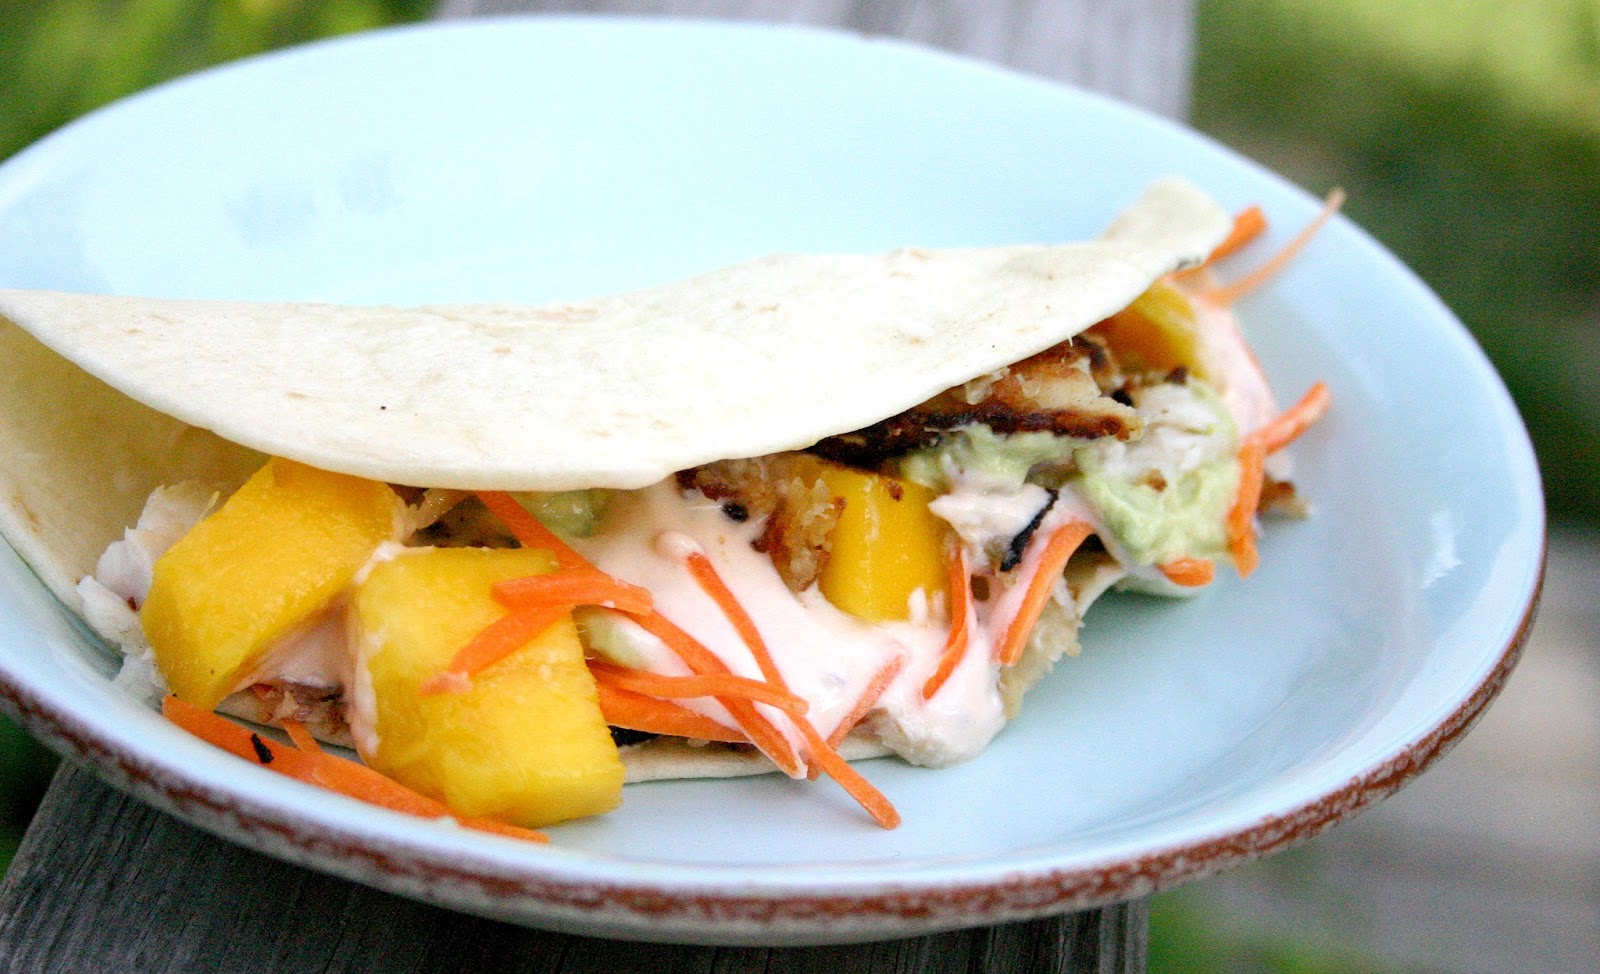
Coconut-Encrusted Fish Tacos with Mango, Avocado Crema, and Sweet Chipotle Sauce
*This summer I am also hoping to make many recipes with tomatoes and squash from our garden, as long as they do well this season. Last season our zucchini crop did not produce. I want to make lots of recipes from this list. And, of course, I will be making plenty of yummy desserts this summer!
Recipe for Coconut-Encrusted Fish Tacos with Mango, Avocado Crema, and Sweet Chipotle Sauce
INGREDIENTS:4 (4 ounce) frozen filets of flaky white fish (such as Alaskan Flounder), thawed
2/3 cup of flour
2/3 cup of Panko bread crumbs
1 1/4 cup of shredded sweet coconut (such as Bakers brand)
1/4 tsp. of smoked sweet paprika
1/8 tsp. of salt
Honey
Sea salt
Olive oil
Avocado Crema
2 large Hass avocados
Pinch of sea salt
3 Tbsp. of full fat Greek yogurt
Juice of one lime
1/2 tsp. of pure maple syrup
Sweet Chipotle Sauce
One chipotle pepper from can, minced very finely
1 tsp. of chipotle pepper sauce from can
1 tsp. of honey
1/3 cup of full fat Greek yogurt
Mango
2 mangoes, diced into 1/4-inch cubes
Juice of one lime
Pinch or two of sea salt
Assembling
Shredded carrots or cabbage
4 - 6 soft taco size flour tortillas
DIRECTIONS:
In a shallow dish, stir together the flour, Panko bread crumbs, coconut, smoked paprika, and salt. Pat thawed fish fillets dry with a paper towel. Drizzle a little of honey over one side of the fish, use your hands or a spoon to make sure honey is rubbed in, and then sprinkle with some sea salt. Flip, and repeat on the other side. Then dredge the fish fillets into the coconut mixture, coating each side. Place the coated fish on a plate or pan and set in the fridge for 30 to 45 minutes. Chop up the mangoes and place in a bowl. Squeeze juice of one lime over the chopped mango and sprinkle with sea salt. Place in container, cover, and put in fridge until ready to use.
Heat 1 Tbsp. of olive oil in a large non-stick saute pan over medium-high heat. Once oil is hot, add in 2 of the fish fillets (more if there is room in your pan, without overcrowding) in the pan, and cook for 2 - 3 minutes. Then flip, and cook for an additional 2 - 3 minutes, or until coconut is browned, but not burnt, and fish is cooked through and flaky. Remove fish from the pan. Place fish on a baking pan and keep warm in oven at 200 degrees while you cook up the remaining two fillets of fish. Before cooking the rest of the fish, wipe the pan clean with a paper towel and add another tablespoon of olive oil to the pan. Once all fish is cooked, transfer to a plate, drizzle with a little honey, sprinkle with sea salt, and cut up.
While the fish is cooking, make the avocado crema sauce and sweet chipotle sauce. For the avocado crema sauce, pit the avocados and remove the skin. Put the fruit of avocado into a bowl. Add the juice of one lime, pinch of sea salt, Greek yogurt, and pure maple syrup. Use a fork to stir well until completely smooth.
For the sweet chipotle sauce, add Greek yogurt, minced chipotle pepper, chipotle sauce, and honey to a bowl and mix well.
To assemble, warm tortillas by wrapping in paper towel and heating in microwave for about 30 seconds. Put cut up fish in tortilla, top with avocado crema, mangoes, sweet chipotle sauce, and carrots. Enjoy!
Recipe serves 2 - 3
Recipe Inspired by Beer Battered Fish Tacos, by Pink Parsley
Sunday, April 24, 2016
Avocado Ice Cream with Homemade Chocolate Syrup

Recipe for Avocado Ice Cream with Homemade Chocolate Syrup
INGREDIENTS:1/2 cup of organic cane sugar
1 1/4 cup of whole milk
3 small to medium sized ripe (but not overripe) avocados, pit and skin removed
2 tsp. of freshly squeezed lemon juice
1 1/4 cup of heavy whipping cream
DIRECTIONS:
Put the sugar, milk, avocado, and lemon juice into a blender. Mix until smooth. Pour into a large bowl. Stir in the heavy cream and whisk until well combined. Cover the bowl and place in the refrigerator for 3 - 4 hours. Then pour mixture into an automatic ice cream maker. Start ice cream maker, and let it mix for about 5 - 7 minutes, or until ice cream is formed. It will take less time than regular ice cream mixtures due to the thickness of the avocado. Then transfer ice cream into a freezer safe container and freeze for desired amount of time before serving.Serve ice cream with homemade chocolate syrup!
For the chocolate syrup:
INGREDIENTS:
1/2 cup sugar
2 1/2 Tbsp. of cocoa powder
1/8 tsp. salt
2 Tbsp. of unsalted butter
2 Tbsp. water
1/4 tsp. pure vanilla extract
DIRECTIONS:
Put the sugar, cocoa powder, and salt into a small saucepan. Add the 2 Tbsp. of water, more if needed, so mixture is able to be stirred. Add the unsalted butter. Put the saucepan over medium high heat, stirring constantly, until it comes to a boil. Let the mixture boil for 1 minute, then remove from heat and immediately stir in the vanilla extract. Serve warm or at room temperature over ice cream. Store any leftovers in an airtight container in the fridge for up to 5 days.
Saturday, March 26, 2016
Portobello Mushrooms Stuffed with White Beans, Spinach, and Prosciutto

Recipe for Portobello Mushrooms Stuffed with White Beans, Spinach & Prosciutto
INGREDIENTS:
4 large portobello mushrooms, with the stems and gills removed
2 Tbsp. of extra-virgin olive oil, divided
1 Tbsp. of balsamic vineger
salt and pepper
1 Tbsp. of unsalted butter
1 shallot, finely chopped
2 cloves of garlic, pressed
1 tsp. of fresh rosemary leaves
1 can of great northern or cannelini beans, drained and rinsed
 2 Tbsp. of chicken broth
2 Tbsp. of fresh parsley leaves
3 ounces of prosciutto, sliced thin
1 cup of baby spinach leaves
1/3 cup of finely grated Parmesan cheese
1/4 cup of Panko bread crumbs
DIRECTIONS:
Preheat the oven to 450 degrees. Mix 1 tablespoon of the olive oil and the balsamic vinegar together in a small bowl. Stir in some salt and pepper. Put the mushrooms cap side up on a baking sheet lined with parchment paper. Brush each cap lightly with the olive oil mixture. Place in the oven, and cook for 8 minutes.
While the mushrooms are cooking, put the butter and the remaining 1 Tbsp. of olive oil into a large pan and set over medium heat. Once the butter has melted, add in the chopped shallot, garlic, and rosemary leaves. Cook, stirring often, until the shallots have softened. Then stir in the beans and the chicken broth, remove from heat. Put the mixture into a medium bowl and add in the parsley and the prosciutto. Put the pan you used back over the stovetop on medium-low heat. Add in the spinach leaves and cook until wilted, about 1 - 2 minutes.
Once mushrooms have cooked for 8 minutes in oven, remove from the oven and carefully drain the liquid off. If needed, very carefully transfer mushrooms to a plate, wipe down the baking sheet, and line with new parchment paper (I decided to do this). Turn mushrooms over and stuff with the beans and spinach. In a small bowl, toss together the Panko bread crumbs and the Parmesan cheese. Evenly distribute over top of the mushrooms, and then drizzle each with a little bit of olive oil. Sprinkle a little salt and pepper over the top of each. Place back into the oven and cook for about 10 minutes, or until the tops are browned and crispy. Remove from oven, allow to cool for a few minutes, and then serve.
You can serve as a side to chicken or fish, or eat it as a light lunch. They taste good leftover, too! Greg said he liked them even better leftover, because they were even more flavorful! I think these would also be good with bacon or crumbled sausage in the stuffing. If you want to make it vegetarian, leave out the meat and add a little extra Parmesan.
Recipe adapted from: Self Magazine, November 2014 issue
Tuesday, February 16, 2016
Apple and Vanilla Pancakes with Fresh Thyme

Cooking is something that I love so much and it is a stress release for me. The meals and baked goods that I make and enjoy are something that I want to share with you. One meal that I have made a lot lately and I have thoroughly enjoyed are these apple and vanilla pancakes with thyme (thyme is not as good as time, but it will have to do). The thyme was actually just something I decided to throw in the batter when I made the pancakes on Valentines Day, and it was quite a nice addition to the sweet flavors of the apple and vanilla. If you want, you can leave it out, but if you have some on hand, I definitely suggest adding it in. These pancakes are super easy to make and they are pleasing to both kids and adults. I serve them with chicken sausages, apple slices, cheddar cheese, and maple syrup. The combination of those foods together is quite amazing. It is great for breakfast and just as satisfying for dinner. The recipe makes plenty of pancakes, so you may even have some leftover, and Wendy can tell you that they hold up pretty well as leftovers. I hope you get a chance to try this recipe out, and I hope you find these apple and vanilla pancakes as incredible as we do!
Recipe for Apple and Vanilla Pancakes with Fresh Thyme
INGREDIENTS:
1 cup of diced apples (I used Gala)
3/4 tsp. of cinnamon
2 Tbsp. of light brown sugar or pure maple syrup
1 1/3 cups of all-purpose flour
2 1/2 tsp. of baking powder
1/2 tsp. of salt
2 Tbsp. of unsalted butter, melted
1 1/4 cups whole milk*
1 Tbsp. of freshly squeezed lemon juice*
2 large eggs
1 tsp. of pure vanilla extract
A pinch or two of torn fresh thyme leaves
Unsalted butter for the pan
Butter and pure maple syrup, for serving
DIRECTIONS:
Put the chopped apple, cinnamon, and brown sugar or maple syrup into a smallish bowl and give it a stir. Set aside.
Put the milk and lemon juice into a liquid measuring cup and allow to sit for five minutes before using (*or you can use 1 1/4 cup buttermilk ins place of the milk and lemon juice mixture - I choose not to because every time I buy buttermilk it goes to waste because I never can use the entire container).
Sift together the flour, baking powder, and salt in a medium bowl.
In a large bowl, whisk together the melted butter, milk and lemon juice (after it has sat for 5 minutes), and eggs. Stir in the vanilla extract. Slowly add the flour into the butter mixture and stir until just combined. Then fold in the apples, and the thyme, if using.
Heat a large pan over medium heat. Add in about a tablespoon of butter. Once it is melted, scoop about a tablespoon of batter into the pan and continue adding tablespoons so you can cook about 7 - 8 pancakes at a time. Cook for about 2 minutes, flip, and cook another two minutes.
I usually heat the oven to about 250 degrees, butter a baking pan, and let the pancakes that have already been cooked in the pan keep warm in the oven. Also, since the pancake pan can get really hot, I sometimes give it a rest off the heat and then wipe it out with a paper towel between pancake batches.
Serve the pancakes with butter and maple syrup. For a hearty meal, serve with chicken sausages, cheddar cheese slices, and apple slices.
Recipe makes approximately 28 pancakes.
Recipe adapted from: Weelicious cookbook
Sunday, February 7, 2016
Eggs Baked in an Avocado with Fresh Herbs & Sriracha Sauce

Recipe for Eggs Baked In Avocado with Fresh Herbs & Sriracha Sauce
INGREDIENTS1 Hass avocado (any size, I've been using smallish ones lately), cut into half lengthwise with pit removed
Juice of 1/2 lime

2 eggs
Extra-virgin olive oil
Crushed red pepper flakes
Sriracha sauce
Fresh Herbs (thyme, dill, parsley, whatever you want)
DIRECTIONS
Preheat the oven to 400 degrees. Line a baking sheet with foil.
Scoop out some of the avocado from each half so that there is enough room for the egg in each. Squeeze desired amount of lime juice over each avocado half. Sprinkle each with salt and pepper. Crack one egg into one half of the avocado. Don't worry if some of the white runs out, you just want to make sure the yolk is in the avocado. Crack another egg into the other half of the avocado. Place in oven and bake for 12 - 14 minutes, depending on how runny you like your yolks. Make sure the egg whites are set and not runny, though! Remove from oven and drizzle with olive oil and sriracha sauce. Sprinkle with salt and pepper, crushed red pepper flakes, and fresh herbs.
Grab a fork or spoon and dig in (make sure you only eat the fruit of the avocado and the eggs - discard the peel)!
Recipe Adapted from: Serious Eats
BRAIN FOOD
Brain benefits of Avocado: Cognitive functioning and mood.
Brian benefits of Eggs: Cognitive functioning, focus, and mood.
Brain benefits of Olive Oil: Cognitive functioning and memory.
Brain benefits of Lime: Cognitive functioning, memory, and mood.
Information from: The Healthy Mind Cookbook
Monday, January 25, 2016
Baked Hot Chocolate

Recipe for Baked Hot Chocolate
INGREDIENTS: 5 ounces of semisweet baking chocolate, finely chopped (I used SCHARRFEN BERGER 62% baking bar)
3 1/2 Tbsp. of unsalted butter, cut into small cubes
 |
| SNOW DAY + BAKED HOT CHOCOLATE = HAPPINESS |
2 Tbsp. of pure cane sugar (or granulated)
A pinch of cinnamon (optional)
DIRECTIONS:
Position the oven rack to the middle and preheat oven to 350 degrees. Put two 8-ounce oven-proof mugs or ramekins into a baking pan or roasting pan.
Put an inch of water in the bottom pan of a double boiler and set over medium high heat. Bring to a gentle simmer. Put the chopped chocolate and butter in the top pan of the double boiler and set over the simmering water, stirring until fully melted and smooth. Set aside. Leave the bottom pan with the water on the stovetop and continue to let it simmer.
Put the eggs, sugar, and cinnamon in a small saucepan and whisk together with a fork. Then use the handle of the saucepan to hold it over the simmering water for a few minutes or until warm, almost hot to the touch(I just literally held it over the steam from the water - it's a good workout...). Then use a hand mixer set on medium-high speed to beat the egg and sugar mixture until light and fluffy, about 3 - 4 minutes. Carefully pour the egg mixture into the chocolate mixture, making sure that there is no water from condensation on the bottom of the pan that drips in (I used a towel to wipe the bottom of the pan before I added to chocolate mixture). Use a spoon to gently fold the eggs and chocolate together until smooth and you don't see any streaks. Pour or ladle into the mugs or ramekins. Pour very hot water into the baking dish, being careful not to let water splash into the mugs, until it reaches about halfway up the sides of the mugs. VERY carefully transfer the pan to the oven. Cook for 15 - 20 minutes, or until the tops are no longer shiny. Remove from oven, use a hot pad holder to remove the mugs out of the water, and place mugs on a cooling rack for a few minutes before serving. I topped mine with plain cream and some chocolate chips. I am sure it would be amazing with some fresh whipped cream too!
Baked hot chocolate is best enjoyed hot (in my professional opinion), but it can be also eaten at room temperature. You can cover well with foil and store in the fridge for up to one day. To reheat, first let it come to room temperature and then bake at 350 for 5 - 8 minutes.
Recipe Adapted from: The Essence of Chocolate Recipes for Baking and Cooking with Fine Chocolate
Recipe serves 2.
 |
| A shot of our home in the snow! |
Friday, January 22, 2016
Creamy Sweet Potato and Bean Taquitos (Vegetarian)

Today I made a huge amount of Mexican slow cooker chicken, corn pudding, and hot chocolate. I am excited to have this time this weekend to spend with Greg and Wendy, to catch up on some reading, and to eat delicious food. East coasters, stay warm, stay safe, eat well, and enjoy the beautiful snow!
Recipe for Creamy Sweet Potato and Bean Taquitos
INGREDIENTS:2 medium-sized sweet potatoes, peeled and chopped into 1/2-inch cubes
1 Tbsp. of extra virgin olive oil, plus extra for brushing the tortillas
Salt and pepper
1 cup of beans from spicy bean burritos (omit the Chipotle peppers in adobo sauce and salsa from the recipe)
 3 ounces of cream cheese, softened at room temperature
1 cup of grated cheese (I used Monterey Jack)
2 Tbsp. of your favorite salsa (I used Kirkland organic salsa)
10 Taco size soft flour tortillas
Coarse sea salt
DIRECTIONS:
Preheat the oven to 400 degrees. Put the chopped potatoes, olive oil, salt, and pepper into a bowl and toss well. Pour the sweet potatoes onto a baking pan and place in heated oven. Cook for about 25 - 30 minutes, stirring occasionally. Remove from oven and allow to cool. Leave the oven on.
While the potatoes are cooking, start the bean mixture. You will have beans leftover to use for burritos, because you will only need 1 cup for the taquitos. Remember to omit the following ingredients from the recipe: Chipotle peppers in Adobo sauce, salsa. Use vegetable broth in place of chicken broth if you are choosing to make this a vegetarian meal. Make sure to cook the beans until moisture has absorbed and then stir and mash to desired consistency.
Use your hands or use a fork to mash the potatoes up into a mound. Put the potato mash, 1 cup of the beans, cream cheese, salsa, and cheese into the bowl and use a fork to mix well.
Zap the tortillas in the microwave for about 30 seconds to make them easier to roll. Then scoop the sweet potato and bean mixture down the middle of each tortilla and roll tightly. Arrange each one next to the other on a baking sheet. Lightly brush olive oil over the top of each tortilla and sprinkle each with a pinch of sea salt. Place in the oven and cook for 8 - 10 minutes, watching carefully so they do not burn around the edges. Remove from oven and serve with your favorite taquito dipping sides!
Original Recipe
Monday, January 18, 2016

Friday, January 1, 2016
Warm and Gooey Chocolate Cake

This recipe comes from the Fearless Baker cookbook, which was a Christmas present from my older sister this year. I had quickly scanned the cookbook to find recipes that looked good to me, and the warm and gooey chocolate cake definitely stood out as something that I needed to try. I celebrated my 25th birthday (again, can you believe it) on the 29th of December, and I knew that if I wanted to eat birthday cake on my birthday that I would have to make my own cake. I looked over the recipes I had marked in the cookbook and the only one that I could make with the ingredients that I had on hand in my kitchen was the warm and gooey chocolate cake. While Wendy napped, I made the cake. Luckily it was really easy to make and it did not take long to bake, because she did not grant me with the birthday present that I wanted from her (a super long nap). I was able to finish the cake, and then Wendy and I headed up to my parents' place in Columbia with the cake in tow. Greg met me up there after finishing his work day so he could treat me to dinner at one of my favorite restaurants, the Tomato Palace. Although we could have gotten a tiramisu on the house, we decided to pass it up and we headed back to my parents' place to dig into the chocolate cake. Everyone in the family had a piece of the cake, and it was a major hit all around. I do not want to downplay this cake, so I will tell you that it was absolutely heavenly. Although it was totally amazing on its own, it was brought to a ridiculous level when topped with fresh whipped cream, chocolate sauce, and strawberries.
The nice thing about this cake (besides it being the best thing on this planet) is that it is super easy to make, and it can be made in under 45 minutes. Chocolate is the shining star in this cake, as it should always be. If you are a chocoholic like I am, you will definitely fall head over heels in love with this warm and gooey chocolate cake. Enjoy!
*I have made this 2 times and still haven't taken the time to take a really good picture. I will surely be making it again soon, so if it isn't devoured before I get a fresh picture, I will probably be replacing the one that is in this posting. I just was really eager to share the recipe with YOU!
Recipe for Warm and Gooey Chocolate Cake
INGREDIENTS6 ounces of dark chocolate, 58% - 62% cacao (I used Scharrfen Berger semisweet 62% cacao baking chocolate), chopped into 1-inch pieces
8 Tbsp. of unsalted butter, divided
3/4 cup plus 2 Tbsp. of pure cane sugar (or granulated sugar), divided
3 eggs
Large pinch of kosher salt
2 Tbsp. of unbleached all-purpose flour
For topping
Fresh whipped cream
Chocolate Sauce
Strawberries or raspberries
DIRECTIONS
Preheat the oven to 350 degrees.
Prepare an 8 x 8 round metal cake pan. Use 1/2 Tbsp. of the unsalted butter to generously butter the bottom and sides of the pan (you may not use all of the butter). Then add 1 Tbsp. of the sugar to the pan and coat the bottom and sides by shaking and tapping the pan over the kitchen sink. Add another tablespoon of sugar to the pan and repeat until the pan is coated with sugar. Find a larger baking dish that will allow the round 8 x 8 pan to fit inside of it (you will use it during the baking process). Set aside.
Put an inch of water in the bottom pan of a double boiler and bring it to a simmer over medium high heat. Put the chocolate and the remaining 7 1/2 tablespoons of the unsalted butter in the top pan of the double boiler and set it over the pan with the simmering water. Stir, almost constantly, until the butter is melted and the chocolate is smooth. Remove the pan with the chocolate from the heat and set aside.
In a medium sized mixing bowl, use a fork to whisk together the eggs, 3/4 cup sugar, and kosher salt until well blended. Pour the chocolate mixture into the mixing bowl and mix well. Add in the flour and stir until just blended.
Pour the mixture into the prepared pan. Set the pan into the larger baking dish. Fill a 2-cup liquid measuring cup with hot water from tap. Pour the water into the larger baking dish until it comes halfway up the sides of the pan with the chocolate batter in it, being sure to be careful so water does not splash into the batter. Then very carefully transfer to the oven. Bake for 25 - 30 minutes or until a toothpick or tins of a fork are inserted into the cake and it comes out a bit fudgey. Remove from the oven. Allow to cool for 10 minutes, then lift the cake pan out of the pan with the water.
Cut into 8 slices and serve immediately, or cover with foil and keep at room temperature for up to 24 hours. If you don't serve right away, reheat in oven at 325 degrees for five to ten minutes, being careful not to heat for too long.
Serve each slice with whipped cream, chocolate sauce, and berries (or if you have to choose just one, do the fresh whipped cream)!
Recipe makes 8 servings
Recipe Adapted from: Fearless Baker Cookbook
Subscribe to:
Posts (Atom)